
Whenever I used to have a picture to hang that had two hooks – one on each end, I’d suffer through many nail holes in the wall trying to get it straight. But I have a pretty much fool-proof method now that keeps me sane while hanging this type of picture or ornament on the wall.
Here’s how I do it:

I put a piece of tape – scotch or masking will work fine – all the way across the picture from one hook to the other. I mark the middle of each hook on the tape.
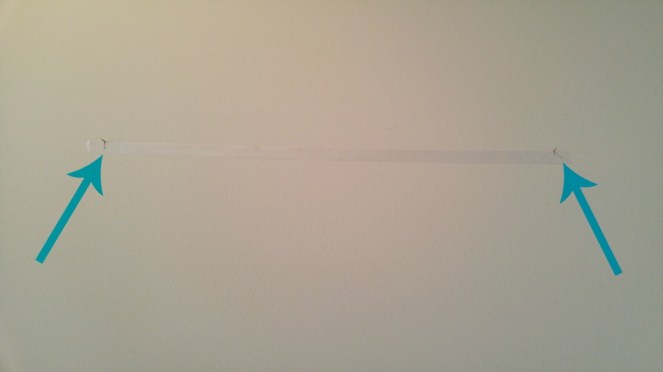
Then I take the tape off and put it on the wall where I want the picture to hang. I get it as straight as my eye can tell, then I pull out the level and put it across the top of the tape and check to see if it’s crooked.

I move the tape up or down, as necessary. Now the piece of tape is straight and the marks where the nails go are clear. I tap the nails into place and hang the picture!

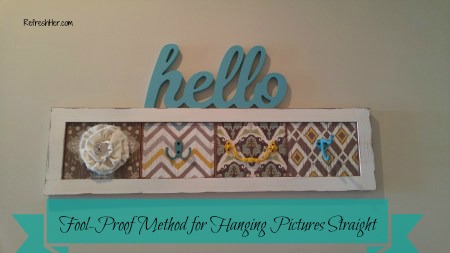
I hung this rack in my entry way this week and love it! It was a clearance find at Hobby Lobby. The regular price was $27.99 – I paid under $10 for it! Woo Hoo! I popped the little Hello sign on top for a little whimsy. That was a $3 Target spot find.
Anyone else have trouble with getting things hung straight? I hope this will keep you from making a dozen holes in your walls!
Stay refreshed,


I love how that looks in your hallway! So cute!
LikeLike
Thanks, I’d wanted coat hooks for a long time but never really found something I loved that was my style…until your dad spotted this one!
LikeLiked by 1 person
Here’s another good tip: Wrap wire from one hook to the other. That way only one nail is needed for the center. For an oblong picture the wire would need to be pulled tighter. My hubby discovered this after placing MANY holes in the wall. 🙂
LikeLike
Why did I never think of that?! Smart guy! Thanks for sharing!!
LikeLike