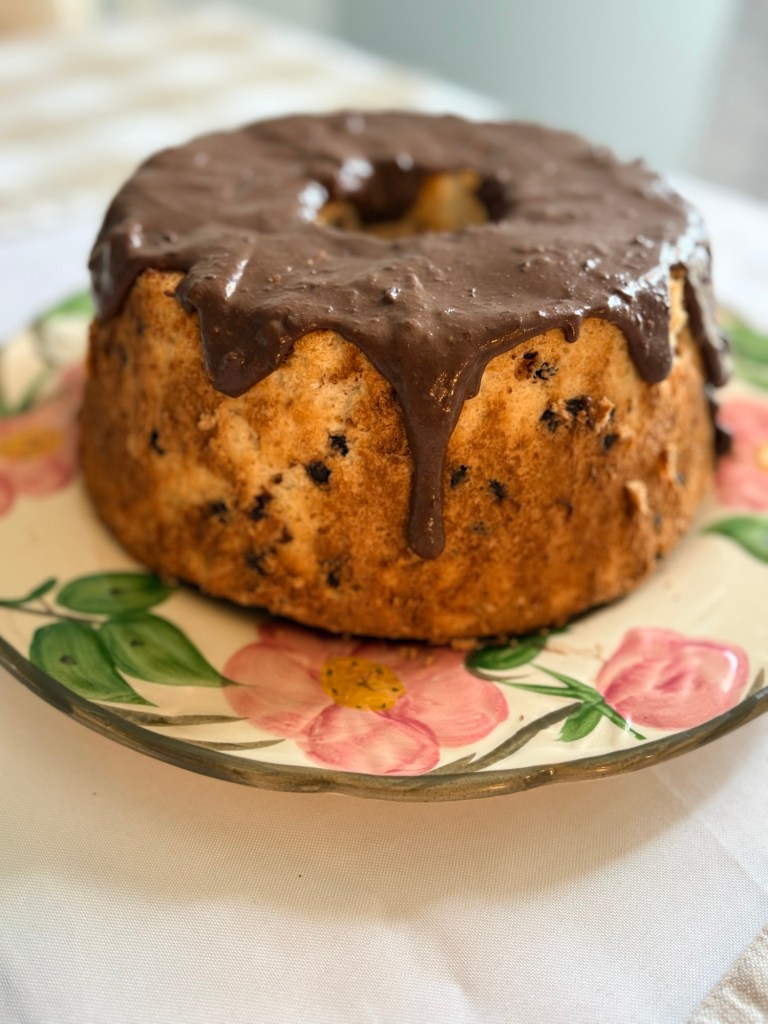
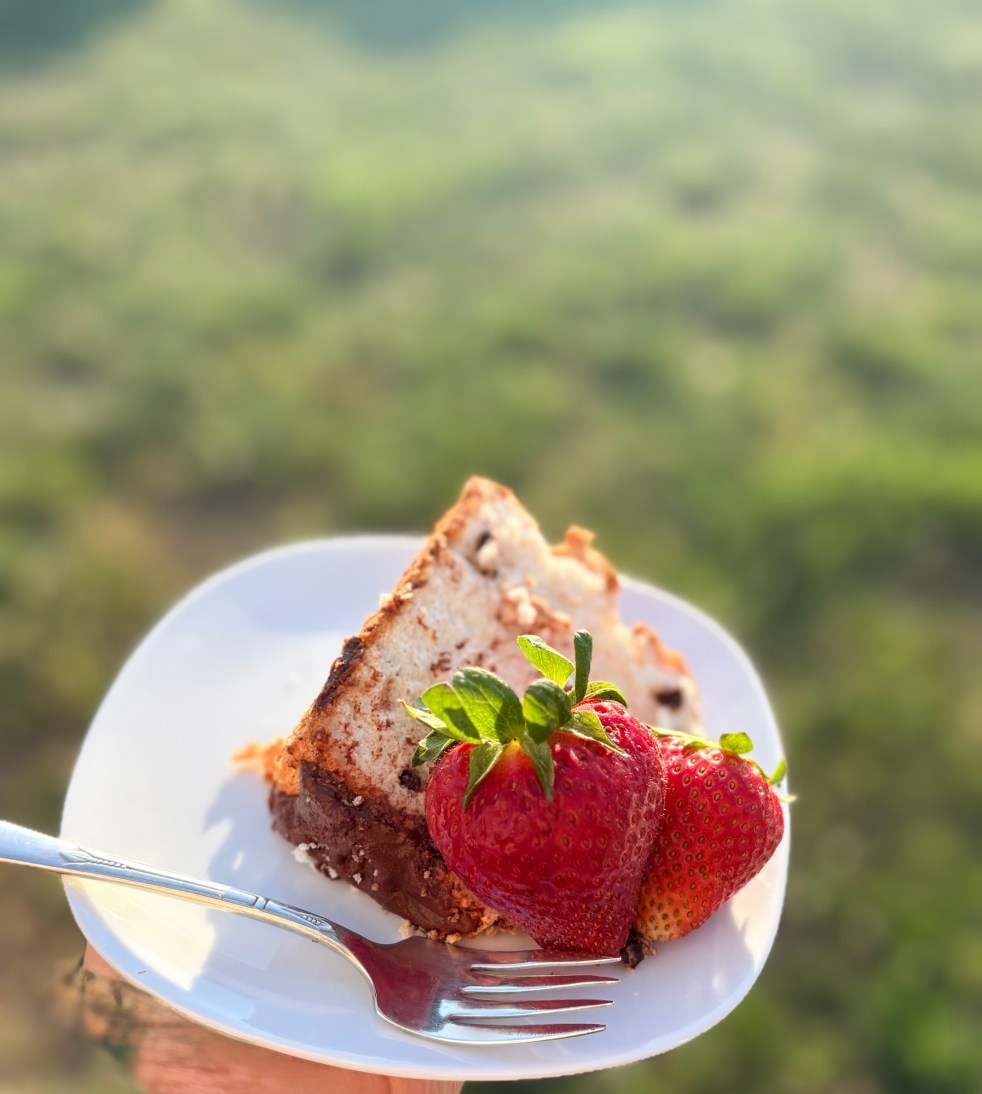
baking · Cookies · Healthy Eating

Low-Fat Oatmeal Chocolate Chip Cookie

I had a fun baking afternoon last week. I whipped up a batch of Low-Fat Oatmeal Chocolate Chip cookies. When I told my daughter Alli what I had made she said,

No cookie should be Low-fat!

I get what she’s saying, but honestly, I have tried many recipes that are labeled “low-fat,” but still have so much flavor. Also, they don’t taste like you’re eating the sand on the beach! This new recipe is one of those great finds! It replaces applesauce for some of the fat, giving it plenty of moisture. It has oatmeal in it, too, giving it texture and chewiness. Add those chocolate chips in there and you have a delicious cookie without the guilt!

Continue reading “Low-Fat Oatmeal Chocolate Chip Cookie”
Fast dessert · Kitchen Tips

Homemade Bisquick

Bisquick is a baking mix that has flour, leavening, and oil in it (plus a bunch of preservatives). Pancakes, biscuits and muffins (and MANY other recipes) come together very quickly with this baking mix, because you just have to add a few other ingredients.

When I made brunch recently, I was sure to add Sausage Balls to my menu because not only are they the perfect finger food, everyone LOVES them! They’re so easy to make because it’s just Bisquick, sausage and shredded cheese. When I went to purchase the Bisquick I gasped! It was not cheap! Then I realized I have a recipe to make my own!

Continue reading “Homemade Bisquick”
baking · Healthy Eating · muffin

Oatmeal Chocolate Chip Greek Yogurt Muffins

Once a week I like to indulge in a breakfast with a little something sweet. I recently came across a recipe that I loved! Also, muffins with a struesel topping are always a favorite of mine. That crunchy, sweet topping adds a nice crunch and sweetness that make them perfect for breakfast or snacking.

Continue reading “Oatmeal Chocolate Chip Greek Yogurt Muffins”
baking · cakes · dessert

Angel Food Cake – A Perfect Spring Dessert!

Angel food cake is a perfect spring dessert. Its light texture is perfect alone or with strawberries that are in the market right now. It’s also low in calories, so if winter added a few pounds, you won’t feel guilty about indulging! I was also amazed at how few ingredients it takes to make one. There are lots of eggs, but other than that, it’s just a few other things added!

I made this last week, and there’s really no comparison to this and what you buy in the bakery department of your grocery store. The texture is so much better. Mine had a nice brown, sugar-y edge that gave it a delicious texture. My only warning is not to make this on a rainy, humid day. Beaten egg whites don’t respond with that kind of atmosphere…I speak from experience!

Here’s the simple recipe from Taste of Home ~

Angel Food Cake

Ingredients

  • 1-1/4 cups egg whites (about 9 large)
  • 1-1/2 cups sugar, divided
  • 1 cup cake flour
  • 1-1/4 teaspoons cream of tartar
  • 1 teaspoon vanilla extract
  • 1/4 teaspoon almond extract
  • 1/4 teaspoon salt

Directions

  1. Place egg whites in a large bowl; let stand at room temperature 30 minutes. Sift 1/2 cup sugar and flour together twice; set aside.
  2. Place oven rack in the lowest position. Preheat oven to 350°. Add cream of tartar, extracts and salt to egg whites; beat on medium speed until soft peaks form. Gradually add remaining sugar, about 2 tablespoons at a time, beating on high until stiff peaks form. Gradually fold in flour mixture, about 1/2 cup at a time.
  3. Gently spoon into an ungreased 10-in. tube pan. Cut through batter with a knife to remove air pockets. Bake until lightly browned and entire top appears dry, 35-40 minutes. Immediately invert pan; cool completely, about 1 hour.
  4. Run a knife around side and center tube of pan. Remove cake to a serving plate.

Eggs are usually marked lower in spring, which makes this dessert an incredible value. Give your hand a try at this wonderful cake and I doubt you’ll be buying the ones in the plastic containers at your grocers!

baking · breakfast · Gifts

Peach Cream Cheese Danish

Breakfast perfection!

For quite a few years I have been baking these Cream Cheese Danishes because after making them the first time, I was hooked! I usually make them for gifts at Christmas time, but save one for our family’s holiday breakfast!

It’s hard to believe these are light, but they are, but they taste every bit as good as any danish you could purchase at a lovely bakery! I made this recipe up last week and have been enjoying a little sliver with my coffee, fruit, yogurt and granola each morning. It’s made this a much anticipated meal! It’s soooo good!

These do take a little time, but I usually make the dough in the evening, stick it in the fridge, and then finish making them the next day. They are so worth the effort! You get four large danishes out of this recipe. Whoever you choose to share this with, will be your humble servant for life! (!) Okay, maybe not life, but they’ll love you for your kindness!

I like to set them on a piece of thin cardboard, covered with foil, then slide them into one of my large bread bags and tie with a ribbon. The cardboard will keep the delicate danish from breaking. You could top these with almonds, if you wish!

Here’s the lightened up recipe from Cooking Light ~

Peach Cream Cheese Danishes

  • ½ cup granulated sugar
  • ⅓ cup butter
  • ½ teaspoon salt
  • 1 (8-ounce) carton light sour cream
  • 2 packages dry yeast (about 4 1/2 teaspoons)
  • ½ cup warm water (100° to 110°)
  • 2 large eggs, lightly beaten 
  • 4 cups all-purpose flour 
  • Filling:
  • ⅔ cup Peach preserves – Or your favorite flavor!
  • ¼ cup granulated sugar
  • 1 teaspoon vanilla extract
  • 2 (8-ounce) blocks 1/3-less-fat cream cheese, softened
  • 1 large egg, lightly beaten
  • Cooking spray 
  • Glaze:
  • 1 ½ cups sifted powdered sugar
  • 2 tablespoons fat-free milk
  • 1 teaspoon vanilla extract

Directions

  • Step 1 To prepare dough, combine first 4 ingredients in a saucepan over medium heat, stirring until sugar dissolves. Remove from heat; cool. Dissolve yeast in warm water in a large bowl; let stand 5 minutes. Stir in sour cream mixture and 2 eggs. Lightly spoon flour into dry measuring cups; level with a knife. Gradually stir flour into sour cream mixture (dough will be soft and sticky). Cover dough; chill 8 hours or overnight (my preference).
  • Step 2 To prepare filling, combine preserves and next 4 ingredients (preserves through 1 egg) in a medium bowl; beat with a mixer at medium speed until well blended.
  • Step 3 Divide dough into 4 equal portions. Turn each portion out onto a lightly floured surface; knead lightly 4 or 5 times. Roll each portion into a 12 x 8-inch rectangle. Spread one-fourth of filling over each portion, leaving a 1/2-inch border. Starting at a long side, carefully roll up each portion jelly roll fashion; pinch seam and ends to seal.
  • Step 4 Place 2 loaves on each of 2 baking sheets coated with cooking spray. Cut 4 (1/4-inch-deep) “X”s in top of each loaf with scissors. Cover and let rise in a warm place (85°), free from drafts, 25 minutes or until doubled in size.
  • Step 5 Preheat oven to 375°.
  • Step 6 Place 1 baking sheet in oven (cover remaining loaves to keep from drying). Bake at 375° for 15 minutes or until lightly browned. Repeat procedure with remaining loaves. Cool loaves slightly.
  • Step 7 To prepare glaze, combine powdered sugar, milk, and 1 teaspoon vanilla, stirring with a whisk. Drizzle warm loaves with glaze.

These are amazingly easy…really! I hope you’ll try them! You’ll keep making them, like I do. I’m sure!

Could you enjoy a little danish with coffee in the morning? It makes morning even sweeter in my book!