My favorite holiday of the year is this week! It’s both surprising and exciting! I’m surprised because, well, where did March go?! It flew by for me! However, I’m not sad about that! Why? The last week of March took us to New York and Pennsylvania. The last leg of the trip in PA hit me between the eyes when I came down with Flu A. It caused me to miss out on most of a marriage retreat my husband was leading, as well as Sunday services. Those days are kind of a blur, but I remember enough to grimace at the thought. Thank the Lord for healing, home, and chicken noodle soup!
A few weeks ago, my daughter asked if I minded if she hosted Easter this year. Her family moved into a lovely country home this year, and she felt excited about having everyone there to celebrate the resurrection. Of course I agreed, and now I see the Lord was going before me, knowing I would just be recovering. So this year, I’m simply making a couple sides to take to the meal. That means I can focus on what I really think everyone would enjoy.
I’m so excited for my favorite week of the year to be here – EASTER! The hope and promise of eternal life through Christ’s death and resurrection gives my life purpose and joy! That’s reason to celebrate!
Our greatest celebration will be that we will get to attend our church’s Easter service! We’ve been away since February, allowing the transition to go more smoothly. We are excited to worship with our church family and rejoice in the resurrections of our Savior!
After church, we will come home with our family (and I pray a few other guests) for dinner. I’ve already starting prepping for the meal! I like to get as much done ahead of time as possible! I thought I’d share what I’m fixing so you might get some inspiration for your meal!
Easter weekend is my FAVORITE weekend in the whole year! It encapsulates the reason I can face tomorrow – Jesus is alive! No matter what we’re facing today – even with all the craziness, confusion, unrest, hatred and division, the truth that Christ arose from the tomb promises us all victory over sin, death and hell!
Because of that, I believe we should celebrate to the hilt!
Let’s magnify Christ!
Let’s share the Good News of eternal life that comes by placing our trust in Jesus alone for salvation!
Here are a few ways I’m celebrating Easter this weekend:
Reading the chapters in John about Jesus’ death and resurrection. I love to read the Scriptures early in the morning and think about the women at the tomb and the joy that filled their hearts to learn that their Savior was alive! Their joy is MY joy!
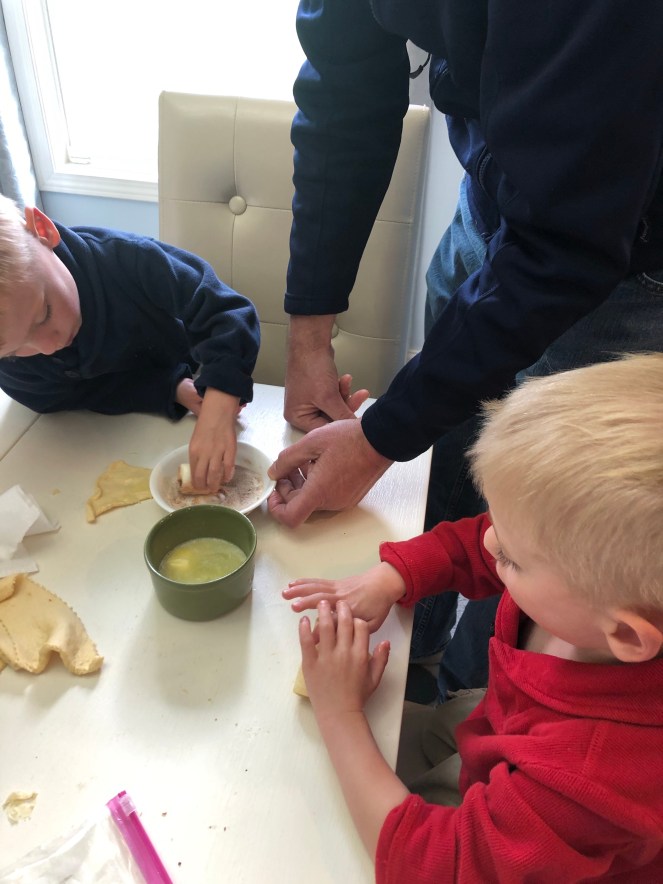
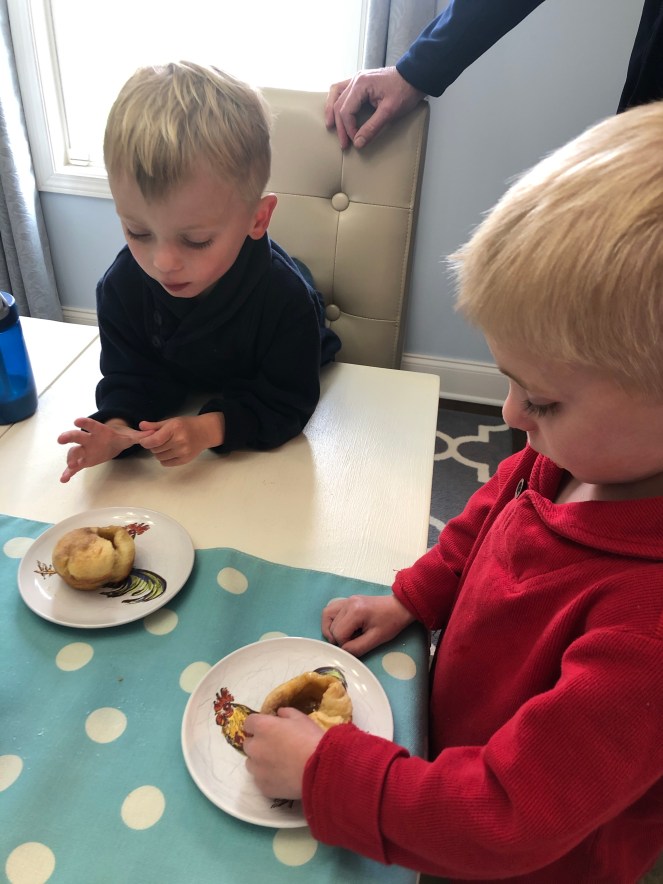
Resurrection Rolls – This treat is such a fun and delicious way to remind children of the elementary facts of Christ’s resurrection from the tomb. Here’s the idea – A simple marshmallow is rolled in melted butter, then tossed in cinnamon and sugar, reminiscent of Jesus’ body being covered by spices before He was buried. The crescent roll is wrapped around the marshmallow, reminding us that Jesus body was wrapped in linen cloth. The roll is then placed in a muffin tin, reminding us of the tomb where Jesus was laid. The pan is then put into the oven to bake, and in about 12 -14 minutes, the baked rolls can be eaten.
When you open the rolls up you find the inside (the tomb) is EMPTY! My grandsons loved this activity!
Resurrection Rolls
Ingredients
8-ounce package refrigerated crescent roll dough
8 regular-sized marshmallows
4 tablespoons butter, melted
1/4 cup granulated sugar
2 tablespoons ground cinnamon
Directions
1. Preheat oven to 350 degrees. Line 8 wells in a muffin tin with baking cups (for easier clean up) or spray the wells with non-stick cooking spray.
2. Unroll crescent dough and divide into 8 triangles at the perforations
3. Mix sugar and cinnamon together in shallow bowl.
4. Dip marshmallow in melted butter, then in cinnamon and sugar.
5. Place marshmallow in the middle of a crescent roll. Wrap dough tightly around the marshmallow, making sure there are no openings.
6. Place roll in muffin tin. Repeat with the rest of the rolls. Brush rolls with remaining butter and sugar.
7. Bake at 350 for 12-14 minutes. Cool sightly before serving.
Good Friday Service – Today is Good Friday and my church is having a Good Friday service at 3:00 in the afternoon. I always LOVE these afternoon services! We will be observing the Lord’s Supper, singing, reading Scripture, and being reminded of the sacrifice of Jesus’ death. If you’re in the area, we would love for you to join us. Here is the link to our website where you can find the address at the bottom of the Home Page.
Sunday service – Of course I’ll also be attending Easter service at church on Suinday. Remembering back to last year when we were unable to get together makes me doubly thankful to be able to meet together to worship and praise the Lord with other believers! Again, if you don’t have a church home, we welcome you to attend! Go here to learn the times of the services.
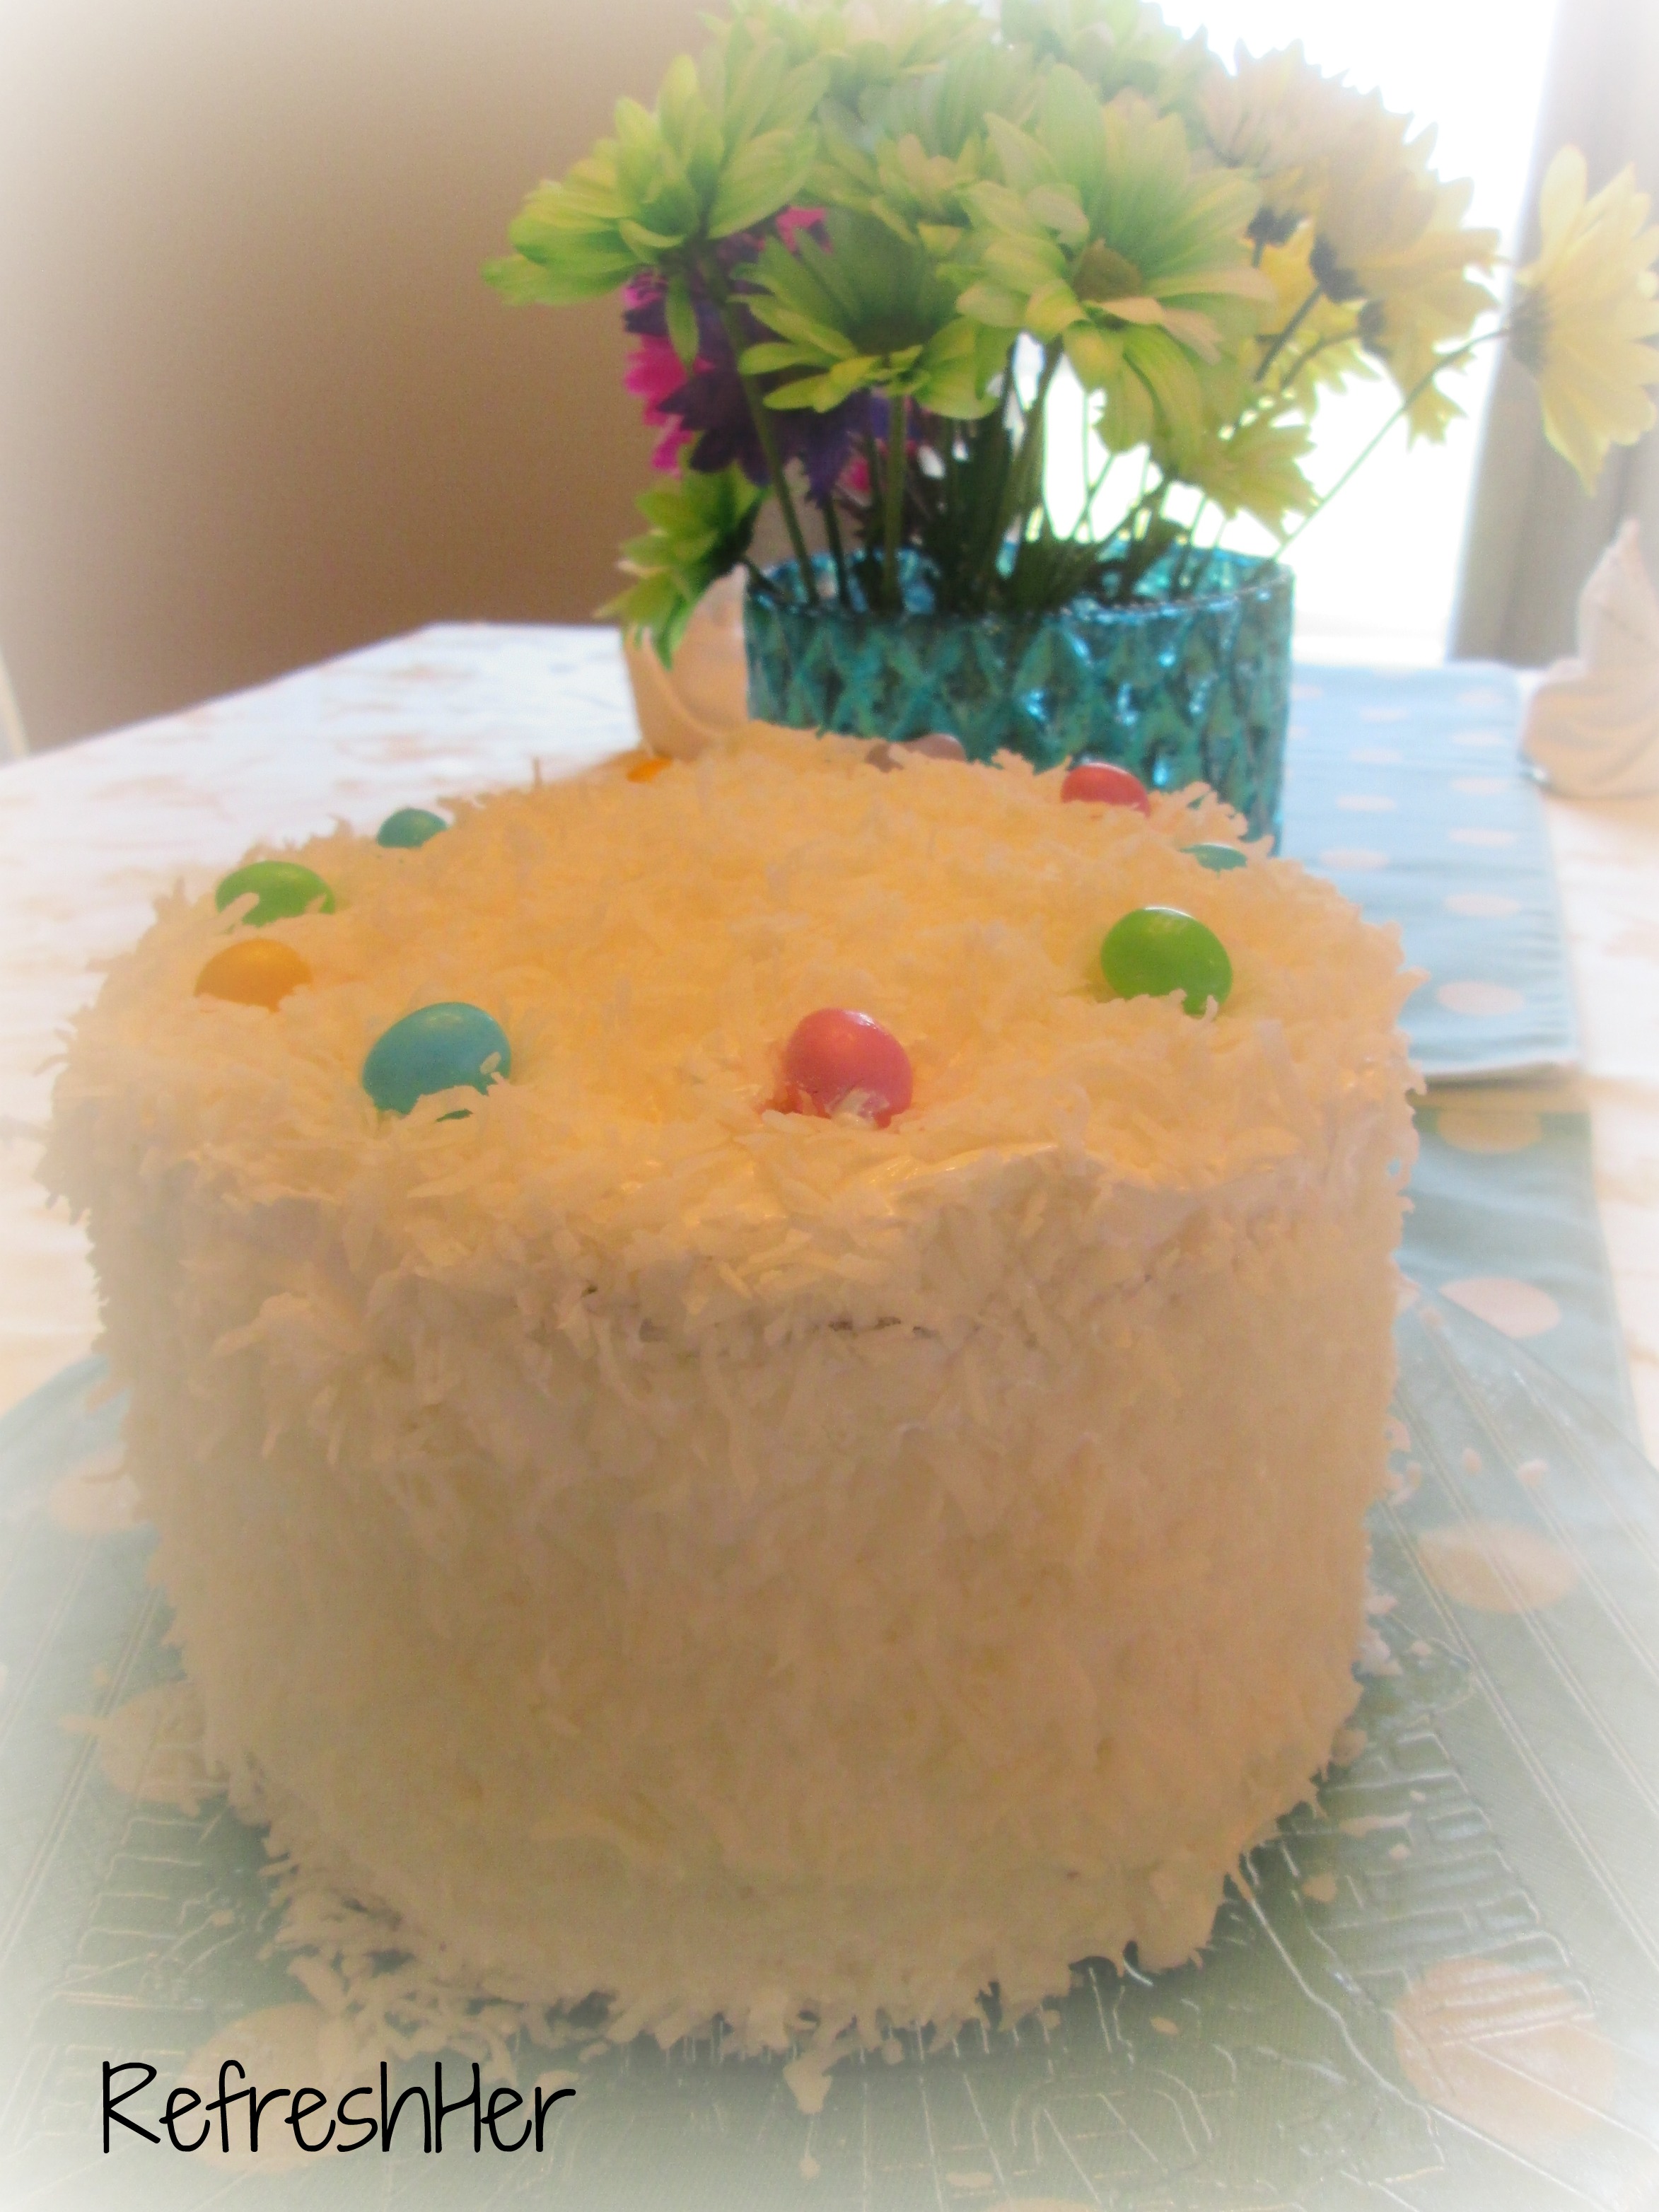
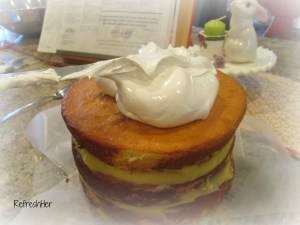
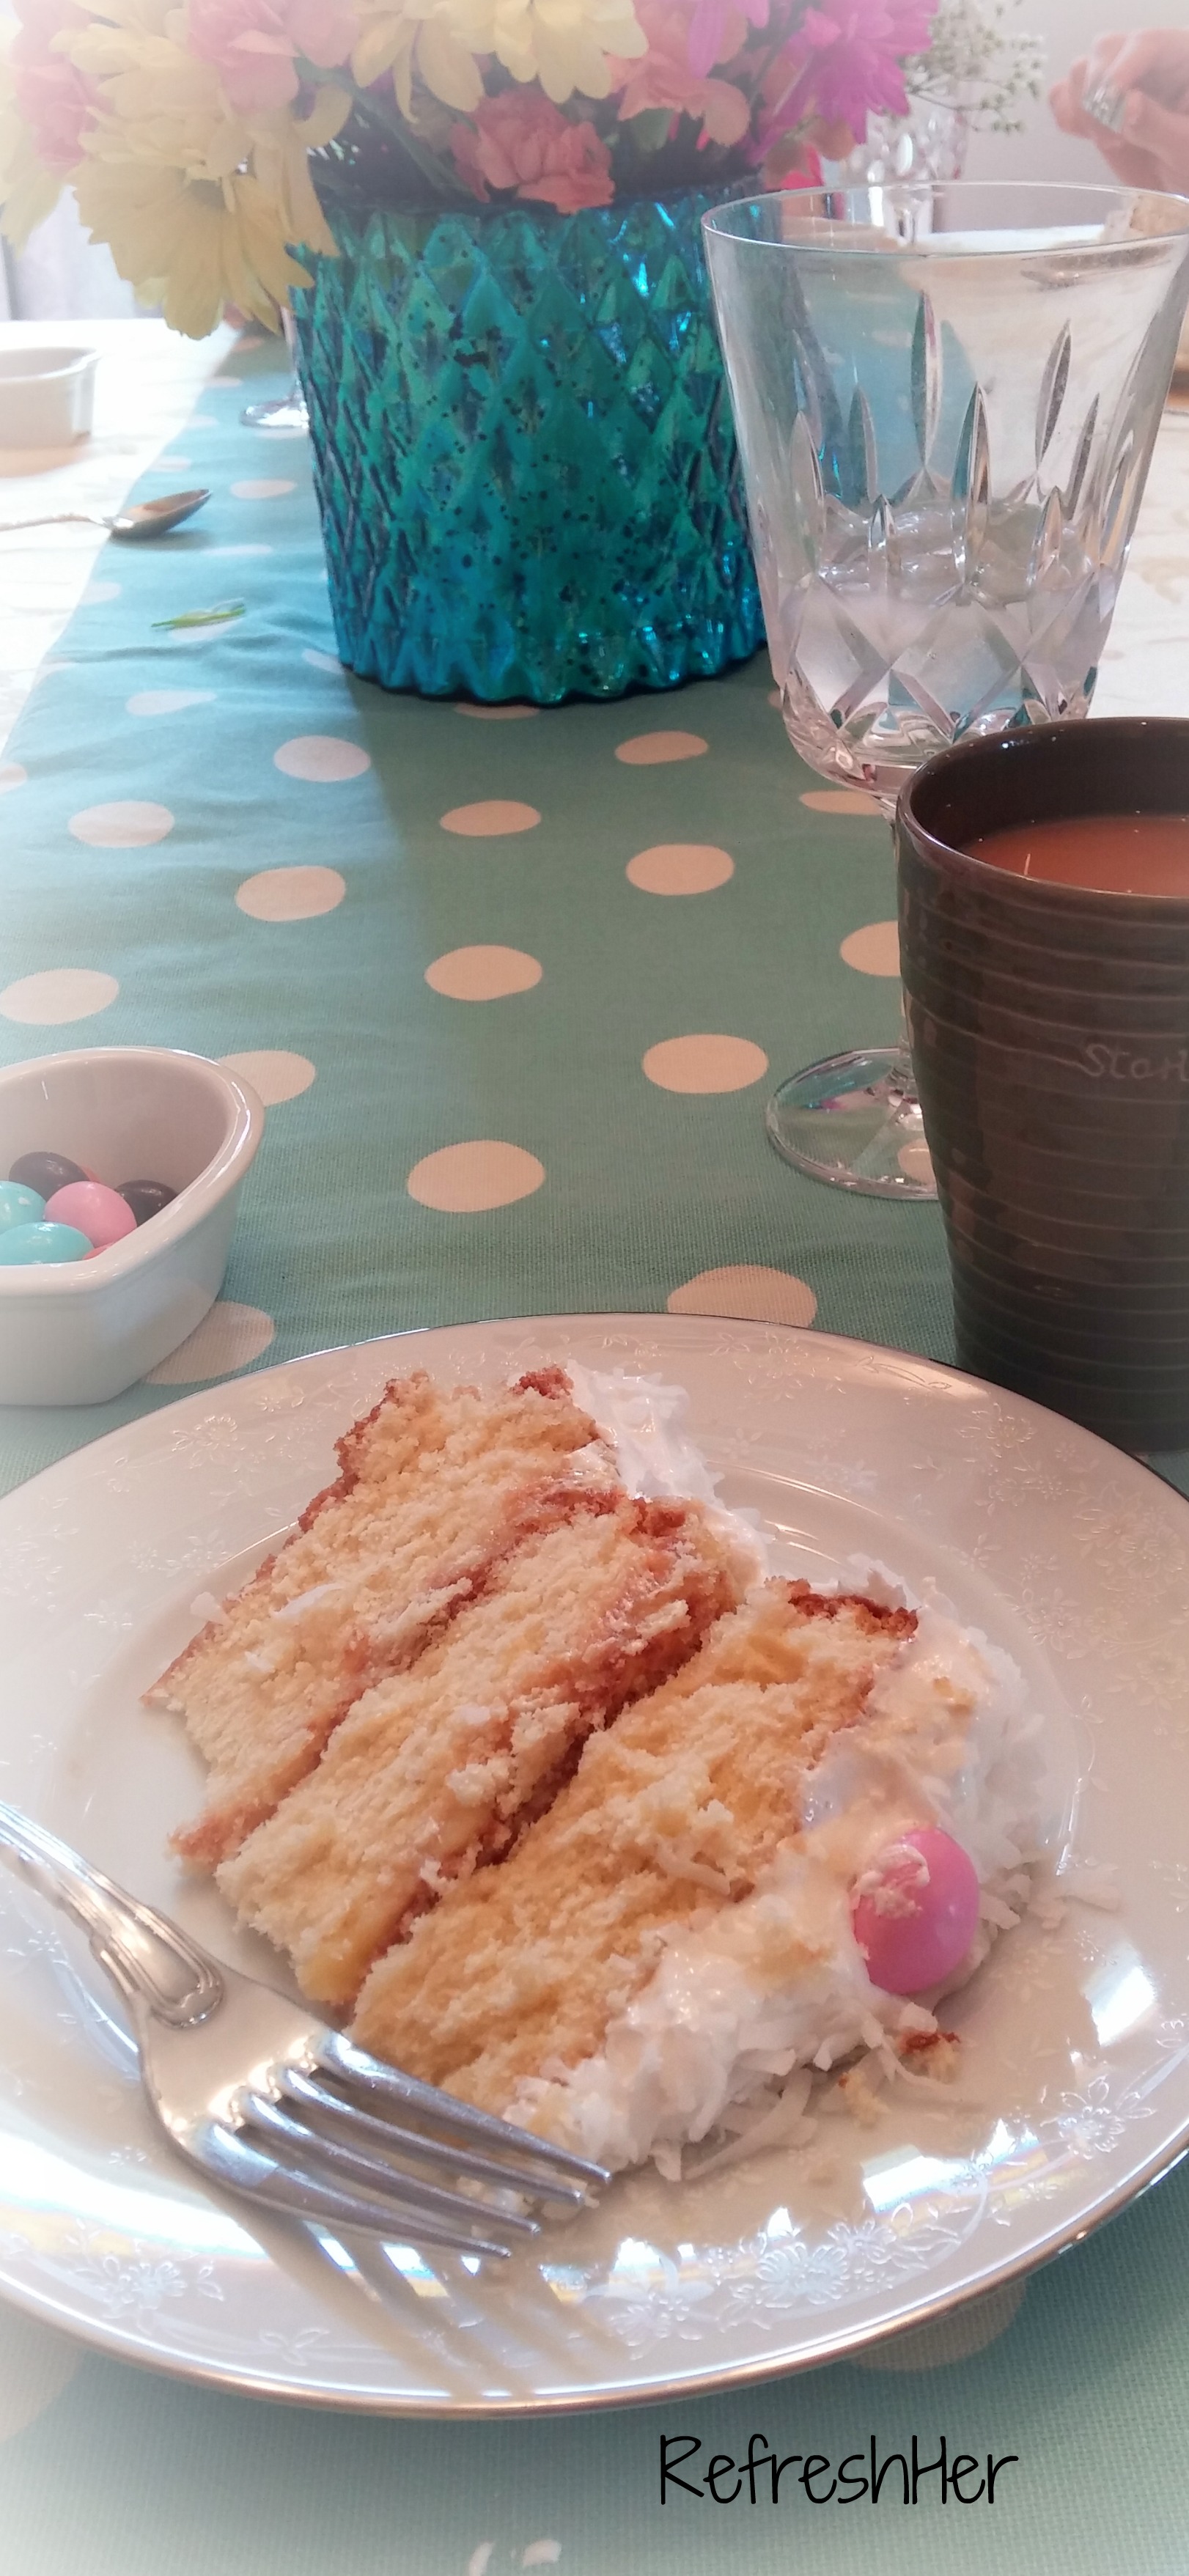
Cake – My family will also get together to enjoy an Easter dinner after church. It will include this traditional Coconut Cake with Lemon Filling! We’re all a little very excited about that!
T
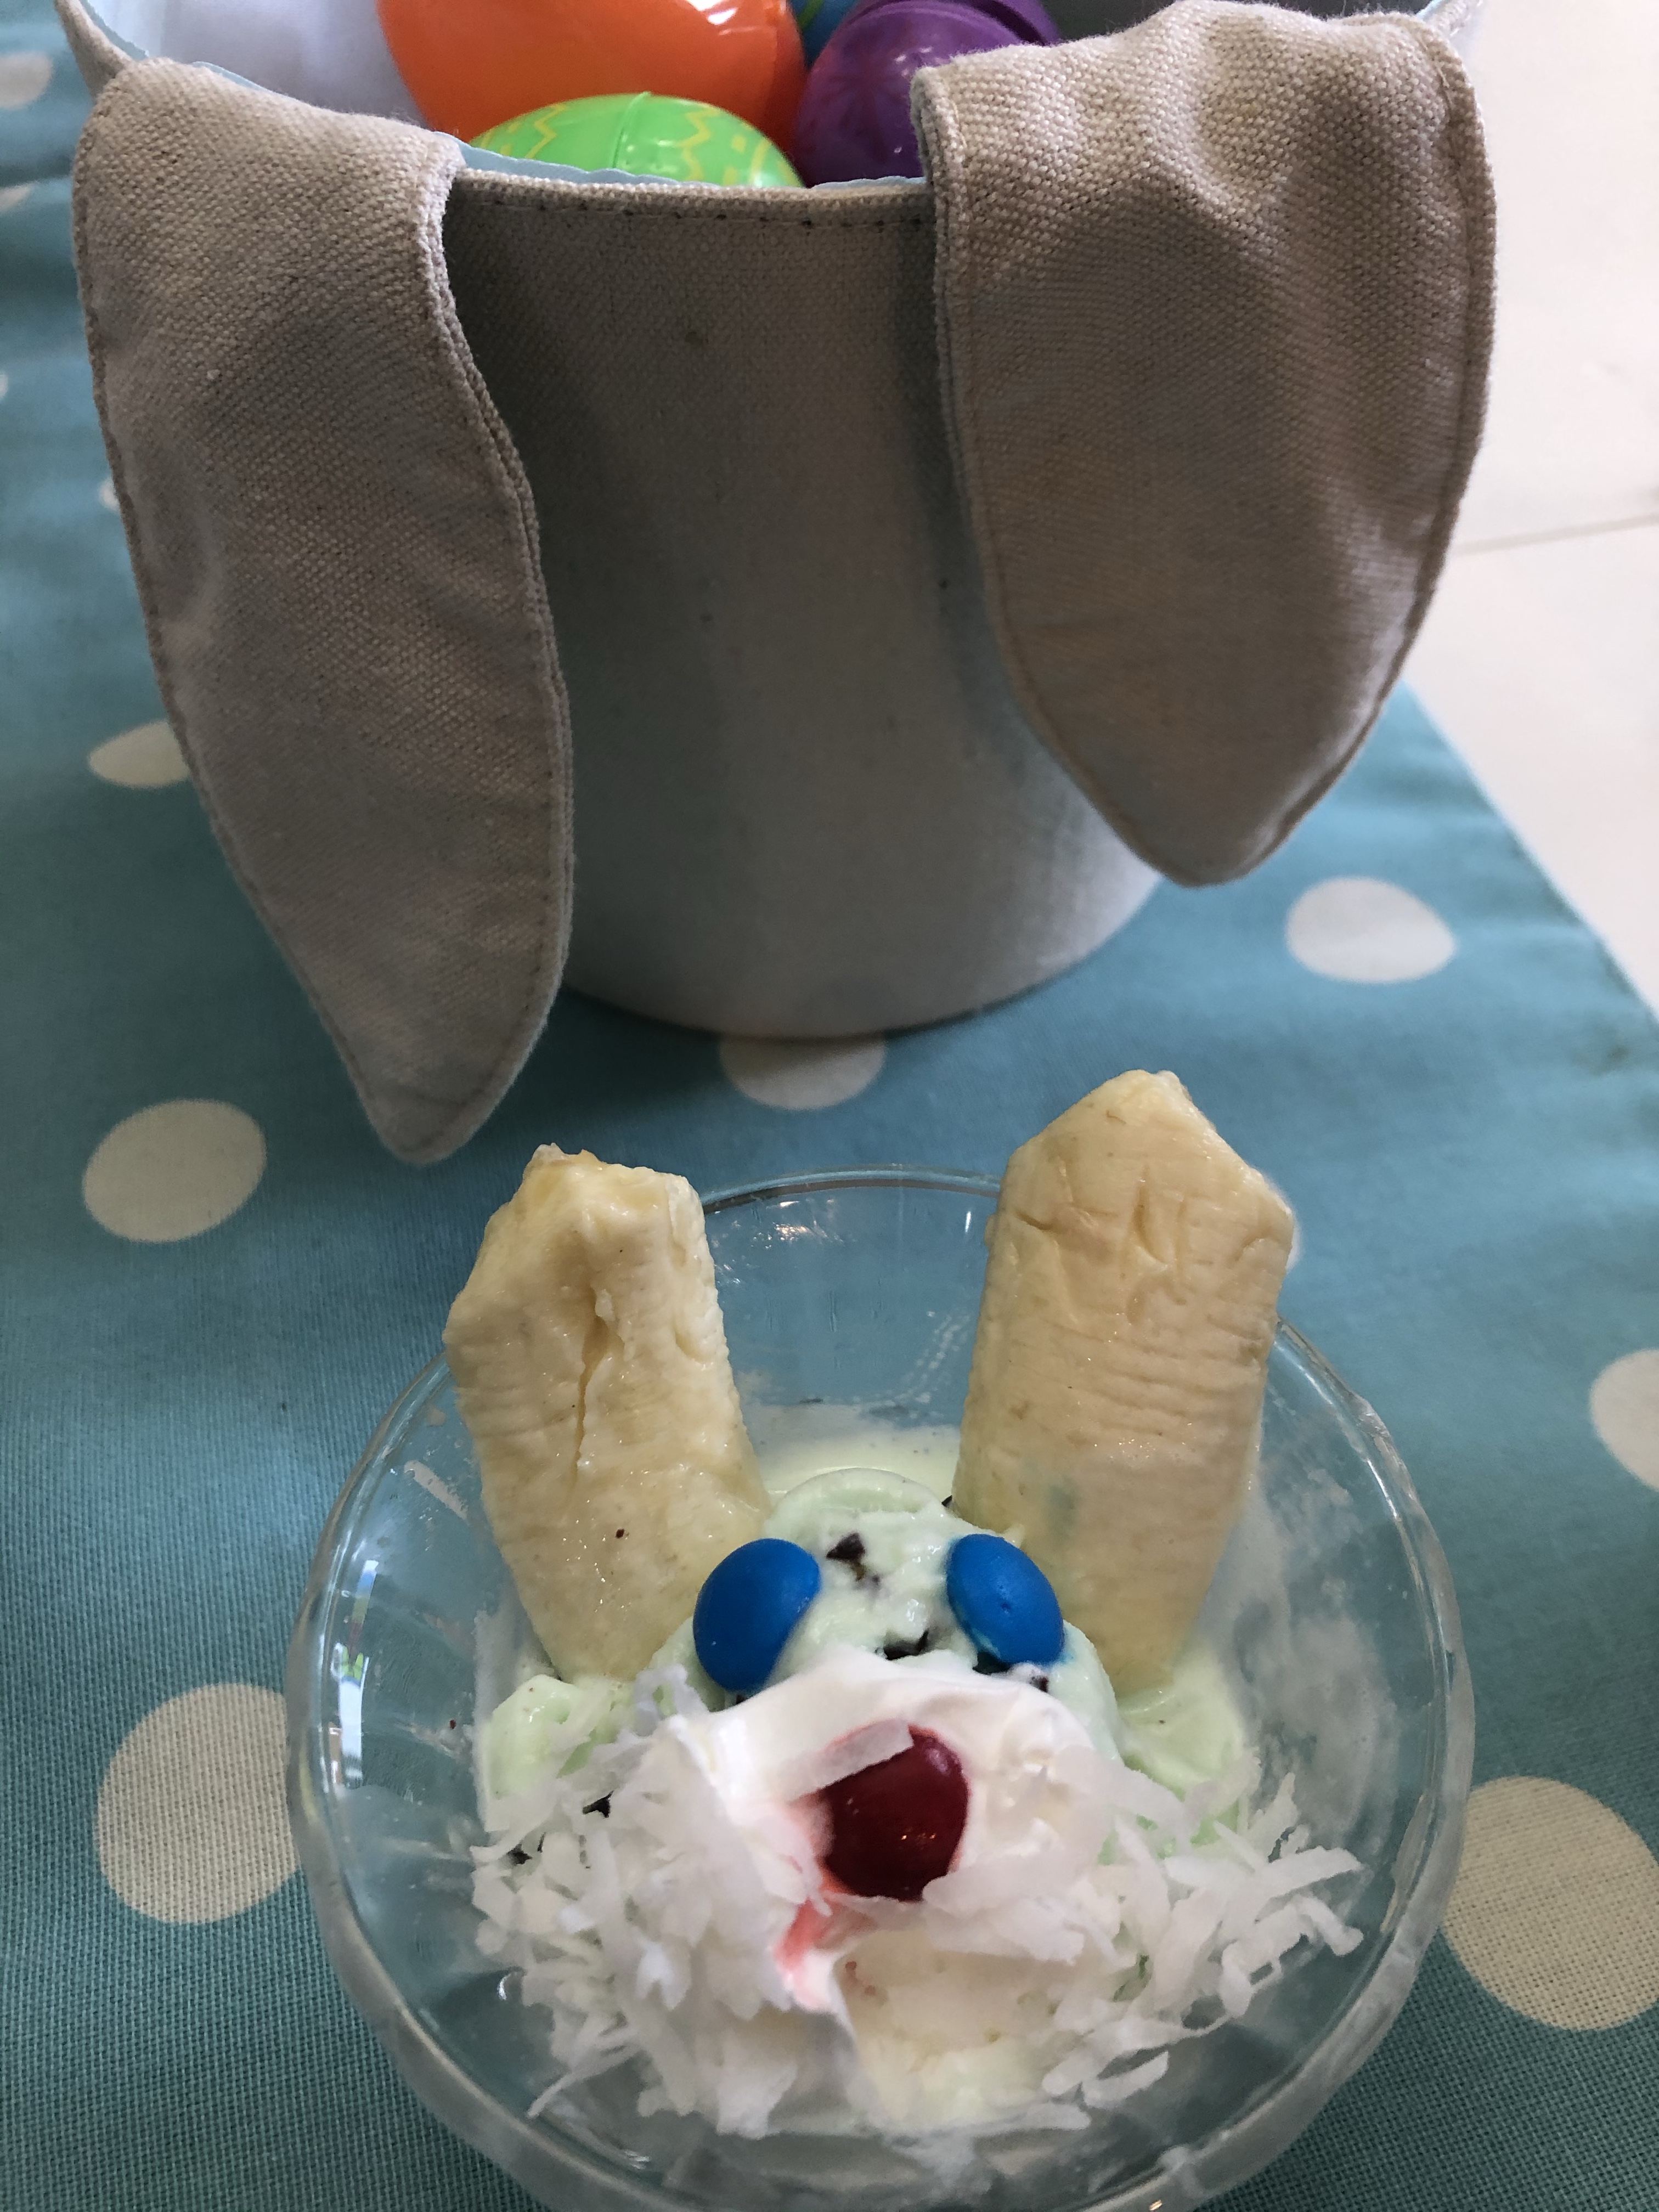
If you need something a whole lot simpler for your Easter dessert, here’s a cute little bunny sundae my dad always made for our family every year. Everyone could make their own and add what they like. You could even have a contest to see whose bunny is the “Best dressed!”
All this takes is a scoop of ice cream, some whipped topping, coconut, for whiskers Jelly beans, M&M’s or chocolate chips for his face, and some banana slices for ears.
I pray that your Easter weekend is filled with the joy of the risen Savior! He loves you and died in your place so you could have eternal life in Him. That’s the only thing that will truly refresh you for now and all eternity!
Uncharacteristic as it is for my Monday posts, I’m just going to do a recap of some of Easter’s highlights. Since it’s my favorite holiday, I’m going to continue to let my thoughts dwell on the great time we had celebrating Resurrection Day! Continue reading “Easter Reflections”→
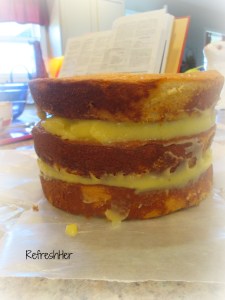
For our Easter dessert last weekend, I made my traditional dessert – Coconut Cake with Lemon Filling. It’s from Southern Living and it’s the perfect dessert for Easter or Christmas or Ground Hog day or Lincoln’s Birthday or trash picking up day…you get the idea. It’s so yummy I really only make it once a year.
The cake is a golden batter – not a white cake, but it’s three layers with a homemade Lemon curd in between. The fluffy white icing balances out the tartness of the filling just perfectly!
Like any cake of this nature, it can take lots of time to make and can be intimidating to a beginning baker. However,I am writing this post to simplify the whole process. You can do a cake like this!!!!
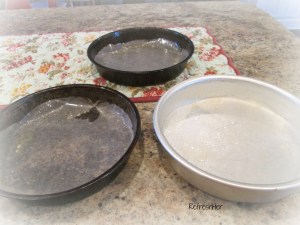
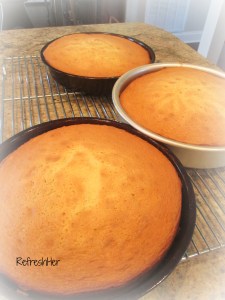
Start by making and baking the cake layers a week (or even two weeks) before you need the finished cake. Always, always, always put waxed paper in the cake pans for easy removal! I don’t care if the recipe says to grease and flour the pans, I always use waxed paper instead. No use making a cake if half of it sticks to the pan!
After cooling the baked layers, wrap them in plastic Wrap and then place each layer in a freezer bag. Freeze until needed.
Make the filling for the cake a day or two before you need the finished cake. This will allow time for it to set up and thicken nicely and it will spread on the cake layers easily.
The day you need the cake, make the icing.
Take the layers out of the freezer. Place waxed paper pieces on the cake plate to keep the plate free of icing, crumbs and coconut. Place filling between the layers.
Start by putting a large scoop of icing on the top and push it over the sides of the cake. Smooth icing. Top with coconut. Remove waxed paper from under cake layers.
Line the pans with waxed paper and spray the paper and the pan edges with cooking spary.
Bake layers until golden and a toothpick comes out clean. The batter will pull away from the sides of the pan, too.
Place waxed paper pieces on the cake plate before filling and icing.
Place a dollop of icing on top, then push over the edges to ice the sides.
The result will be something delicious and beautiful, and you won’t be exhausted!
When you work ahead and do a part of the whole recipe a little at a time, it really is a simple process (I am resisting the urge to say “it’s a piece of cake! But it really is!).
Here’s the recipe for the Coconut Cake from Southern Living:
Coconut Cake with Lemon Filling
Ingredients
1 cup unsalted butter, softened
2 cups sugar
4 large eggs, separated
3 cups all-purpose flour
1 tablespoon baking powder
1 cup milk
1 teaspoon vanilla extract
1/8 teaspoon salt
1. Beat butter at medium speed with an electric mixer until fluffy; gradually add sugar, beating well. Add egg yolks, one at a time, beating after each addition.
2. Combine flour and baking powder; add to butter mixture alternately with milk, beginning and ending with flour mixture. Beat at low speed until blended after each addition. Stir in 1 tsp. vanilla.
3. Beat egg whites and salt at high speed with an electric mixer until stiff peaks form. Stir about one-third of egg whites into batter; fold in remaining egg whites. Spoon batter into 3 greased and floured 9-inch round cake pans.
4. Bake at 350° for 18 to 20 minutes or until a wooden pick inserted in center comes out clean. Cool in pans on wire racks 10 minutes; remove from pans, and cool completely on wire racks.
5. Spread Lemon Filling between layers. Spread Fluffy White Frosting on top and sides of cake. Sprinkle top and sides with coconut; garnish, if desired.
Lemon Filling
Ingredients
1 cups sugar
1/4 Cup corns starch
1 cup boiling water
4 egg yolks, lightly beaten
1/3 cup fresh lemon juice
2 tablespoons butter
Preparation
1. Combine sugar and cornstarch in a medium saucepan; stir in 1 cup boiling water. Cook over medium heat, stirring constantly, until sugar and cornstarch dissolve (about 3 minutes). Gradually stir about one-fourth of hot mixture into yolks; add to remaining hot mixture, stirring constantly with a wire whisk. Stir in lemon juice.
2. Cook, stirring constantly, until thickened. Remove from heat; stir in butter. Cool, stirring occasionally.
White Fluffy Icing Ingredients
1 cup sugar
1 1/2 cups water
2 tablespoons light corn syrup
4 egg whites
1/4 teaspoon cream of tartar
Preparation
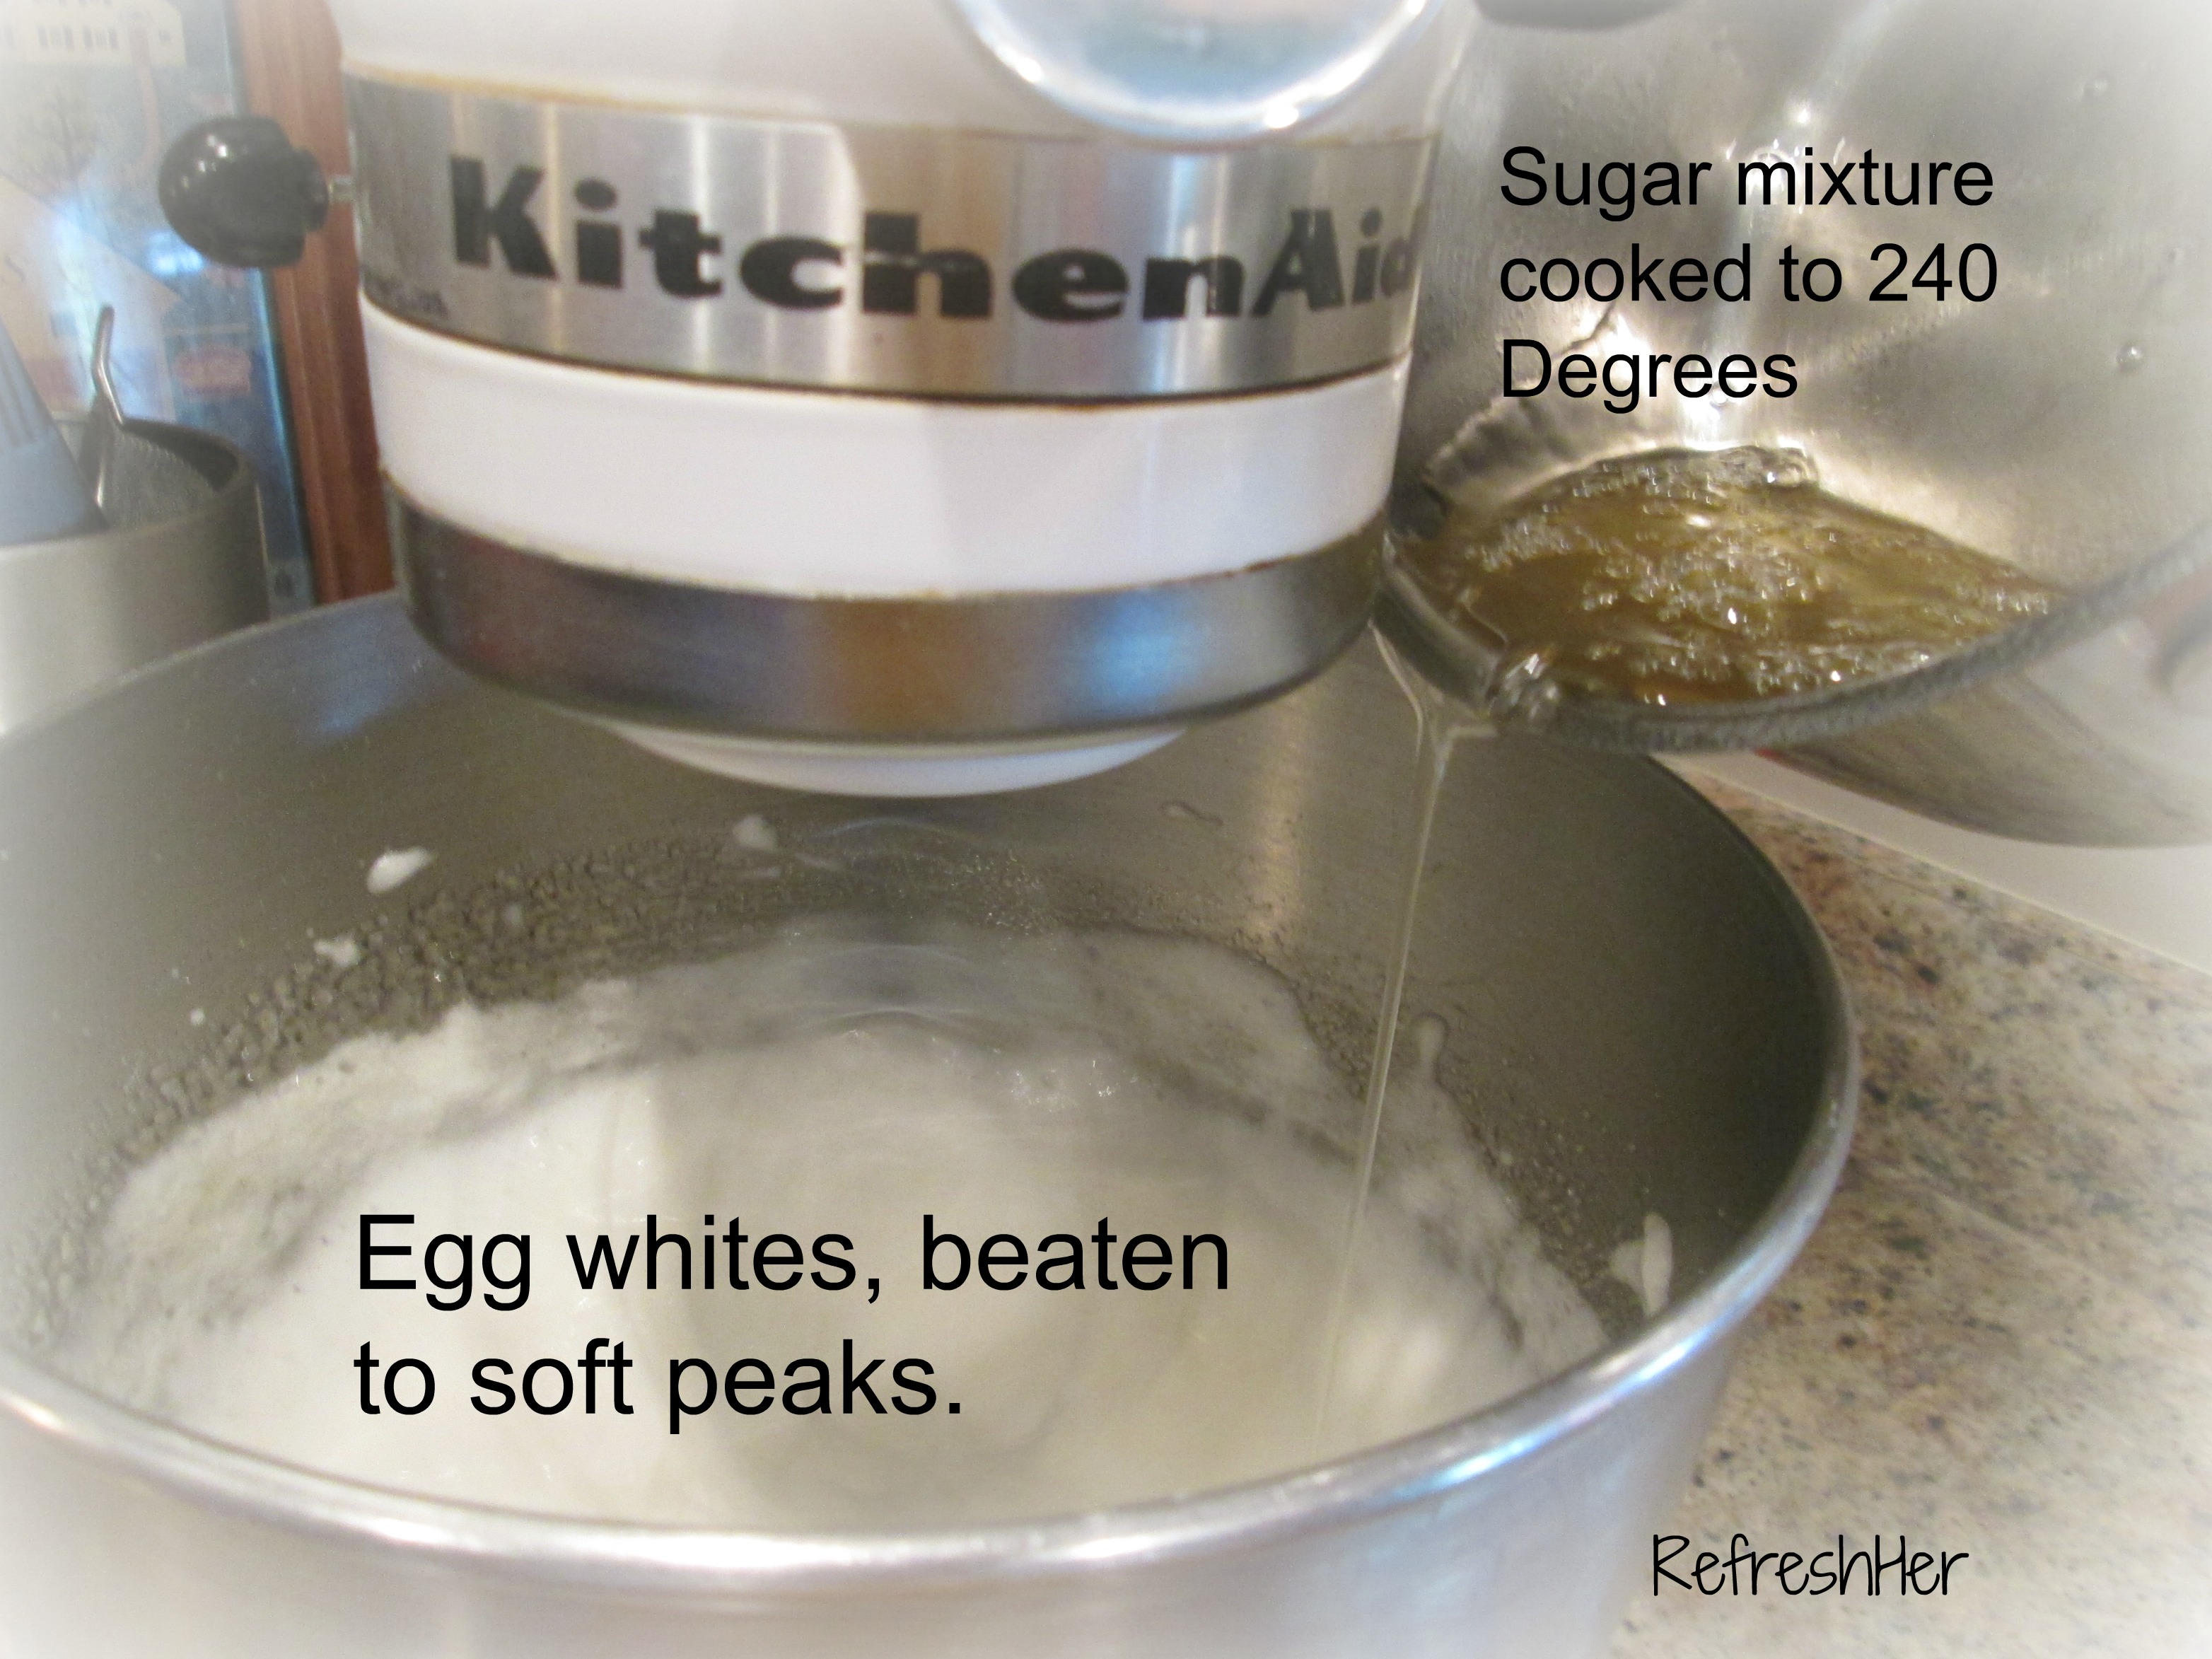
1. Combine first 3 ingredients in a small heavy saucepan; cook over medium heat, stirring constantly, until clear. Cook, without stirring, until mixture reaches soft-ball stage or candy thermometer registers 240°.
2. Beat egg whites and cream of tartar at high speed with an electric mixer until soft peaks form; slowly add syrup, beating constantly. Beat until stiff peaks form and frosting is desired consistency.
Top cake with one cup flaked coconut.
Do you enjoy baking detailed kind of desserts like this cake? I’ll bet if you hesitate it’s because it looks too complicated. Try this sure method, and see if you don’t have a success on your hands…and some really delicious icing!