If you have fresh cranberries left from Thanksgiving, or you see them in the produce section in the store, I have two great ways for you to use them!
The first use is to put them in your morning oatmeal during the last few minutes of the cooking time. I use Old Fashioned Oats, so I boil equal parts of water, milk and oatmeal, then simmer for a few minutes to thicken it up. While it’s simmering I throw in a good handful of fresh cranberries. Oh, that tartness is the perfect fruity addition!

I also add some chopped walnuts and a sprinkling of brown sugar for the perfect winter-y breakfast! You won’t be satisfied with Corn Flakes every again after enjoying this variety of warm, nutty oatmeal!
Now for another perfect combination – cranberries, apples and orange juice for a winning recipe that is from Cooking Light, let’s talk dessert.

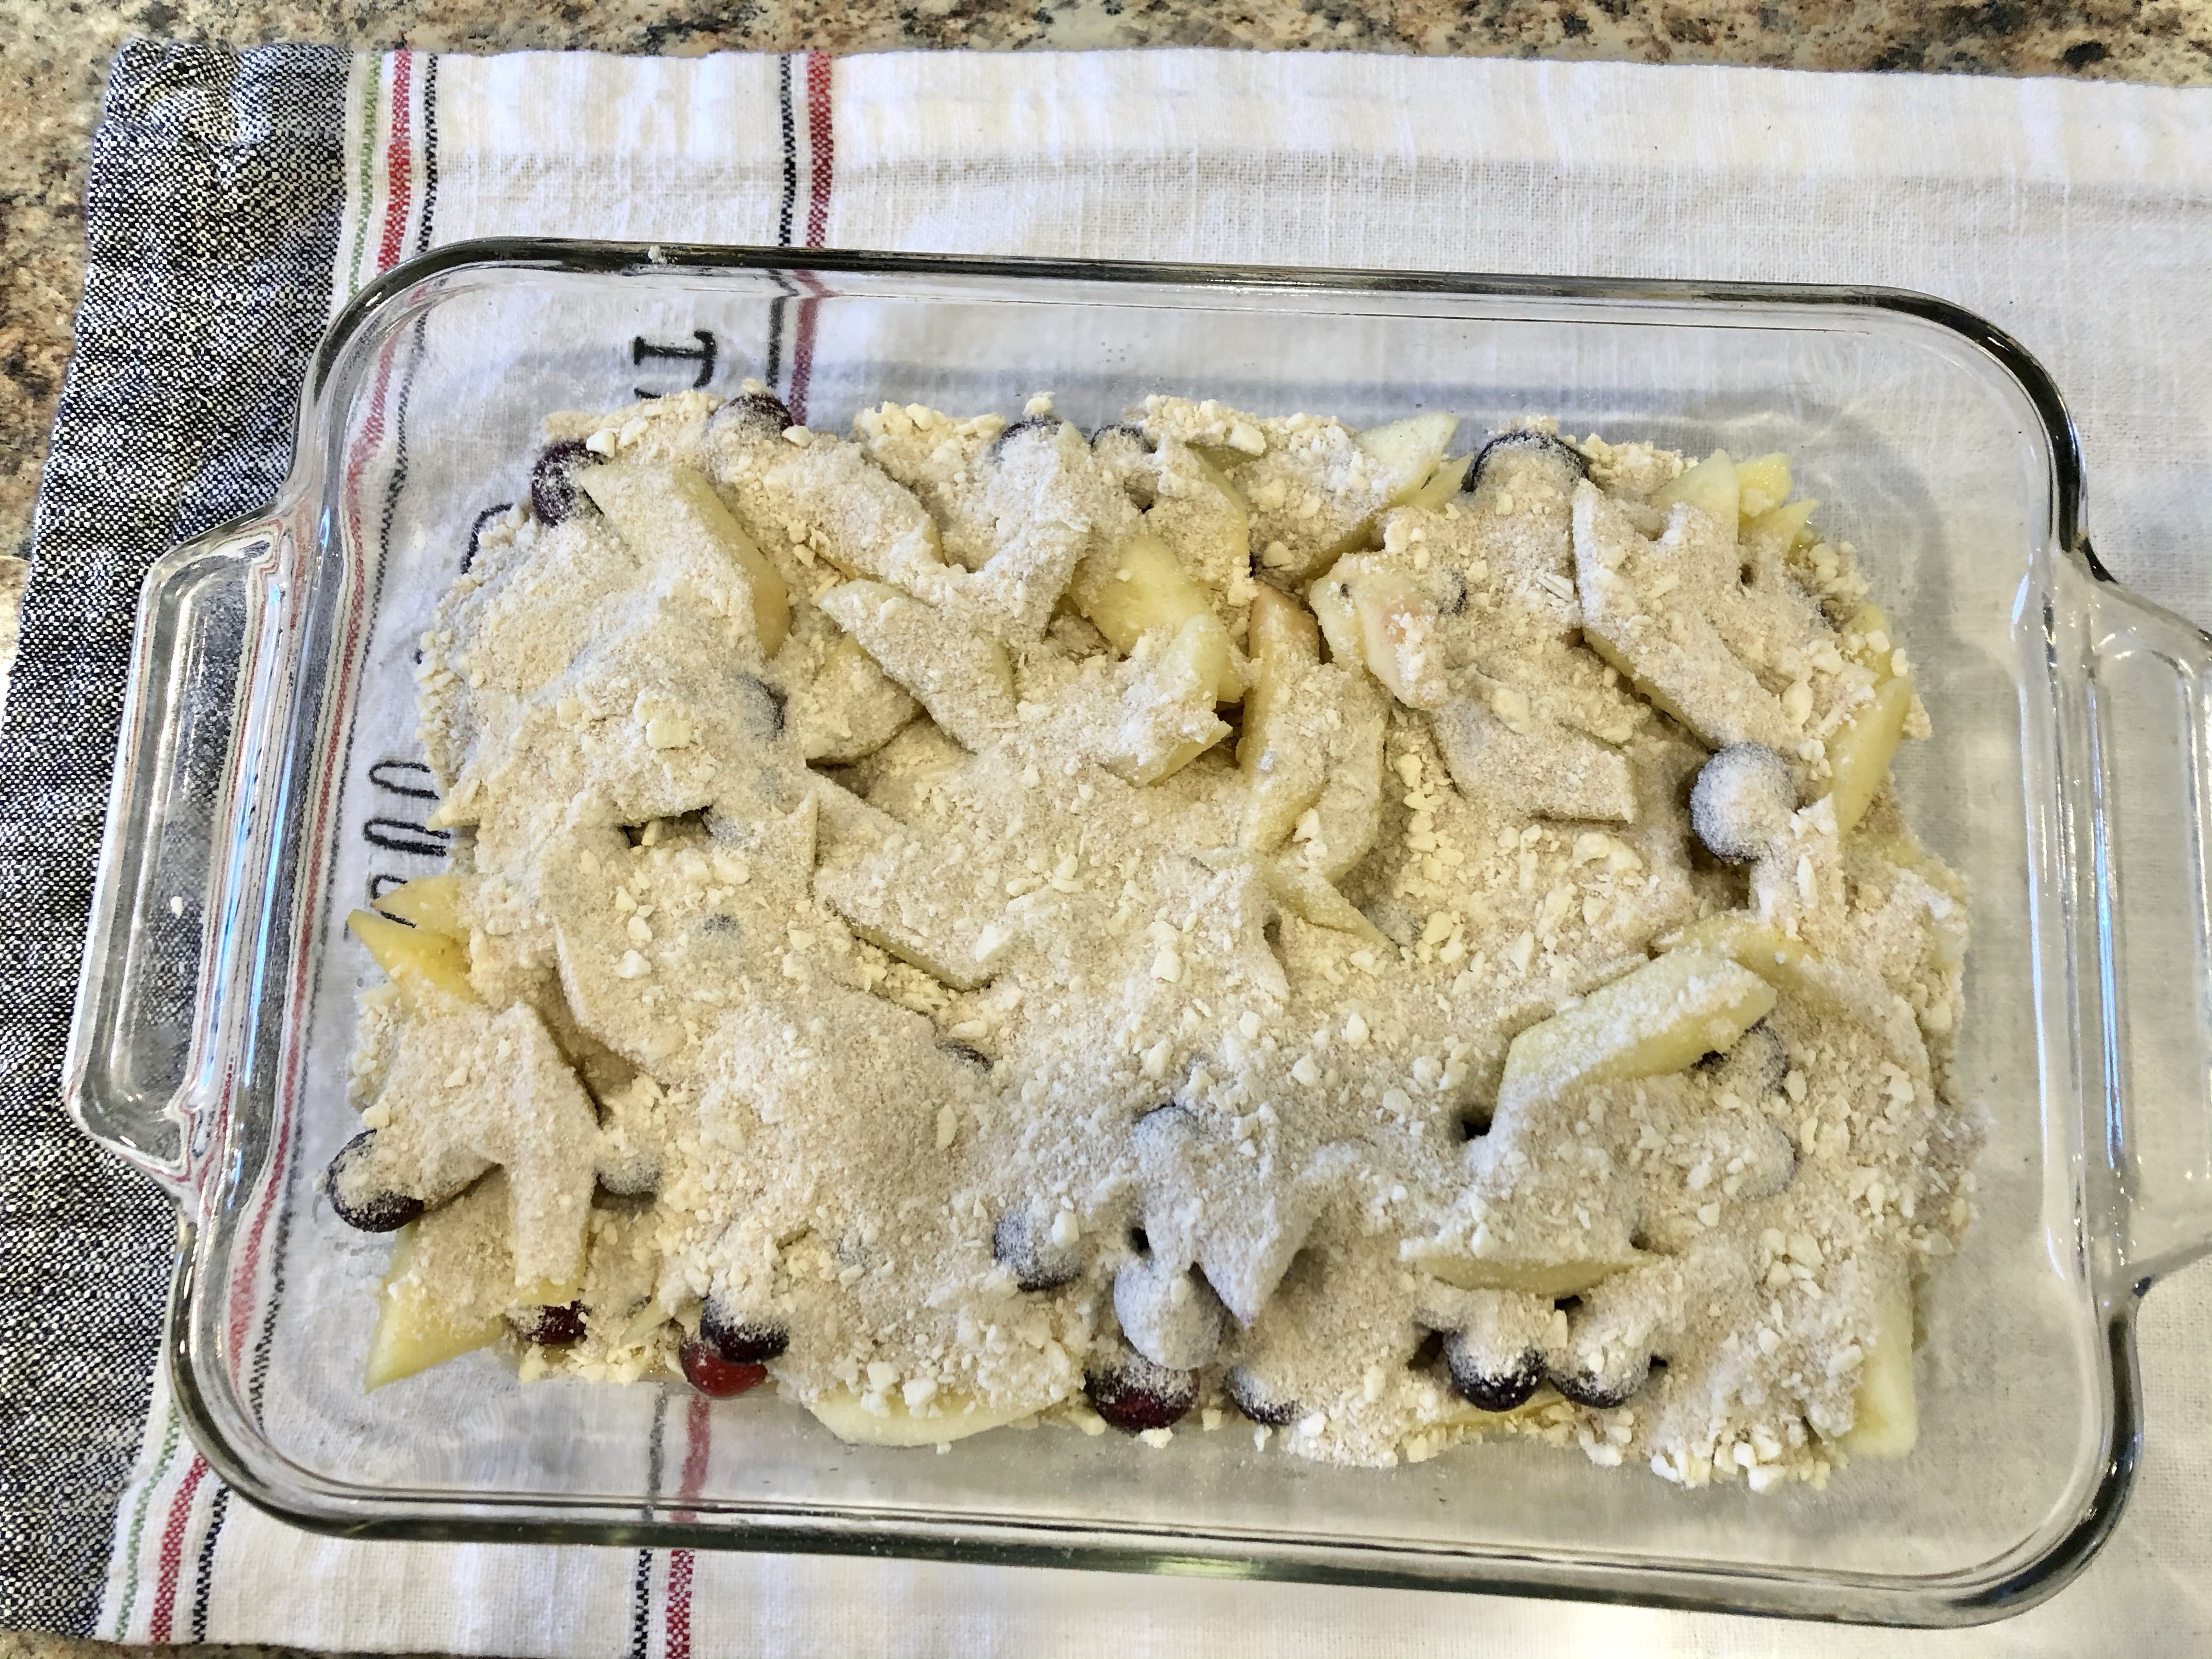
Apple Cranberry Crumble
Ingredients:
1/2 cup all-purpose flour
1/4 cup granulated sugar
1/4 cup packed brown sugar
1/4 cup chilled butter, cut into small pieces
6 cups sliced peeled Braeburn apple
1 cup fresh cranberries – I used 1/2 dried and 1/2 fresh
1/3 cup fresh orange juice
2 tablespoons granulated sugar
1 tablespoon cornstarch
Preparation
Preheat oven to 375°.
Lightly spoon flour into a dry measuring cup; level with a knife. Combine flour, 1/4 cup granulated sugar, brown sugar, and butter in a food processor; pulse 10 times or until mixture resembles coarse meal.
Combine apple and cranberries in a large bowl. Combine juice and remaining ingredients; pour over apple mixture. Toss well. Spoon apple mixture into a 2-quart baking dish. Sprinkle with flour mixture. Bake at 375° for 40 minutes or until bubbly and golden brown. Serve warm.

I love this dessert. I added a small scoop of ice cream for a special finishing touch!
If you need another idea for your cranberries, please try this muffin. I share this recipe every year because it’s too good to live without! Also, if you have canned Whole Berry Cranberry Sauce, use it to make this coffee cake that is to die for!! When I had my baking business, these were so popular, and for good reason!
You’ll be (cran)berry happy you tried any of these recipes! Sorry, I couldn’t resist!
With love from my country kitchen,