Side dish

A New Veggie Side!

sprouts.jpg

“Brussels Sprouts?  Are you kidding me?!” is what I would have said if you would have told me that I had roasted a new veggie in my kitchen!  I had never eaten them before that I can remember, but I’ve seen Ina Garten roast them, and as she is want to do, she made me think I’d like to try them!  Then recently while out for lunch with friends, I got to try their side of Brussels.  Yum!! They were delicious!

Being the Aldi’s fresh vegetable fan that I am, I went there hunting for the green delicacies.  Wow!  I found them super affordable for a bag.  I came home and searched on Pinterest for a recipe that sounded delicious.  Roasting in Olive oil at a high temp until the greens are caramelized, and then adding Balsamic Vinegar and honey pretty much sums it up.  I considered this recipe a success, and I’m sticking with it!  I found it on Once Upon a Chef‘s site.  Thank you, for sharing, Chef!  
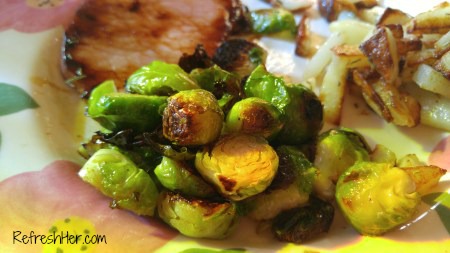
Brussels.jpg

Be sure not to overcook them, I’ve read that this is key to the difference between delicious and really bad!  Take off the outer leaves that are tough.  Aside from that – I’d just say Give them a try! 

Roasted Brussels Sprouts with Balsamic and Honey

Ingredients

  • 1-1/2 pounds brussels sprouts, halved, stems and ragged outer leaves removed*
  • 3 tablespoons extra virgin olive oil
  • 3/4 teaspoon kosher salt
  • 1/2 teaspoon freshly ground black pepper
  • 1 tablespoon balsamic vinegar
  • 1 teaspoon honey

Instructions

  1. Preheat oven to 425 degrees.
  2. Line a baking sheet with aluminum foil. In a large bowl, toss brussels sprouts with 2 tablespoons olive oil, kosher salt and pepper. Transfer the brussels sprouts to baking sheet and roast, stirring occasionally to ensure even browning, until tender and caramelized, about 20 minutes.
  3. Place brussels sprouts back in bowl. Add remaining tablespoon olive oil, balsamic vinegar and honey and toss to coat evenly. Taste and adjust seasoning if necessary, then serve.
  4. *If you have some brussels sprouts that are very large, cut them into quarters. They should all be cut about the same size to ensure even cooking.

As I understand it, they’re not usually available in the warmer months, so hop to it and grab some before the Sprout Season is gone!

Anyone else  love Brussels Sprouts?

With love from my country kitchen,

dessert · Side dish · Uncategorized

The Real Reason for Supper

supper table 1

All this week we’re going to talk about a subject dear to my heart – the Supper table.  From the why’s to the who, and the how – we’re going to discuss it all!  If you have any questions or comments about things you’d like to hear about, please let me know in a comment here!  Let’s get started today with the why of supper!

My husband was gone for a few days last week and I missed him greatly!  On the day of his return, I wanted to make a nice supper for him, even though it would be a little later than we normally eat.  I knew he wouldn’t have stopped for anything, and he’d be hungry!  

I could have just warmed up soup or made sandwiches, but I wanted the meal to communicate something to him – I missed him.  I was thinking of him.  He was worth the effort it took to prepare a nice meal.  Supper is more than just filling our family’s bellies.  It’s about letting them know that we care for them.  It’s about taking the time to sit at the table and chat.  It involves reaching across the table for their heart – not just the bowl of mashed potatoes!  So this is why it was important to me to make a nice supper for my husband’s homecoming!  I had a message to share!

Here was my menu:

Short Ribs
Wild Rice Mushroom Bake
Parmesan Roasted Broccoli
Parkerhouse Rolls
Ginger Cookies

I wanted the ribs to be really tender, so I did them in my pressure cooker.  It only took 15 minutes – which is incredible!  Because I was using my oven for the rice dish, it made it easier for me to cook them this way.  I followed these instructions.

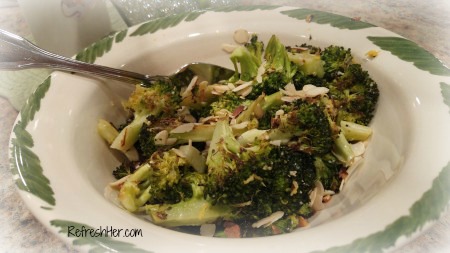
We love broccoli, and though I usually just steam it, I thought I’d try roasting it.  I used Ina Garten’s recipe with Parmesan Cheese and garlic.  Roasting it  gives it a different kind of texture – a little crispier than steamed, but it was good!

broccoli.jpg

Parmesan Roasted Broccoli

4 to 5 pounds broccoli
4 garlic cloves, peeled and thinly sliced
Good olive oil
1 1/2 teaspoons kosher salt
1/2 teaspoon freshly ground black pepper
2 teaspoons grated lemon zest
2 tablespoons freshly squeezed lemon juice
3 tablespoons pine nuts, toasted
1/3 cup freshly grated Parmesan cheese
2 tablespoons julienned fresh basil leaves (about 12 leaves)
Preheat the oven to 425 degrees F.

Cut the broccoli florets from the thick stalks, leaving an inch or two of stalk attached to the florets, discarding the rest of the stalks. Cut the larger pieces through the base of the head with a small knife, pulling the florets apart. You should have about 8 cups of florets. Place the broccoli florets on a sheet pan large enough to hold them in a single layer. Toss the garlic on the broccoli and drizzle with 5 tablespoons olive oil. Sprinkle with the salt and pepper. Roast for 20 to 25 minutes, until crisp-tender and the tips of some of the florets are browned.

Remove the broccoli from the oven and immediately toss with 1 1/2 tablespoons olive oil, the lemon zest, lemon juice, pine nuts, Parmesan, and basil. Serve hot.

The Rice & Mushroom Bake was a nice change from potatoes.  This is an old recipe my mom shared with me years ago.  It makes a lot – so I have some in my freezer for another day.  It’s creamy and delicious.  

Rice bake

Wild Rice Mushroom Bake

Saute one onion and cup of celery in a half stick of butter.  Add 2 cups of beef broth, one cup of sliced fresh mushrooms and a box of Uncle Ben’s Rice.  Bake 45 minutes @ 350 degrees in covered dish.  Uncover and bake 15 minutes longer.

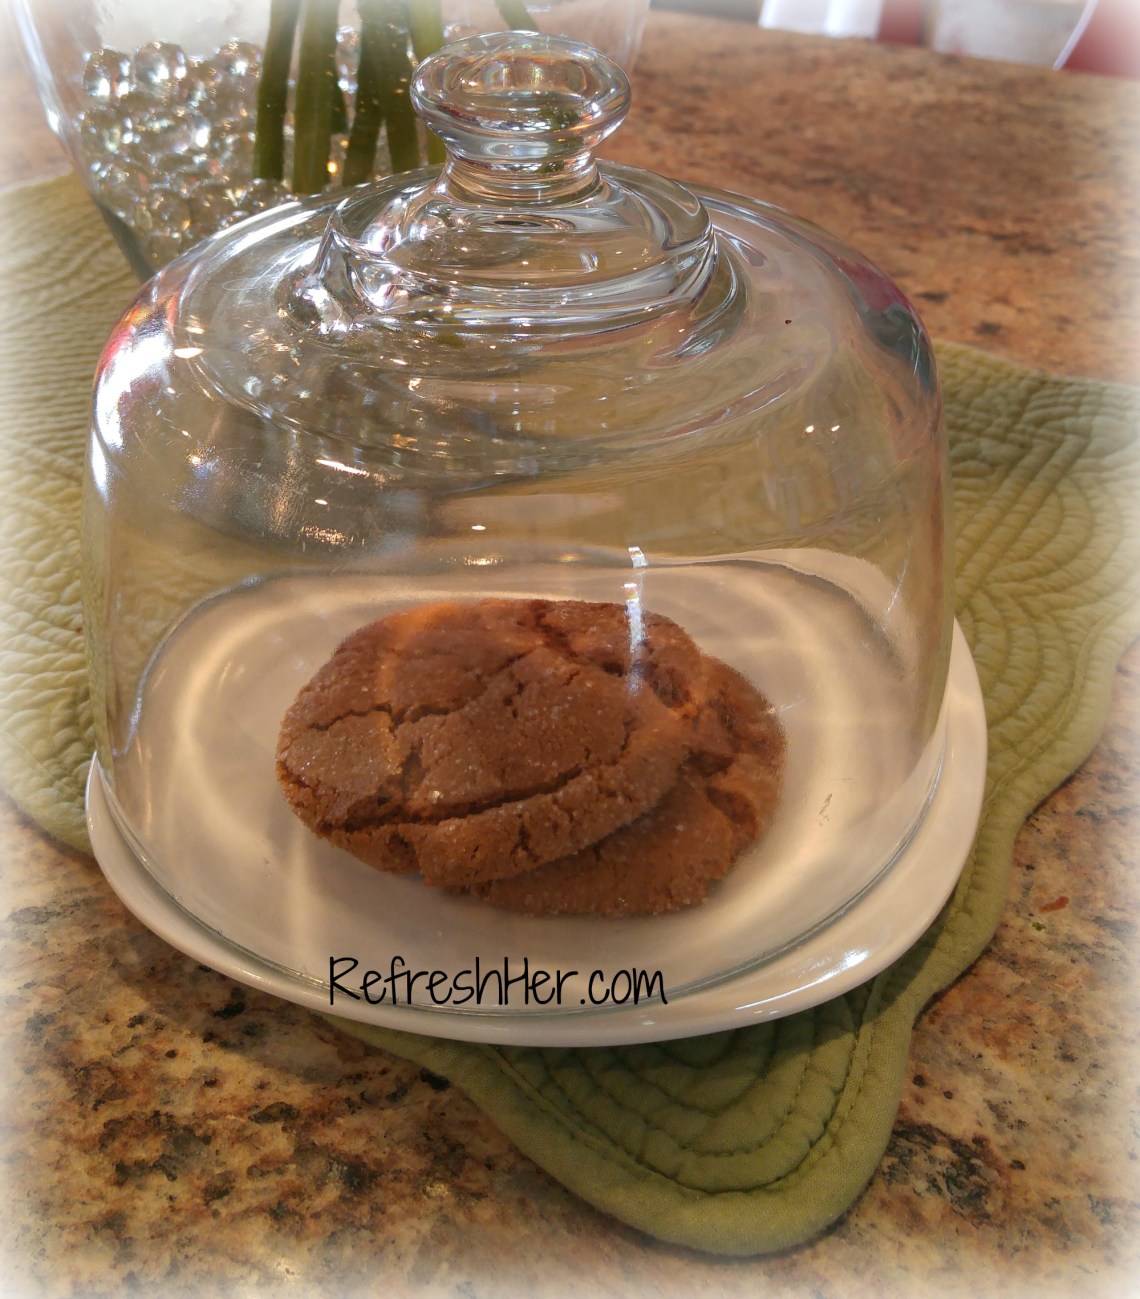
We don’t often have dessert on a weeknight, but you have to make something special for a homecoming meal!  The Ginger cookies are his favorite and I’ve shared them here.  I bake the large size for 11 minutes and it makes them just soft enough to be perfect with a glass of milk or cup of coffee!

Ginger cookies.jpg

I encourage you to think about what your meals are communicating to your family.  No matter if it’s you and your children, you and your husband, or a whole table full of people.  Make your supper meal an occasion – not just food.  You’re making memories around that table, so make them delicious and special!

With love from my country kitchen,

baking · Side dish · Uncategorized

Indulgences/No Guilt

I don’t always eat indulgences, but there are cravings for yummy things that hit like the recent winter storm – hard and with little warning!  But I like to eat what I love in a way that doesn’t bring guilt.  How to eat  delicacies and still feel good?  Enter Cooking Light.  You’ve seen their links all over my blog because with their recipes you eat real food, but it’s just lightened up and tastes outstanding!  

I tried a recipe on Cooking Light for Chocolate Chip Cookies that are a cross between cake and cookie.  Excuse me?  That means Delicious in my book. So would they be called Cakies or Cookes?  I think I’ll go with Cakies – Chocolate Chip Cakies. To make them low-fat, they replaced some of the fat with applesauce and you don’t miss anything but the calories! These are SO good!

Cakie a

Chocolate Chip “Cakies”
Ingredients

1 1/4 cups all-purpose flour
1 1/2 teaspoons baking powder
3/4 teaspoon salt
1/2 cup applesauce
1 cup packed brown sugar
1/4 cup butter, softened
1 tablespoon vanilla extract
1 large egg
1 cup semisweet chocolate chips
Cooking spray
Cakie

Preparation

Preheat oven to 375°.

Lightly spoon flour into dry measuring cups; level with a knife. Combine flour, baking powder, and salt in a small bowl; stir well with a whisk.

Spoon applesauce into a fine sieve over a bowl; let stand 15 minutes. Discard liquid. Scrape drained applesauce into a large bowl. Add sugar and butter; beat with a mixer at medium speed until light and fluffy (about 2 minutes). Beat in vanilla and egg. Add flour mixture; beat at low speed until well-blended. Fold in chips.

Drop by level tablespoons 2 inches apart onto baking sheets coated with cooking spray. Bake at 375° for 10 minutes or until almost set. Cool on pan 2 to 3 minutes or until firm. Remove cookies from pan; cool on wire racks.

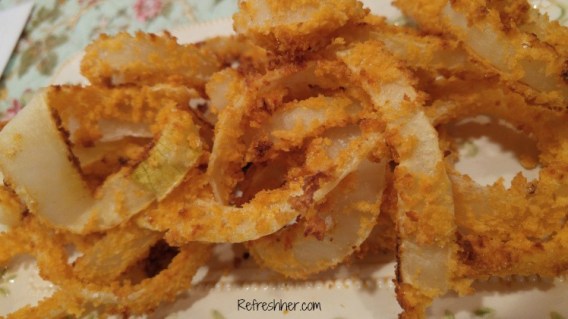
Now for my next low-fat cooking test…I’ve been playing around with Oven-fried Onion rings, trying to find the perfect combination of crunch and flavor.  It’s a little tricky to do when you’re not deep frying.  My old recipe, which will always be my favorite onion ring on a day when I want to splurge, requires oil and deep oil at that, so in order to live without clogging up my arteries, I thought an oven-fried method would be better!  This recipe was found on Food Network’s sight on the Sandwich King’s recipes.  The mix of flour and Panko breadcrumbs give it the perfect crunch with a fraction of the oil!  

onion rings

These little guys had to be husband-worthy, because they were part of his Birthday dinner!  It would be safe to say, he LOVED them!  I had a few…he had the rest.  End of story!  Here’s the recipe…

Oven Fried Onion Rings

Ingredients
2 cups all-purpose flour
2 teaspoons smoked paprika
4 teaspoons kosher salt
2 cups buttermilk
4 eggs
3 cups panko breadcrumbs
4 tablespoons olive oil
2 large yellow sweet onions, such as Maui, sliced 1/4-to-1/2-inch thick

Directions

Preheat the oven to 450 degrees F. Place parchment paper onto 2 baking sheets and set aside.

In a small bowl, combine the flour, paprika and 2 teaspoons salt. In another bowl or shallow dish, whisk together the buttermilk and eggs. Add half of the flour mixture to the buttermilk and beat until smooth and thickened.

In a separate bowl, combine the panko, olive oil and remaining 2 teaspoons salt.

Lightly dredge the onion rings in the flour mixture and then drop into the buttermilk. Drain the excess batter and then dredge in the panko mixture.

Oven Onion rings.jpg

Arrange on the prepared baking sheets in a single layer. You can place smaller rings inside bigger rings if necessary, just make sure there is space between them. Then place in the oven. Cook until golden brown, 14 to 20 minutes. Halfway through the cooking time, flip over each onion ring to ensure even crisping and browning.

Recipe courtesy of Jeff Mauro

I feel for people who settle for substitutes for real food when they want to cut back.  There’s no need to do that when there are recipes this good!  I hope you’ll try a Chocolate Chip Cakie or an Oven-Fried Onion Ring!

What do you do to enjoy your favorite foods without the guilt?

With love from my country kitchen,

  P.S. Don’t forget to enter a picture on Facebook or Instagram today for #Monday Marriage Matters, then check back tomorrow for a post about my favorite photo(s)!

Side dish

Sprucing Up The Baked Potato

Often it’s easy to find a great new main dish, but do you tend to get into a rut with your side dishes?  Green beans, corn and baked potatoes can get a little old if they’re not “spruced” up a bit! Let me share two of my favorite ways to fix a potato in the oven.

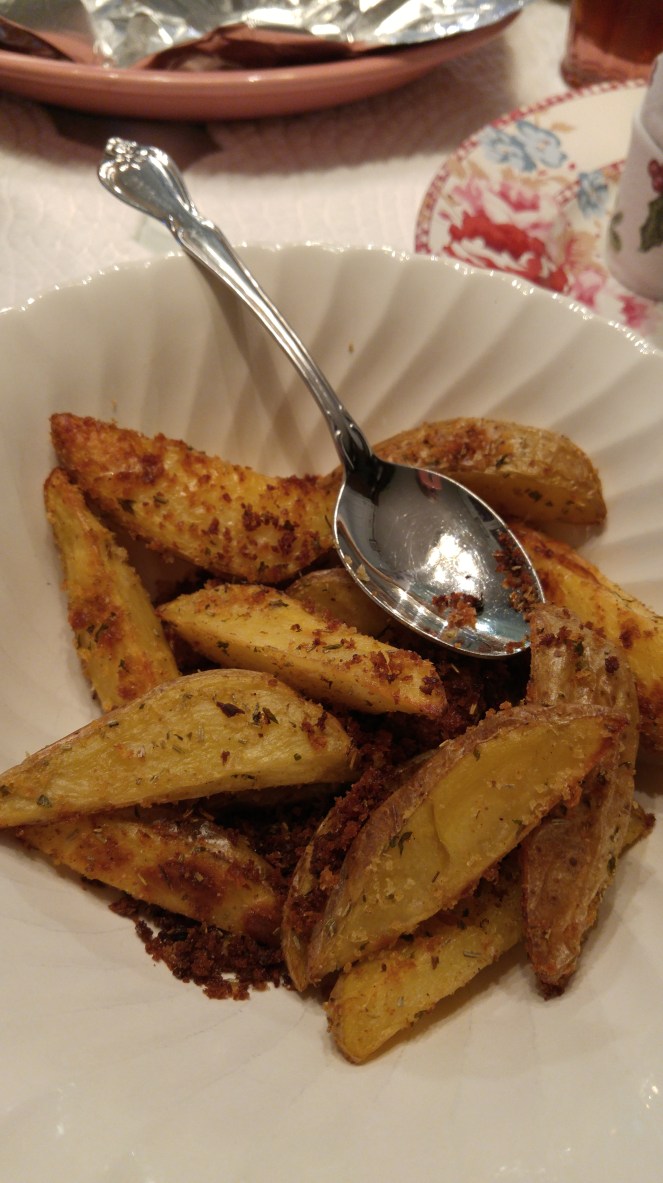
1129151137.jpg
Potato Wedges

Potato Wedges

Ingredients

  • 2 tablespoons vegetable oil
  • 1/4 cup Italian-seasoned bread crumbs
  • 2 tablespoons grated Parmesan cheese
  • 1 teaspoon Italian seasoning
  • 1/2 teaspoon paprika
  • 1/2 teaspoon garlic salt
  • 4 medium unpeeled potatoes (about 1-1/2 pounds)

Directions

  1. Spread oil in a 13-in. x 9-in. baking pan. Combine the next five ingredients in a large plastic bag. Cut each potato lengthwise into eight wedges. Place half of the potatoes in the bag; shake well to coat. Place in a single layer in pan. Repeat with remaining potatoes.
  2. Bake, uncovered, at 350° for 40-45 minutes or until tender, turning once after 25 minutes. Yield: 6-8 servings.

Another delicious potato wedge is the Potato Skin.  If I’m in need of something in about 20 minutes, this is my go-to!

Image result for potato skins

Potato Skins

4 Baking potatoes, washed
Melted Butter
Paprika
Sea salt

Preheat oven to 425 degrees.

Bake the potatoes in the microwave until tender.

Cut into wedges and place flesh side down on a baking sheet.  Brush skins with melted butter and sprinkle with Sea salt. Place in oven for about 5-7 minutes.

Turn potatoes over and brush flesh with butter and paprika.  Return to oven and bake 5-7 minutes, or until crispy.

Serve With sour cream.

I love a good potato, and both of these are great accompaniments to a great main dish!  Do you have a favorite way you fix potatoes fast?

With love from my country kitchen,


Side dish · Steak

Grilled Sweet Potatoes Rescue Boring Sides!

Is it just me or do you get really, really tired of same side dishes for supper?

Beans, corn and potatoes.

Good in their own rights, but boring after a while.  I even serve sweet potatoes, but even a plain ol’ baked sweet potato can get tiring.

Soooo, how about a Hassleback Sweet Potato covered with a Molasses/Butter?  Yes, please!

I saw Bobby Flay make these on the Food Network a few weeks ago and knew then I had to make them!  I made one potato and split it for my husband and me, therefore I also had to tweak the recipe, but it was fabulous!

Hassleback Sweet Potatoes with Molasses/Nutmeg Butter

I served the Sweet potatoes with grilled steak and fresh asparagus. I’ve shared my favorite steak marinade here.  It was a perfect pair with the sweet potatoes!

Grilled Hassleback Sweet Potatoes

Ingredients
4 large sweet potatoes, scrubbed
Kosher salt
1 1/2 sticks unsalted butter, at room temperature
3 heaping tablespoons molasses
1 tablespoon finely chopped fresh cilantro
1 teaspoon finely grated orange zest
1/8 teaspoon freshly grated nutmeg
Freshly ground black pepper
Canola oil, for brushing

Put the potatoes in a large pot, cover with cold water, add 1 tablespoon kosher salt, bring to a boil and cook until a paring knife inserted into the center of the potatoes meets with some resistance. (Do not cook through.) Drain and let cool slightly.

Mix together the butter, molasses, cilantro, orange zest and nutmeg and season with salt and pepper. Cover and refrigerate until ready to use

Heat a charcoal or gas grill to medium high for indirect grilling.

Cut off a thin slice of each potato lengthwise to create an even base for the potato to rest on. Slice off the ends of each potato. Rest each potato between two chopsticks or wooden spoons placed lengthwise along the potato (to act as a stop for the knife) and carefully cut vertical slits about every 1/8 inch.

Here’s my picture of how I did this.  The spoons work better than the chopsticks.  It keeps you from cutting down too far.

wpid-wp-1438993595651.jpeg

Brush the potatoes with the canola oil and season with salt and pepper. Place the potatoes on the cooler side of the grill, cover and cook until lightly golden and cooked through, 12 to 15 minutes.

Place the potatoes on a platter and immediately smear the tops with the butter mixture, making sure it melts into the cuts.

Here’s the finished meal:

wpid-wp-1438993599326.jpegI ask you, does that look boring?!  I hope you’ll turn up the volume on supper and try this side dish!

With love from my country kitchen,