Dinner · Make-Ahead

Shepherd’s Pie Made Light

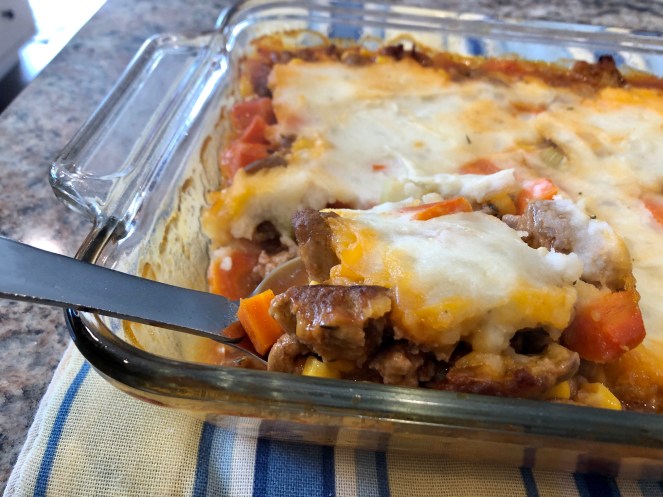
I have a beloved cookbook that houses the recipes of some of our nation’s best Bed and Breakfasts.  One such recipe is for Shepherd’s Pie.  If you’ve never had it, it’s basically a roast beef dinner served in a casserole dish.  The beef, gravy and vegetables are on the bottom and then it gets “iced” with mashed potatoes! 

My cookbook’s recipe  contains a very detailed list of ingredients, including roast beef to make this delectable dish.  I don’t often have a roast on hand to make it, so I’ve learned that there is a simpler, but still delicious way to make a Shepherd’s Pie. It uses ground beef instead of roast. That makes it so much faster, but still delicious! 

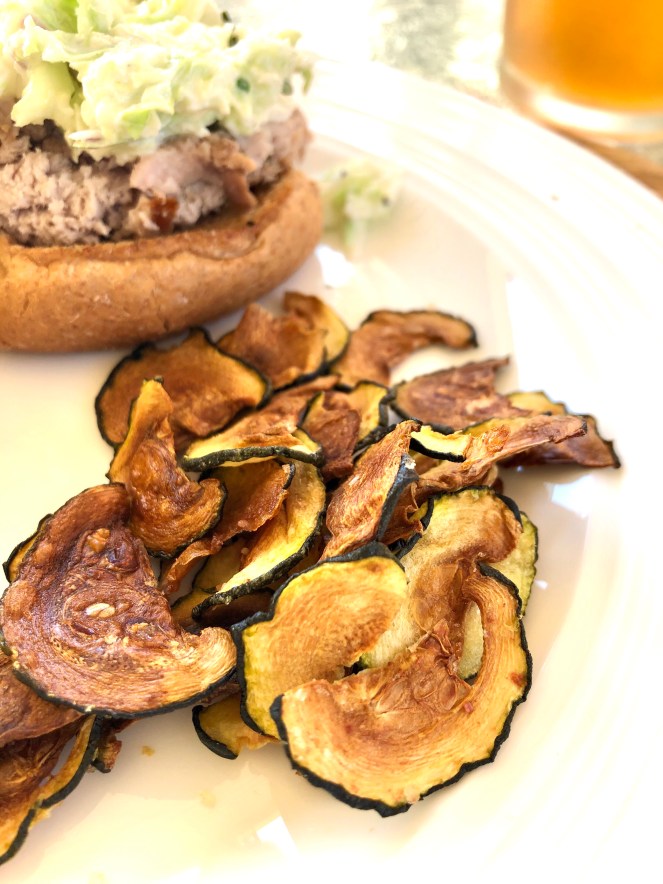
My favorite new substitute for the roast is ground turkey, making it lower in fat.  Don’t worry – you still get the gravy, the vegetables and the mashed potato topping!  I like using just carrots and celery with the meat. I don’t want it to taste like a beef stew, but you could certainly add other vegetables to it. This is a great weeknight dish with all the hearty flavors your family will love!

Another blessing of this recipe is that you can make the whole thing up to two days ahead of time and pop it into the oven to heat up for dinnertime!

Here’s the easy recipe:

Shepherd’s Pie

INGREDIENTS

Potatoes:

  • 1-1/2 lbs  potatoes, peeled, diced
  • 3/4 cup fat free chicken broth
  • 2 tbsp reduced fat sour cream
  • salt and pepper
  • paprika

Filling:

  • 1 lb ground turkey (of course you could use lean ground beef as well)
  • 1 tsp oil
  • 1 medium onion, diced
  • 1 celery stalk, chopped
  • 2 cloves garlic, diced
  • 2 large carrots, chopped
  • 2 tbsp flour
  • 1 cup fat free beef broth
  • 2 tsp tomato paste
  • 1 tsp Worcestershire sauce
  • 1 tsp freshly chopped rosemary leaves
  • 1 tsp freshly chopped thyme leaves
  • kosher salt and pepper

INSTRUCTIONS

  • Boil potatoes in a medium pot of salted water until cooked and soft.
  • Drain and mash with chicken broth, sour cream, 1/2 tsp salt and pepper, set aside.
  • Preheat oven to 400°F.
  • In a large saute pan brown meat over medium high heat, breaking the meat up with a wooden spoon as it cooks. Season with 1/2 tsp salt and pepper to taste.
  • When cooked, set aside on a plate.
  • Add the oil, onion, garlic, carrots and celery. (Add other vegetables of your choice) Sauté on medium heat about 6 to 8 minutes, until the vegetables are tender.
  • Add the flour, beef broth, tomato paste, Worcestershire sauce, rosemary, thyme, cooked meat and mix well. Simmer on low about 8-10 minutes.
  • Spread the meat on the bottom of casserole dish. Top with mashed potatoes and sprinkle with paprika
  • Bake 20 to 25 minutes, then place under the broiler 1 to 2 minutes until the potatoes turn golden.
  • Remove from oven and let it cool 5 minutes before serving

This would be a great dish to take to a new mom, someone recovering from illness or surgery, or a new family that’s moved into your neighborhood.  Add a salad (how about a copycat Olive Garden Salad?) and a biscuit (here’s my favorite recipe) and you’ll have a complete meal!

If you like make-ahead recipes, you might enjoy this one for Hot Chicken Salad!

With love from my country kitchen,

Blog info · Celebrations · spiritual growth

Two Celebrations!

I love celebrations and today I’m enjoying two!

The first one is my daughter, Alli; it’s her 29th birthday! God gave us Alli, our third daughter, during our tenth year of marriage; a special gift we didn’t think we would be able to have. But God in His grace and kindness to us, sent us a daughter to fill our home with music and laughter (lots and lots!) through Alli!

She was the child who was sure life was a stage. She enjoyed nothing more than entertaining Whitney and making her laugh!

From a very early age, Alli showed a love and a gift for music. She was denied the joy of learning to play drums (!), but started taking piano lessons when she was five. After that, she went to violin when she was around ten. Every instrument she’d see, (especially strings) she would want to try to play. She took cello lessons and then taught herself guitar. Her keen ear and natural ability were God-given gifts, and we sought to give her every chance to develop those talents.

One precious memory was the day during home school that she began asking questions about salvation. As we talked, I could see that she had a clear understanding of her sin and her need for a Savior. After excusing herself from my presence, she came back a little while later and announced to me that she had gone off on her own to ask Jesus to save her! Though she had some difficult days in her late teens, that decision to trust Christ kept her tethered to Him, even when she struggled personally. How thankful I am for the Spirit of God that lives inside His children! She responded to His conviction and made things right with the Lord after a brief time of straying away.

Since then she has been resolute in following the Lord and living for Him. Perfect? No, she has her parents’ old sin nature! But like all sinners, she gets it right and moves towards Christ.

What a joy to watch her serve with her husband in our church, and also as she is training her sons. I truly have no greater joy than to hear that my children walk in truth. III John 4.

Happy 29th Birthday, sweet Alli!

The second celebration today is regarding my blog! This week marks my 12th blogging anniversary! It was started 2,750 posts ago! What? Thank you to each of you who read, comment, follow and encourage my heart here.

This has been such a joy to me. I have met the sweetest women around the globe through this simple blog. I’ve been blessed to have some of you come to Tennessee and visit our church! Some I’ve gotten to know just through messages, and some have continued our relationships that began in person.

This blog was started for my church ladies, and is still my focus. I wanted a way to reach out to you, BCBC, ladies on a weekly basis. I pray I’ve ministered and encouraged you through the years by this means. I love each of you and long to serve you and point you to our Savior!

Would you give me a gift today? I’d just love to hear from you! Tell me how long you’ve been reading and where you’re from, would you? You might also add what content you enjoy when you stop by.

Also, how about sharing my blog with a friend? That would be a great gift to me! Thank you!

I hope you get to celebrate something or someone this weekend! Again, don’t forget to leave a comment before you go!

Time for cake!

Side dish · snack · zucchini

Crunchy Zucchini Chips

When you love the crunch and salt of chips, but you’re trying to eat healthy, is there anything aside from a bag of Lay’s that will satisfy that hunger? The answer is Yes! Zucchini Chips! If you own a garden, chances are you have an ABUNDANCE of them right now and are wondering how to use them up! If you don’t have a garden, you’re going to want to get the grocery store to purchase a zucchini or two to make this crunchy side dish!

Crispy, salty and the perfect accompaniment to sandwich!

The two most important ingredients for this yummy recipe are:

  1. Zucchini
  2. Time – These take 2 hours at a low heat, so start them early in the afternoon.

When I found this recipe I was a little skeptical, but because I had the two important ingredients, I decided to try them for myself! I am totally won over!

Here’s all you do ~

Zucchini Chips

  1. Slice the Zucchini to the thickness of about that of a quarter. (I used my food processor and used the blade with the thickest slice and they were just right.
  2. Spray a cookie sheet with cooking spray.
  3. Lay the slices in rows on the cookie sheet.
  4. Spray lightly with cooking spray and lightly salt. (They shrink while they dehydrate in the oven and the salt taste will intensify, so don’t use too much.)
  5. Place in a 250 degree oven for one hour. Flip the zucchini over. Rotate pans.
  6. Bake for up to another hour, or until they turn light brown and crispy.

These are best served right away. The recipe says they will turn chewy as after a while. We didn’t get to test that part because I baked up one zucchini and we ate every bite!

Some tips:

  • These shrivel up quite small, so make twice the amount you think you’ll need!
  • It’s probably better to go a little thicker with the slices than too thin. They just might need longer to bake.
  • Keep a watch on them after that first hour. Some of mine got a little too dark.
  • Eat them right away.

I’m not one who loves weird snacks. Don’t even think about giving me a rice cake! I tell you that to emphasize that I thought these were just delicious! I bet sprinkling them with some grated Parmesan cheese would be an extra layer of deliciousness!

I served these alongside a pork tenderloin sandwich and it made a great side dish! They’d also make a great snack. I’m thinking children would never know they’re getting a helping of vegetables! What they don’t know won’t hurt them!

What’s the strangest vegetable you eat or have eaten as a snack or side dish?

Happy crunching!

canning · Home decor · Home making

Easy Does It!

Sometimes it’s the simplest changes or additions that bring the greatest blessings! I’m starting a new series, Easy Does it, that I’ll feature every now and then of easy things that have made life better or a little easier in my home.

Let’s get started!

  1. After being gifted a bushel of cucumbers, I decided to try my hand at 14-Day Pickles (wish me luck!). I attempted to gather all my ingredients, except I couldn’t find pickling salt on any store shelves! While I was on the search for the missing salt to make my first round of homemade pickles, my husband came across this Mrs. Wages 1 Step Pickling brine. It only takes 5 minutes to cut up the cucumbers and slide them into a clean jar! You let them set overnight and they’re ready to eat!

The result? They are delicious! The package costs a couple of dollars and makes one quart jar of pickles. They offer several different kinds of pickles and also salsa! If you’re not into canning but enjoy a good pickle, you need to try these! No canning is necessary. They’ll keep in your fridge a week. They do all the work and you get to take the credit! Five minutes work and eight hours to wait is it. That’s lots easier than my 14-day recipe!!

Mrs. Wages Pickling Brine makes making homemade pickles 5-Minutes of easy prep!

I’m laughing at my caption…it sounds like a commercial! But hey, they really are good!

2. It’s amazing to me how long I’ve had some of the items I use daily. Age does that, I hear! I’ve had a basket that I have used on my patio for probably more than 30 years. It’s super sturdy and is great as a tray for outside entertaining I usually set it in the middle of the patio table and keep a centerpiece on it, but I also use it to serve beverages and desserts. Recently I looked at it and realized that it had seen better days. I couldn’t get rid of it because the bones of the basket are still in great shape! So, I went to the utility shed and found a can of black spray paint…just the thing to give it new life! A few coats of paint and a couple hours later and it looked brand new!

That was easy!

Sooo much better!

3. Our outside back door rug also got my recent attention one day this week. Its cute little bicycle print had worn off of the surface, leaving just the bristles and dirt. Not long after, I was in Hobby Lobby and found their Spring decor marked down 75% off! They had all kinds of outdoor rugs to choose from! The one I found was only $5! It’s bright colors are perfect for the back porch and the design is still in season! It brightened up the doorway so much! That’s was a simple back porch improvement!

Liza approves, too!!

4. One morning this week when getting coffee cream out of the fridge, I noticed an area on a shelf that needed to be wiped off. An hour later the entire fridge had been completely emptied, shelves taken out, washed and returned to their places. Been there?
When I returned the vegetables and fruits to their drawers, I thought how much better it would be to put something instead of paper towel there to catch the drips from berries and veggies. I had already placed two vinyl place mats on the bottom shelves and decided that would do the trick in the drawers, too! During my next trip to The Dollar Tree, I purchased two more vinyl place mats, cut them to the size of the drawer and placed them at the bottom where the drips will be easily wiped off simply by removing the place mat. The perk is that they’re colorful and pretty! That will be easier to keep clean!

These were four little ideas/changes that were so easy and made me smile this week! Is there one that inspired you?

Refresh yourself by being part of a solid Bible preaching church this weekned!

dinner in 30 minutes · Fast meal · Sandwich

Bumping Up the Hot Dog to a Whole New Level!

“What are some of your favorite things to purchase at Sam’s Club?” I asked a friend.

“I love their chicken sausages! They make such a great supper meal!”

So upon her recommendation, I purchased some and they were good, but just “meh.” But then I realized that they would be fantastic on a bun in the place of a regular hot dog. After searching, I found this recipe for adding a sweet and savory pineapple relish on top of that sausage, and it bumped it up to be the tastiest “Hot Dog” ever!

One great thing about these sausages (you can get them at any grocery store, not just Sam’s) is that most are already cooked, so you’re basically warming them up. We chose to throw them on the grill to add that smokey flavor. Good idea! Then, I also sprayed the buns with cooking spray and warmed them on the grill before placing that hot chicken sausage inside and topping it with the delicious relish. Oh my! What a yummy meal and also so much healthier than the pork version.

Chicken Sausages with Pineapple Salsa
Keep in mind you can leave out any ingredient you don’t love!

  • 4 chicken sausages (or vegetarian sausage)
  • 1 cup pineapple
  • 1/2 cup red pepper, diced
  • 1/2 jalapeno, diced
  • 1/8 cup onion, diced
  • 1/8 cup cilantro, diced
  • 1/4 tsp. cumin
  • 1/4 tsp. pepper
  • 1 lime, juice

Instructions:

Stir together the pineapple, red pepper, jalapeno, onion, cilantro, cumin, salt, pepper, and lime juice.2

Grill the sausages according to package directions, about 6-8 minutes for pre-cooked chicken sausages.

Spray buns with cooking spray and place sprayed side down on grill. Cook until lightly browned and warm.

Place sausage in buns and top with Pineapple relish.

If you’re hungry for a delicious summer meal, I encourage you to jump on the Chicken sausage bandwagon and give them a try inside a toasty bun and smothered with this relish! You’ll be saying,

Move over, hot dog, you’ve got some stiff competition!!

Two questions:
Have you ever tried chicken sausages?

What’s your favorite thing to buy at Sam’s or Costco?

With love from my country kitchen,