Springtime is the time for sprucing things up! It doesn’t always have to be a huge project – sometimes just a deep spring cleaning will do it. Other times a greater change is needed.
For us, this spring meant it was time to paint. Isn’t it amazing what a can of paint will do to a room?! We’ve lived in our house twelve years, and the color of the walls and the paint itself were showing their age. We painted downstairs two years ago and it made such a difference! I knew it was time for that kind of refresh upstairs.
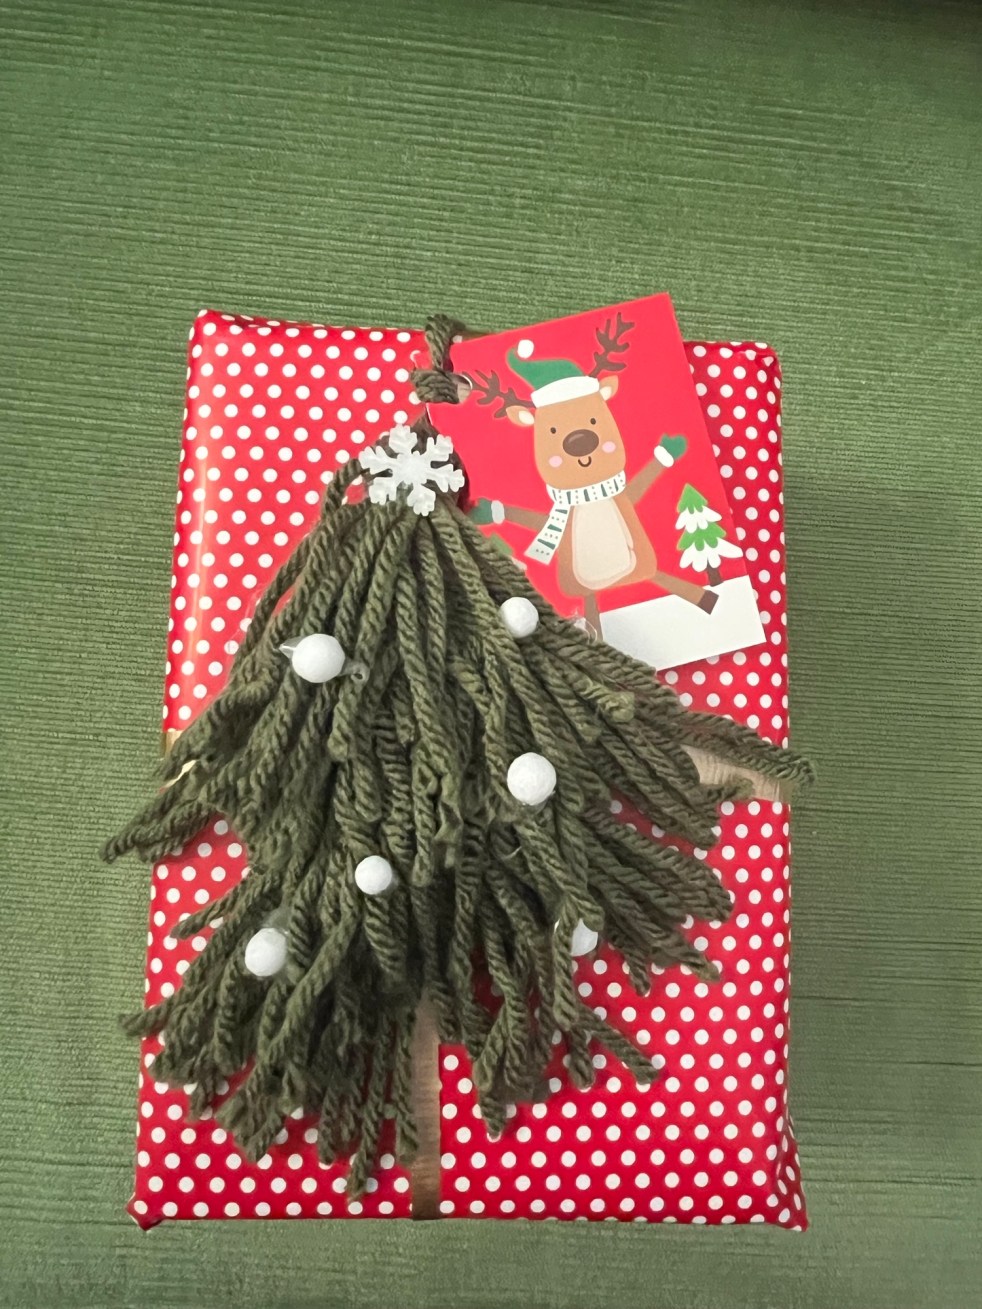
I don’t like making a craft and then trying to find a place to put it. Recently I found and made a cute Christmas craft that you can actually use. This is a Christmas Tree Tassel. It takes about 15 minutes to make. Look at this…
When you open the weather app on your phone and this is what is says – how do you dress?!
Here’s what I try to do:
Layers is the answer for me. When it’s cool in the morning and evening I can leave on the top layer, when it warms up I can take off a layer. This outfit consisted of olive green jeans, a cotton blouse, leopard flats and a denim vest.
Dressier outfit:
Last year I found this winter white skirt at the Dillard’s outlet. I love the versatility it gives me! Here are two ways I’ve found to wear it. The one on the right is another idea of layering.
Now, for a whole different kind of outfit… Brace yourself!
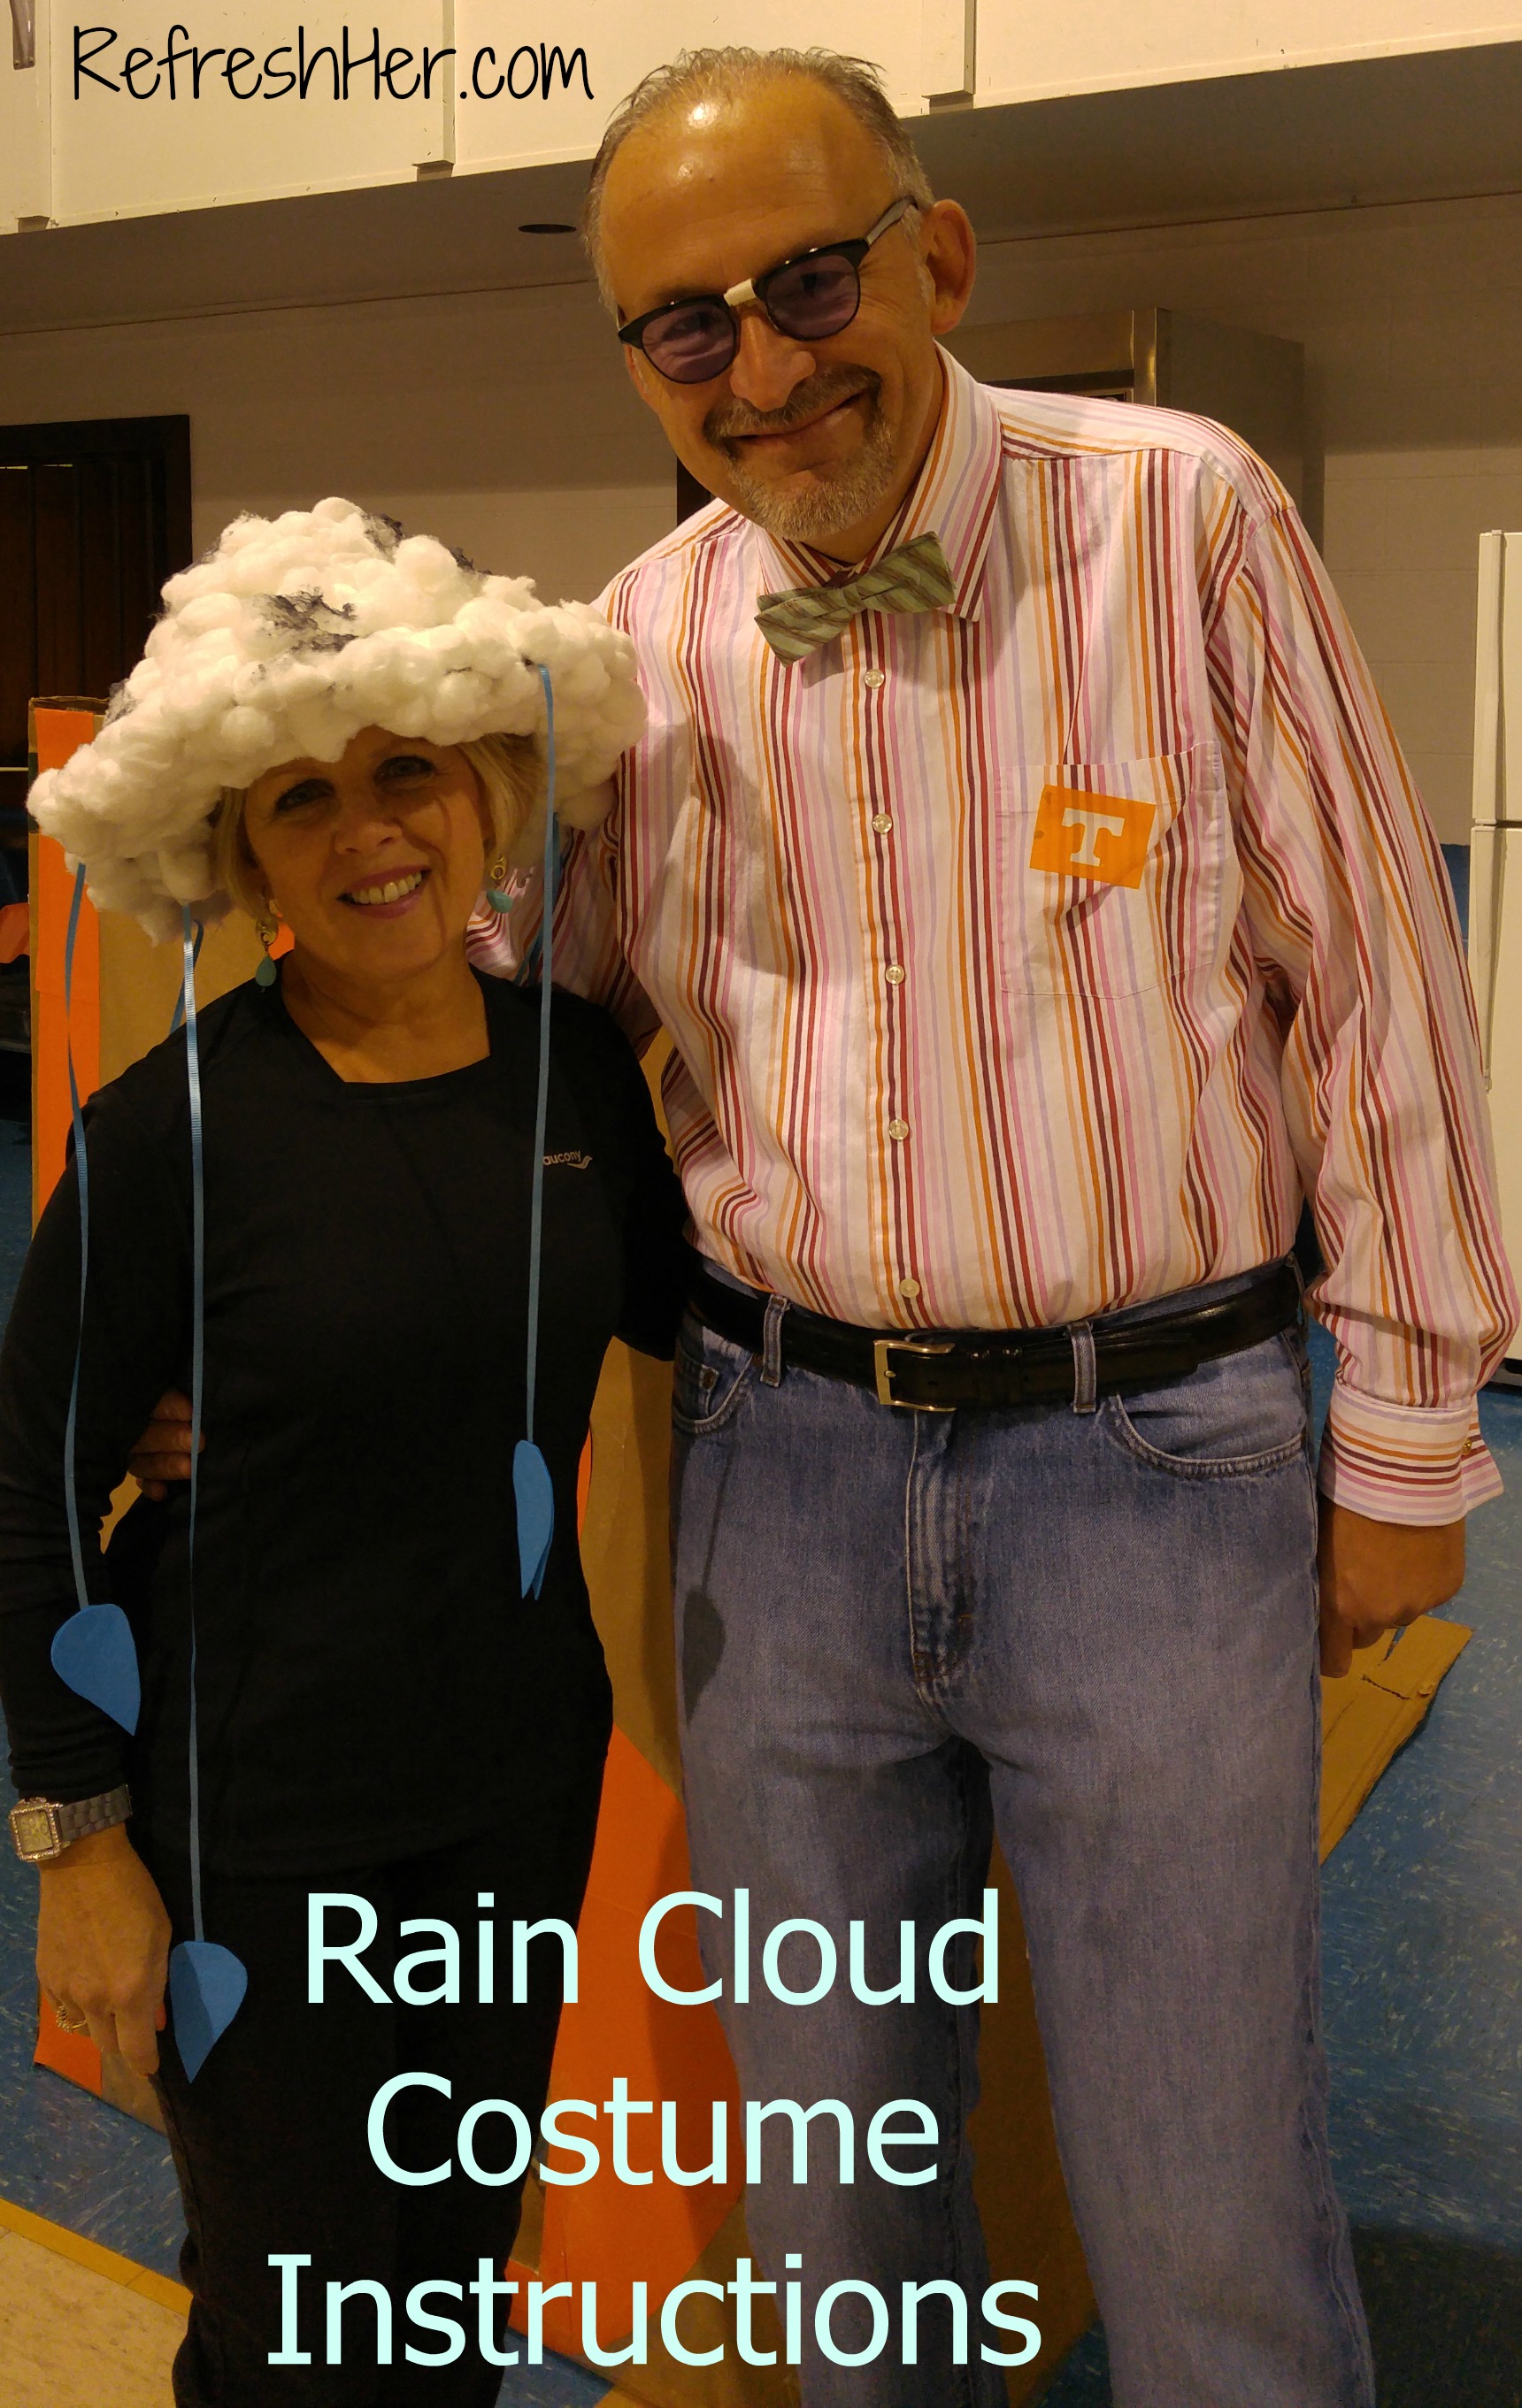
With Trick or Treat coming up, maybe you’re looking for a simple DIY costume? Let me show you the funny ones my husband and I did last Wednesday for our church’s Trunk or Treat. I was a Rain Cloud, he was a Nerd. Oh, did he nail it or what? Yikes!
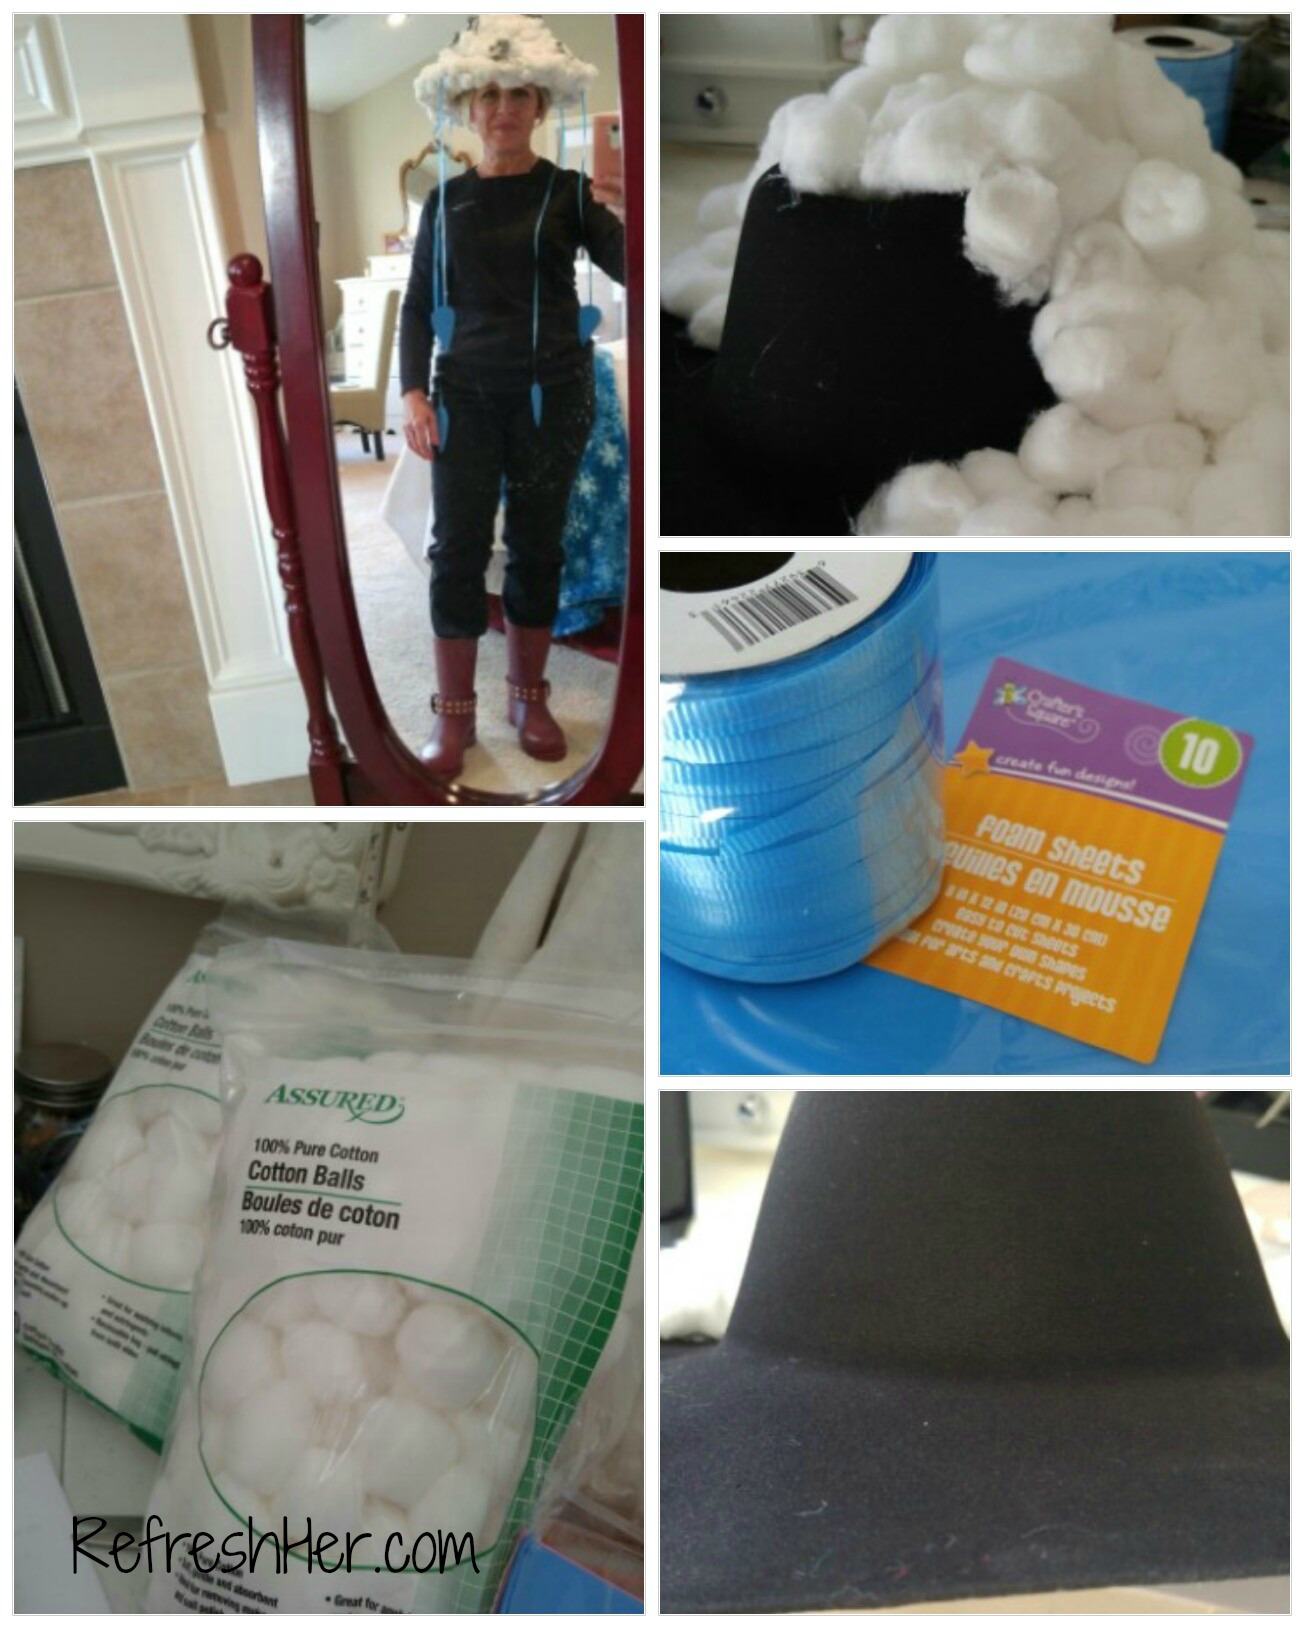
Along with my rain cloud hat, the picture below will show you that I also wore a black top and pants, with rain boots to complete the outfit.
I went to the Dollar Tree and bought
a child’s cowboy hat
four bags of cotton balls
Blue foam squares
Blue ribbon
Gray paint
You’ll also need a glue gun, which I already had.
Take the cotton balls and kind of pull them out to fluff them up a bit, then begin gluing them to the hat to create the cloud. Cover the hat, using more than one layer. This takes a while, just be patient.
Then cut rain drop shapes from the foam, I did about 20. Glue two together with the ribbon in-between. Attach the ribbons to the hat. I tried to stick it up on that hat, between the cotton balls so it would stick a little better. I dabbed a little bit of acrylic gray paint on the white cotton balls. You could also use gray spray paint to add a touch to your cloud.
That’s it! This costume cost me under $10!
Do you ever dress up for Halloween? It was fun to “join the party” and have fun with the kids at church!
What are you wearing during these cool/warm fall days?
Stay refreshed by going to a Bible preaching church this weekend!
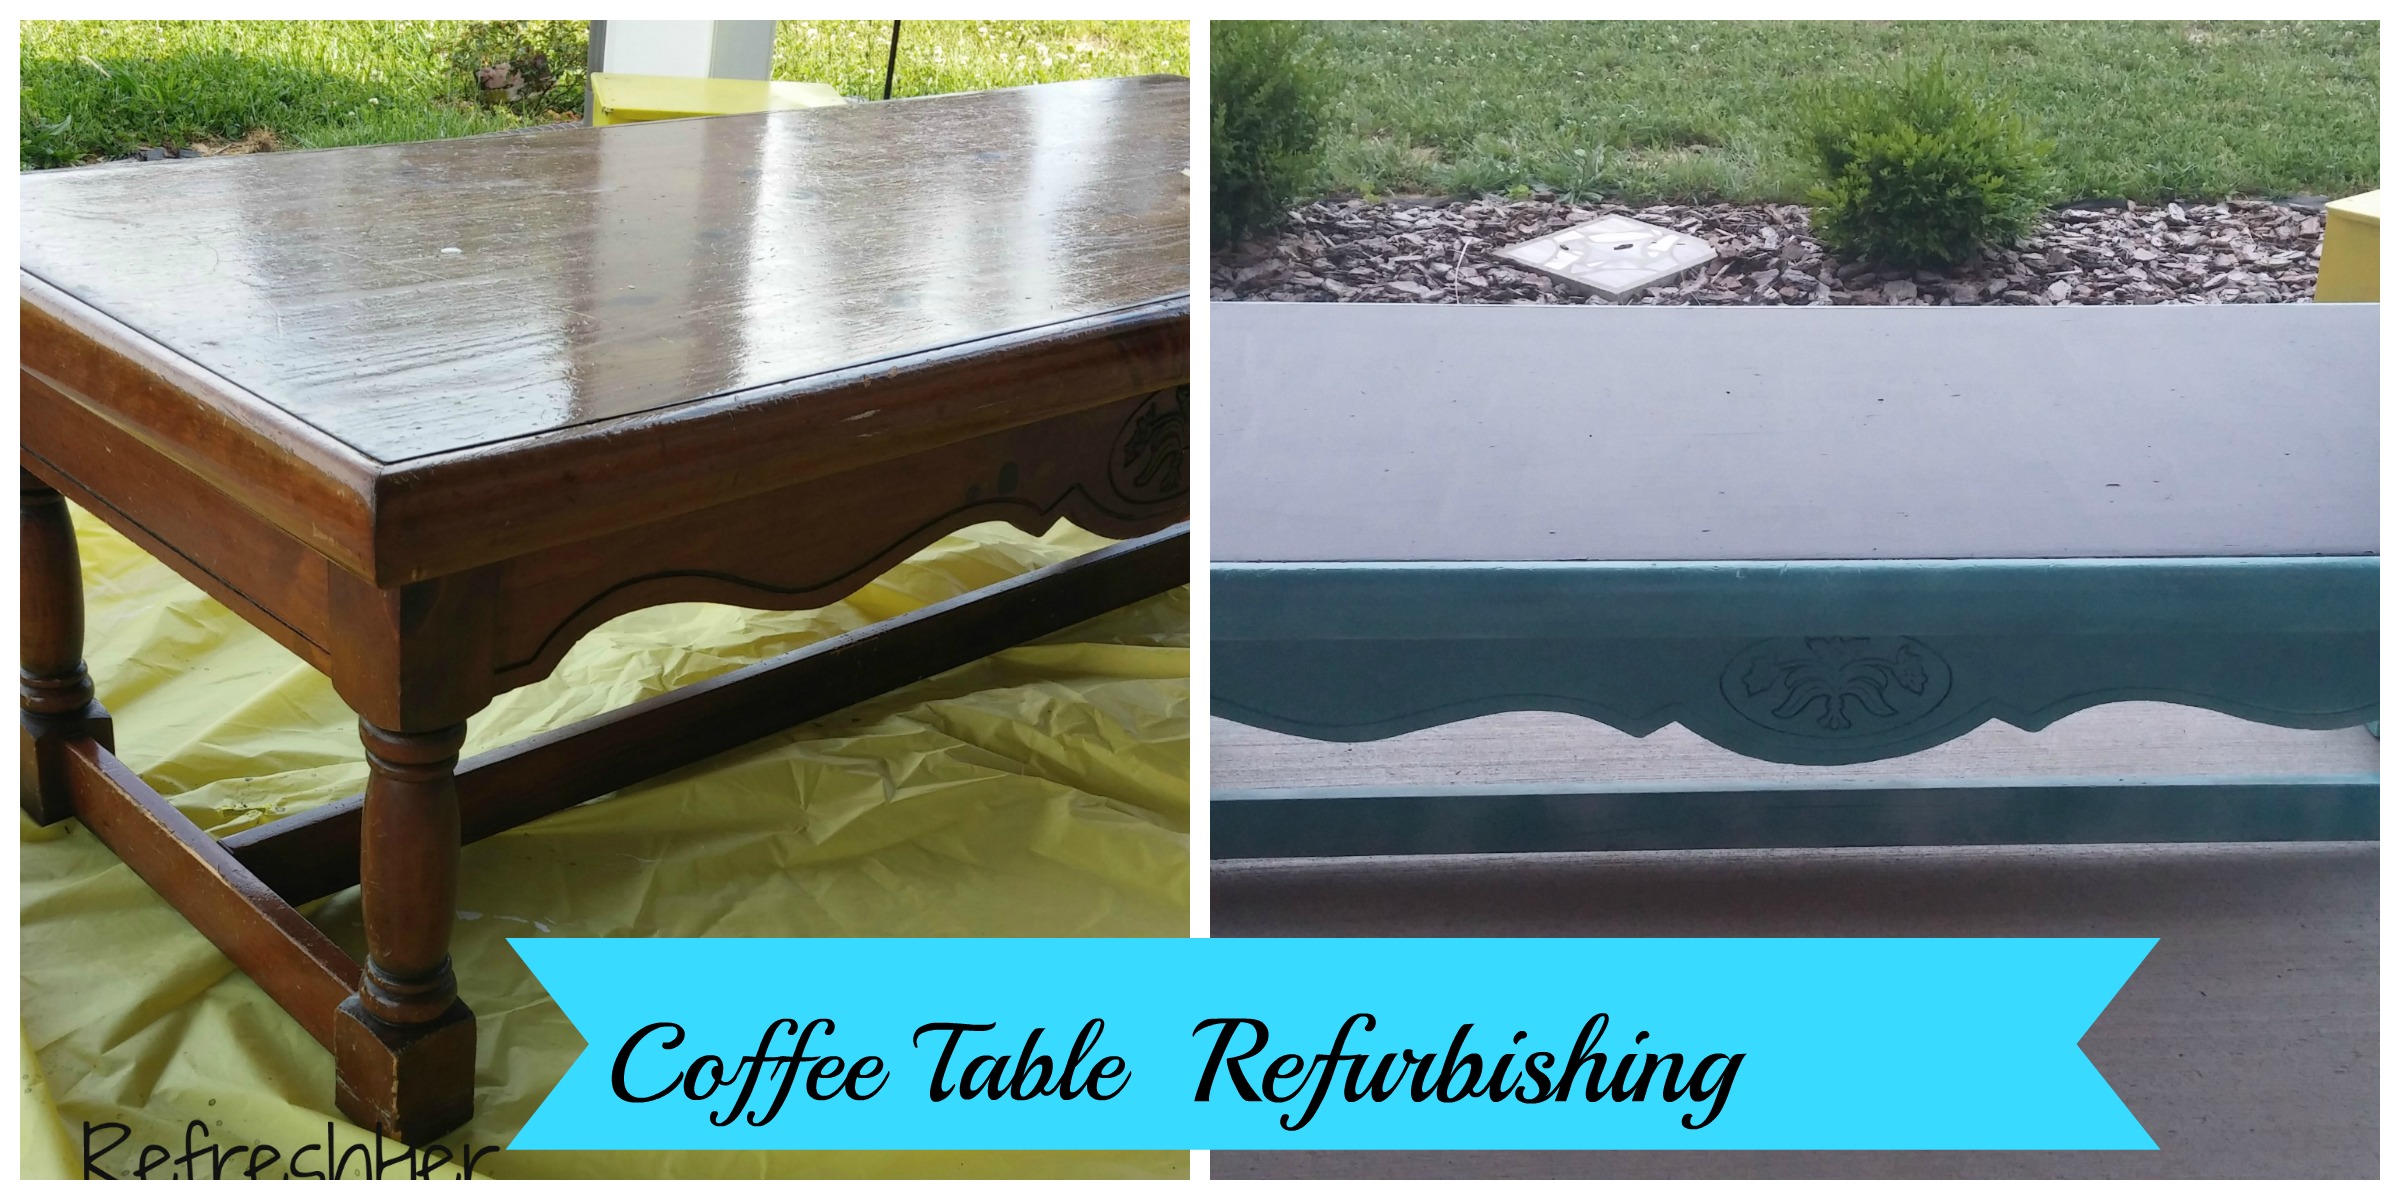
Now that the warm weather is here (woo-hoo!), I have been trying to get my front and back porches in shape so we can enjoy them.
I had added a few touches last year like white lights around the porch ceiling, but I had a couple of other projects I wanted to tackle. For one, there’s nowhere to set a glass of tea or cup of coffee when you’re on the swing, so I was determined to be on the lookout for a table at a yard sale or Goodwill. Since it’s going to be on the back porch, I didn’t want to spend a lot on it. Then, my dear friend posted on Facebook that she had a coffee table she was giving away to the first one who spoke up for it. Free was in my budget and I was the fortunate receiver!
I LOVE painted furniture, so I knew I was going to paint the table, but other than that, I really didn’t have a plan. Enter Pinterest. I found an idea there to paint the top of the table with chalkboard paint! Genius! Since it’s going to be outside, it would be a perfect finish for it! How fun to let children draw or play tic tac toe on it!
Here’s how I tackled the project:
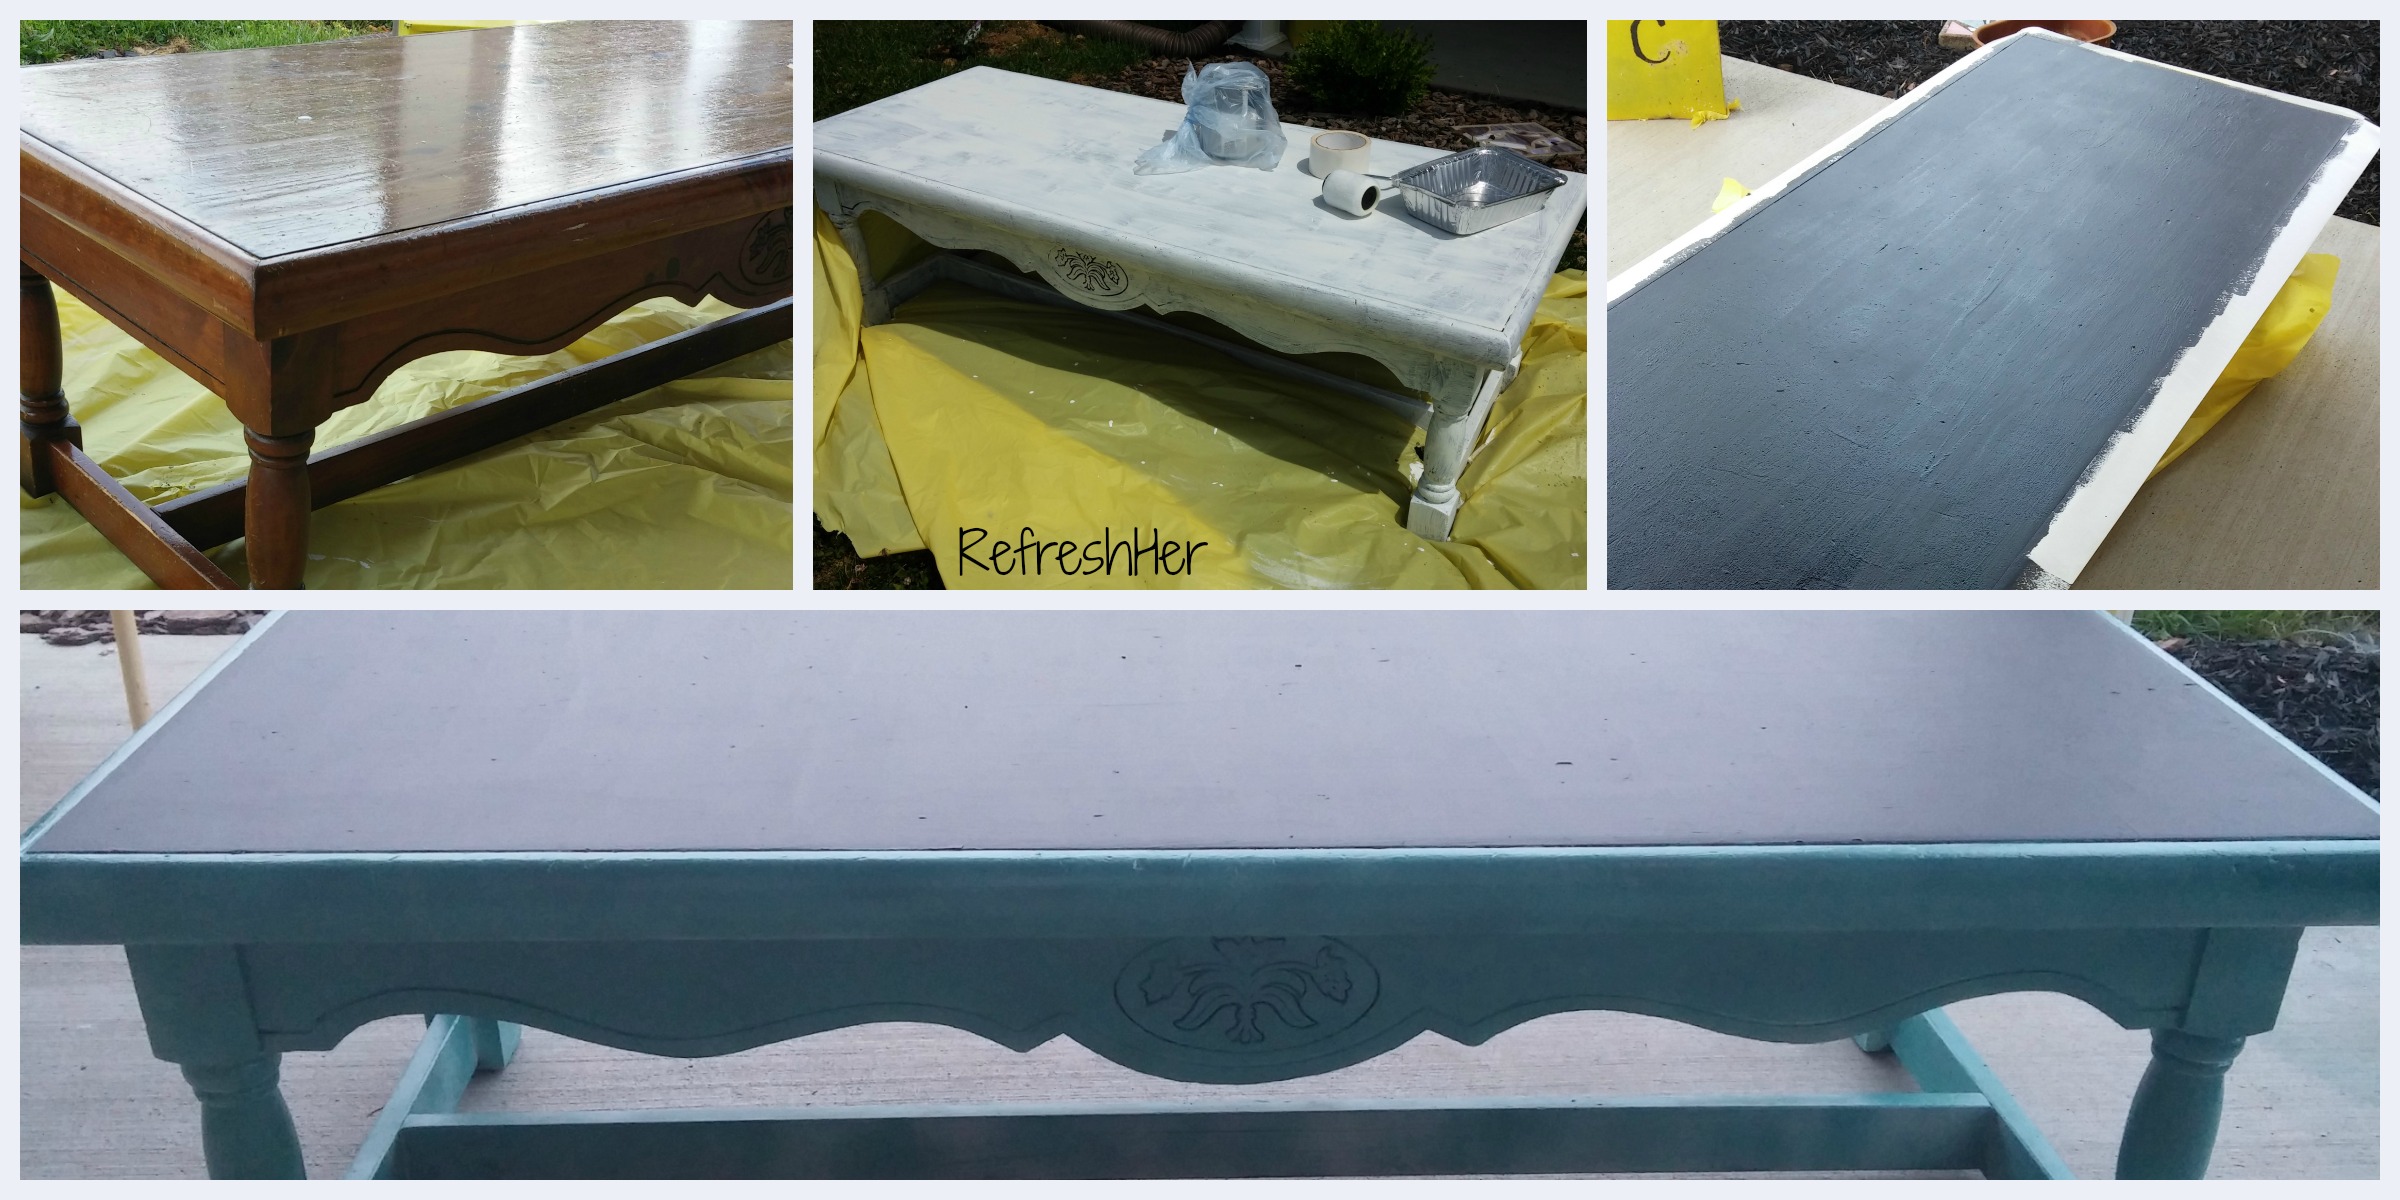
Click on picture to enlarge.
1. The before picture.
2. I covered the table with Kilz, an oil based primer that allows the paint to adhere.
3. I taped off the edges then rolled on the chalkboard paint. I did four separate coats, allowing it to dry in between. First I went one direction, then the other.
4. I spray painted the rest of the table the aqua color. I covered the table top so as not to get blue on the chalkboard.
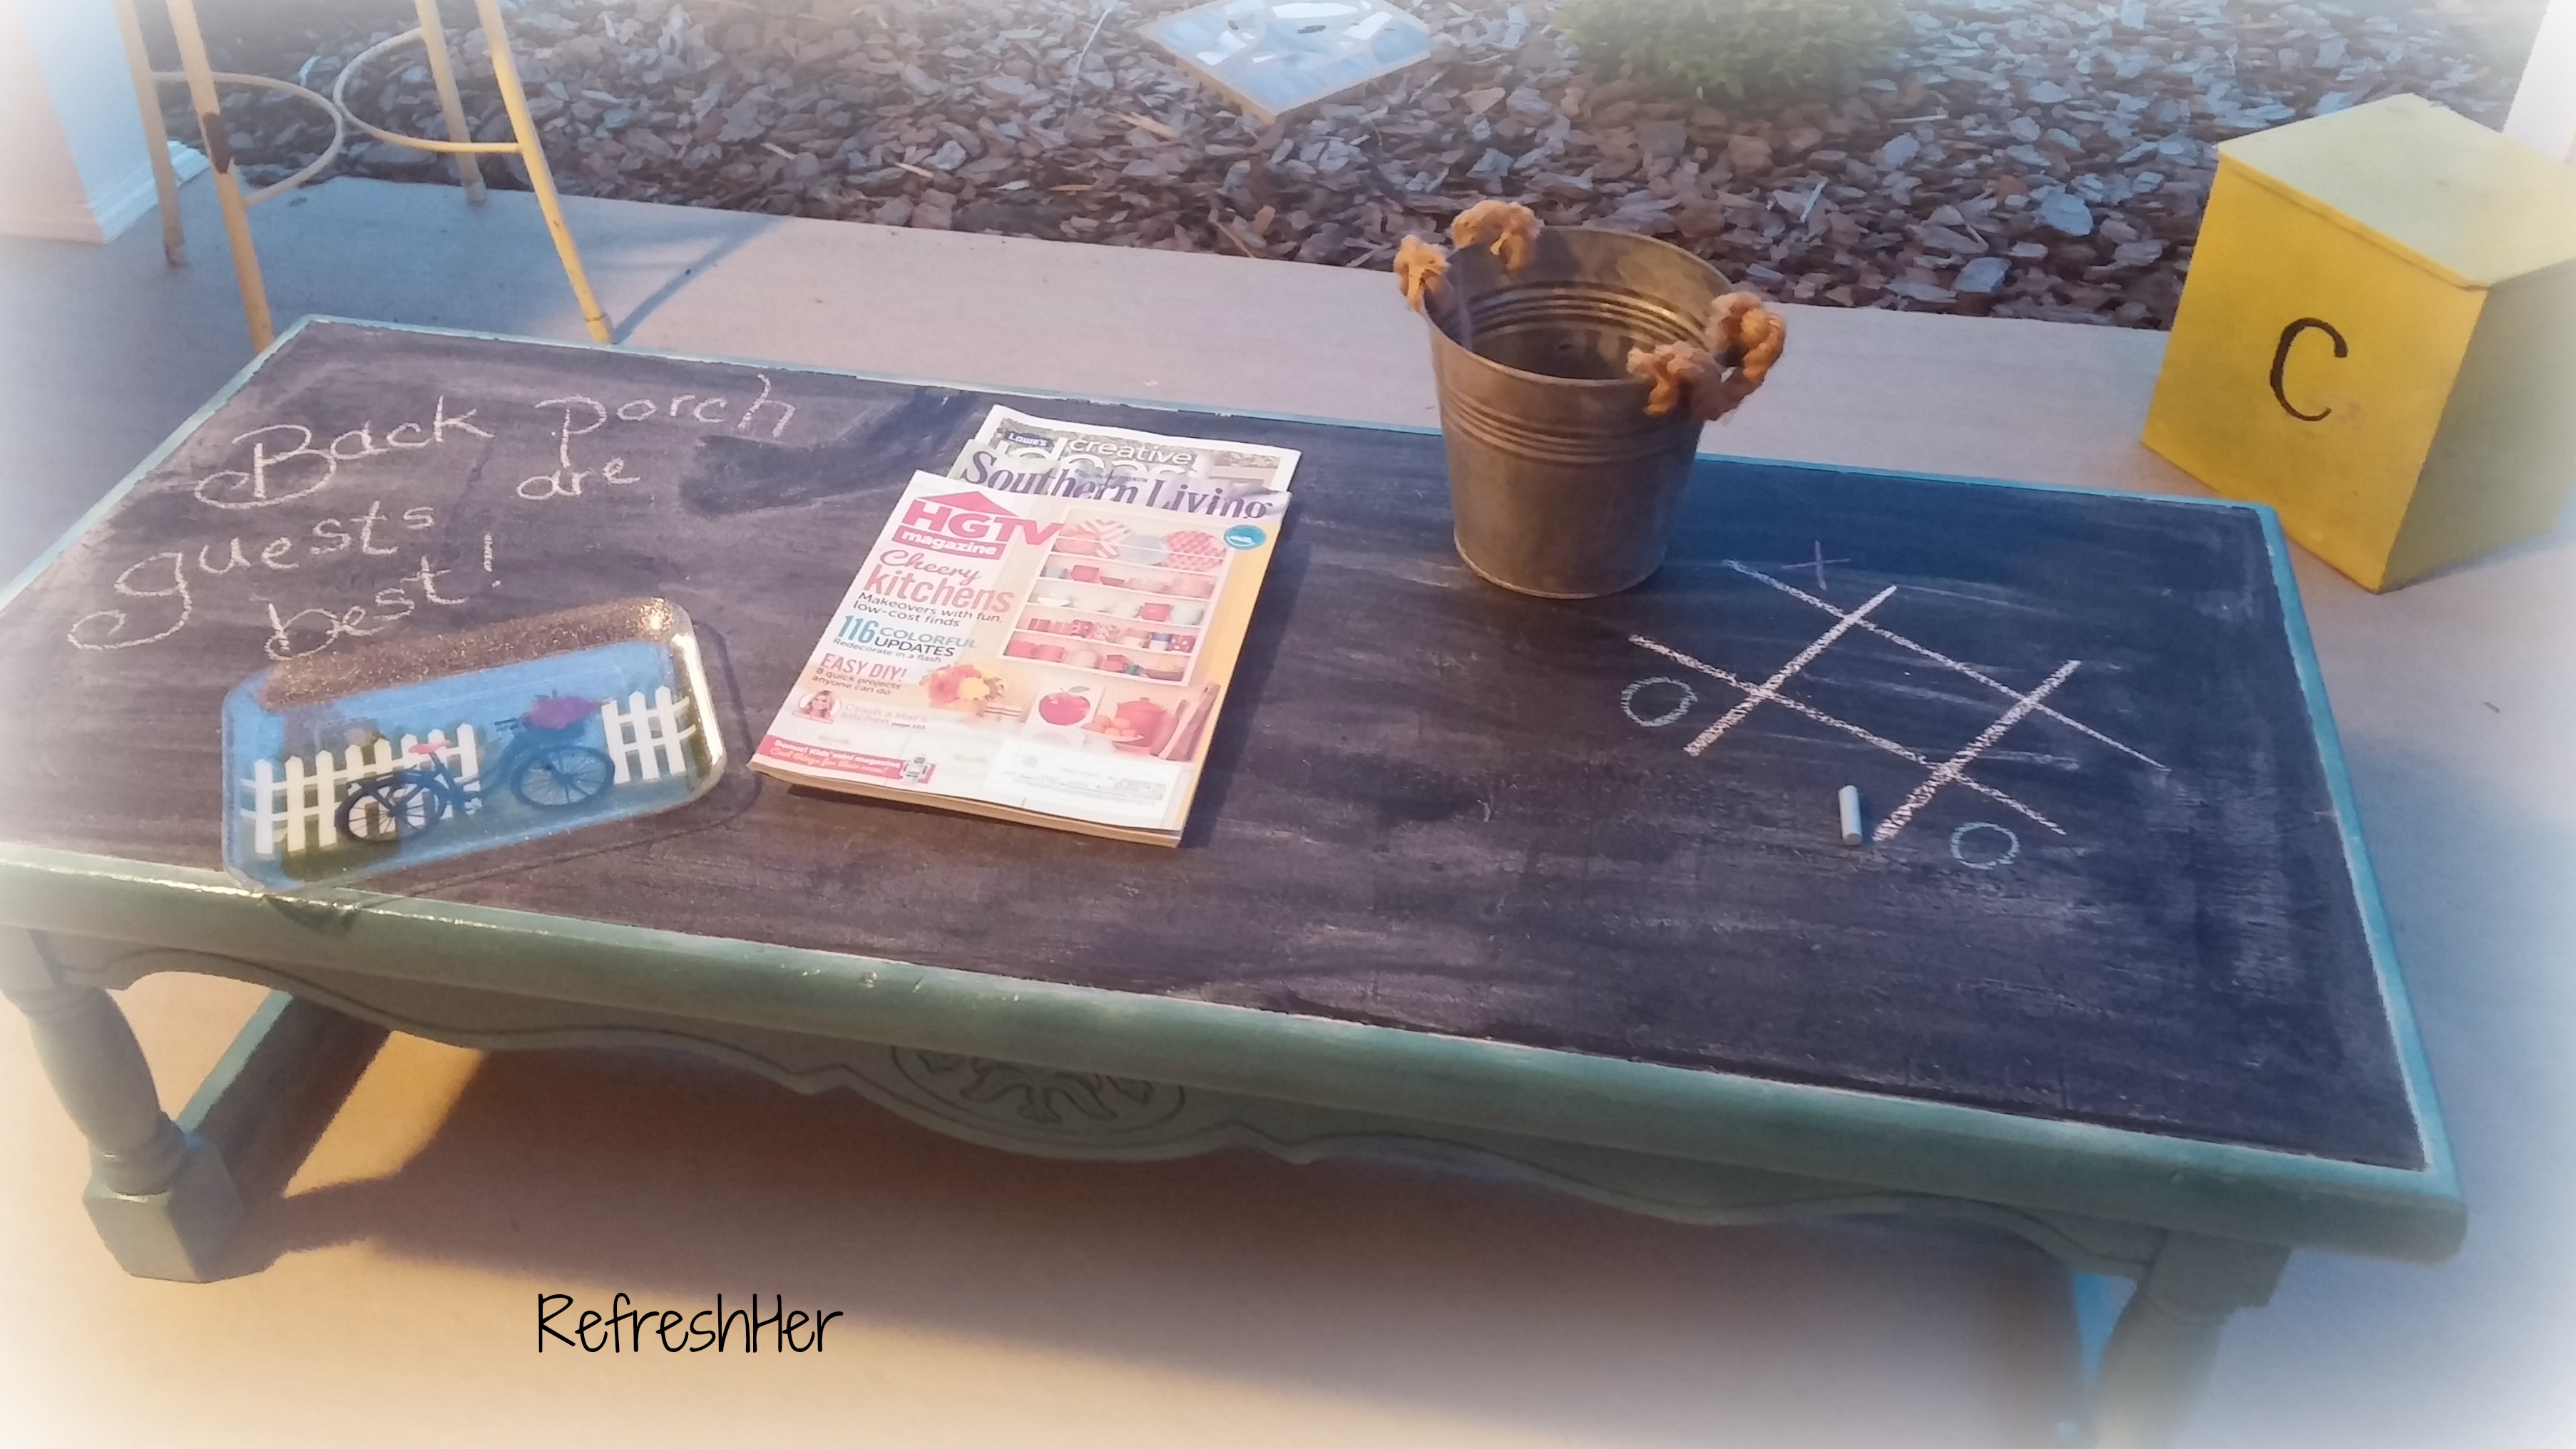
5. The next step is to season the chalkboard after the paint has dried sufficiently. You cover the whole top with chalk, then wipe it off. This is crucial for the board to be usable.Here’s what it looks like to “season” the board…
Here’s the reveal of the refurbished table:
If you need some furniture for outdoors, don’t overlook Goodwill, yard sales, Craig’s list, or freebies from sweet friends! A little time and some elbow grease may be all that piece needs to freshen it up and make it the perfect piece for your porch or patio!
Is anyone else out there a lover of painted furniture?
Have a great weekend! Be sure to get refreshment in God’s House on Sunday!
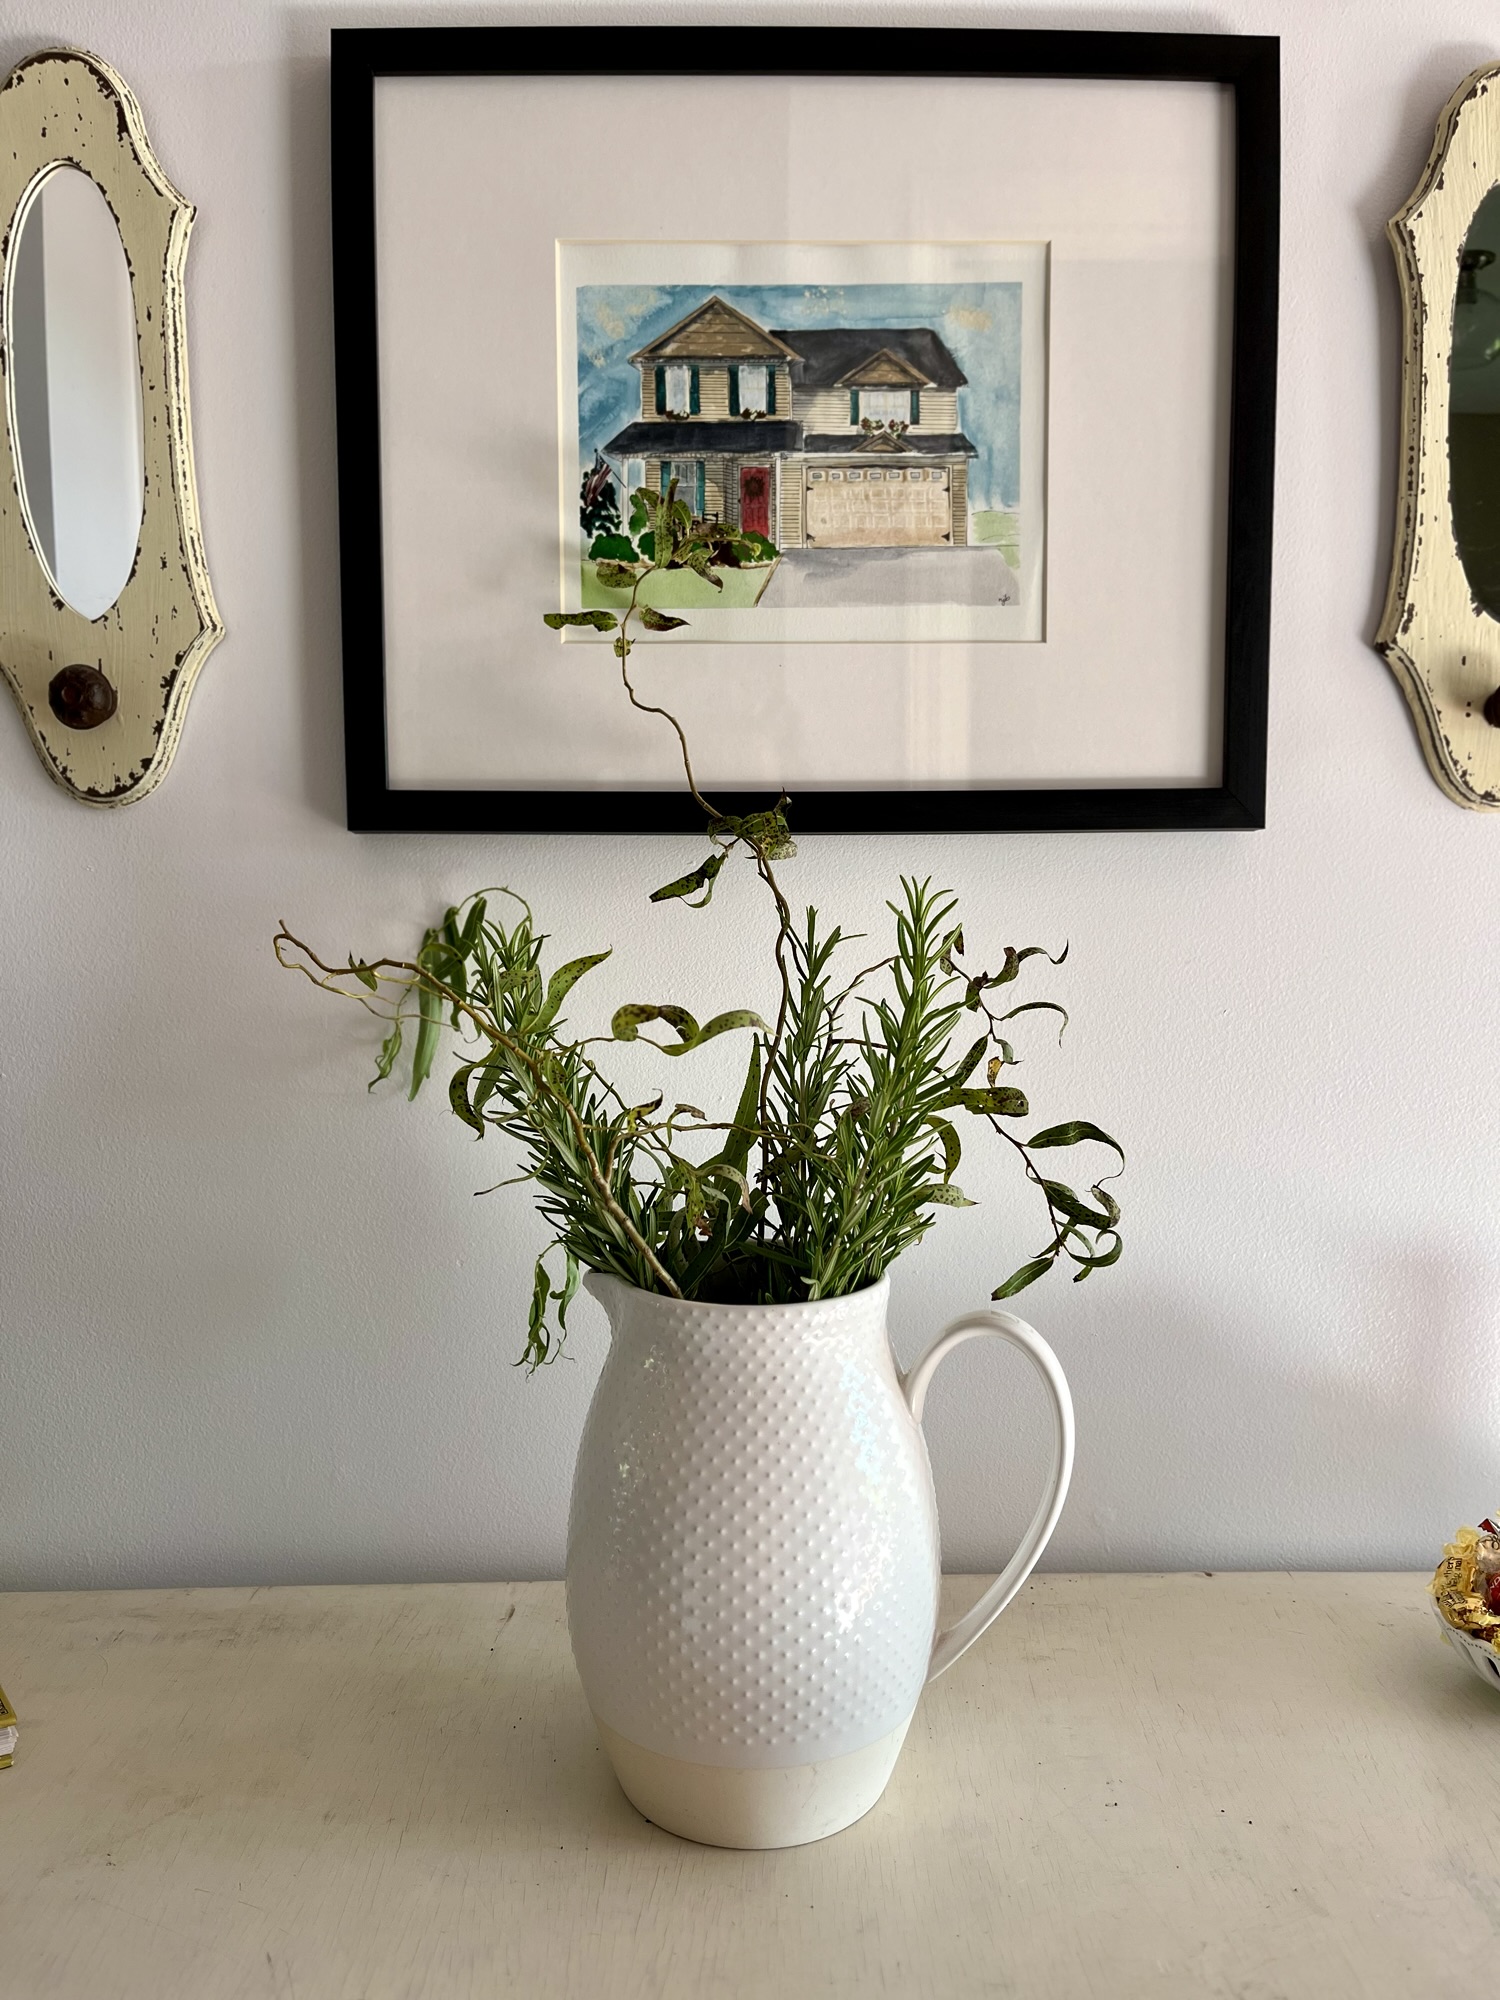
I thought you might like to see my finished projects that I’d posted about a couple weeks ago. This is my entry table, so my guests will have a spring-y welcome when they enter!


 Take the cotton balls and kind of pull them out to fluff them up a bit, then begin gluing them to the hat to create the cloud. Cover the hat, using more than one layer. This takes a while, just be patient.