Fall · Home decor · seasonal decor

Hand-Sewn Fabric Pumpkin Tutorial

fabric pumpkina

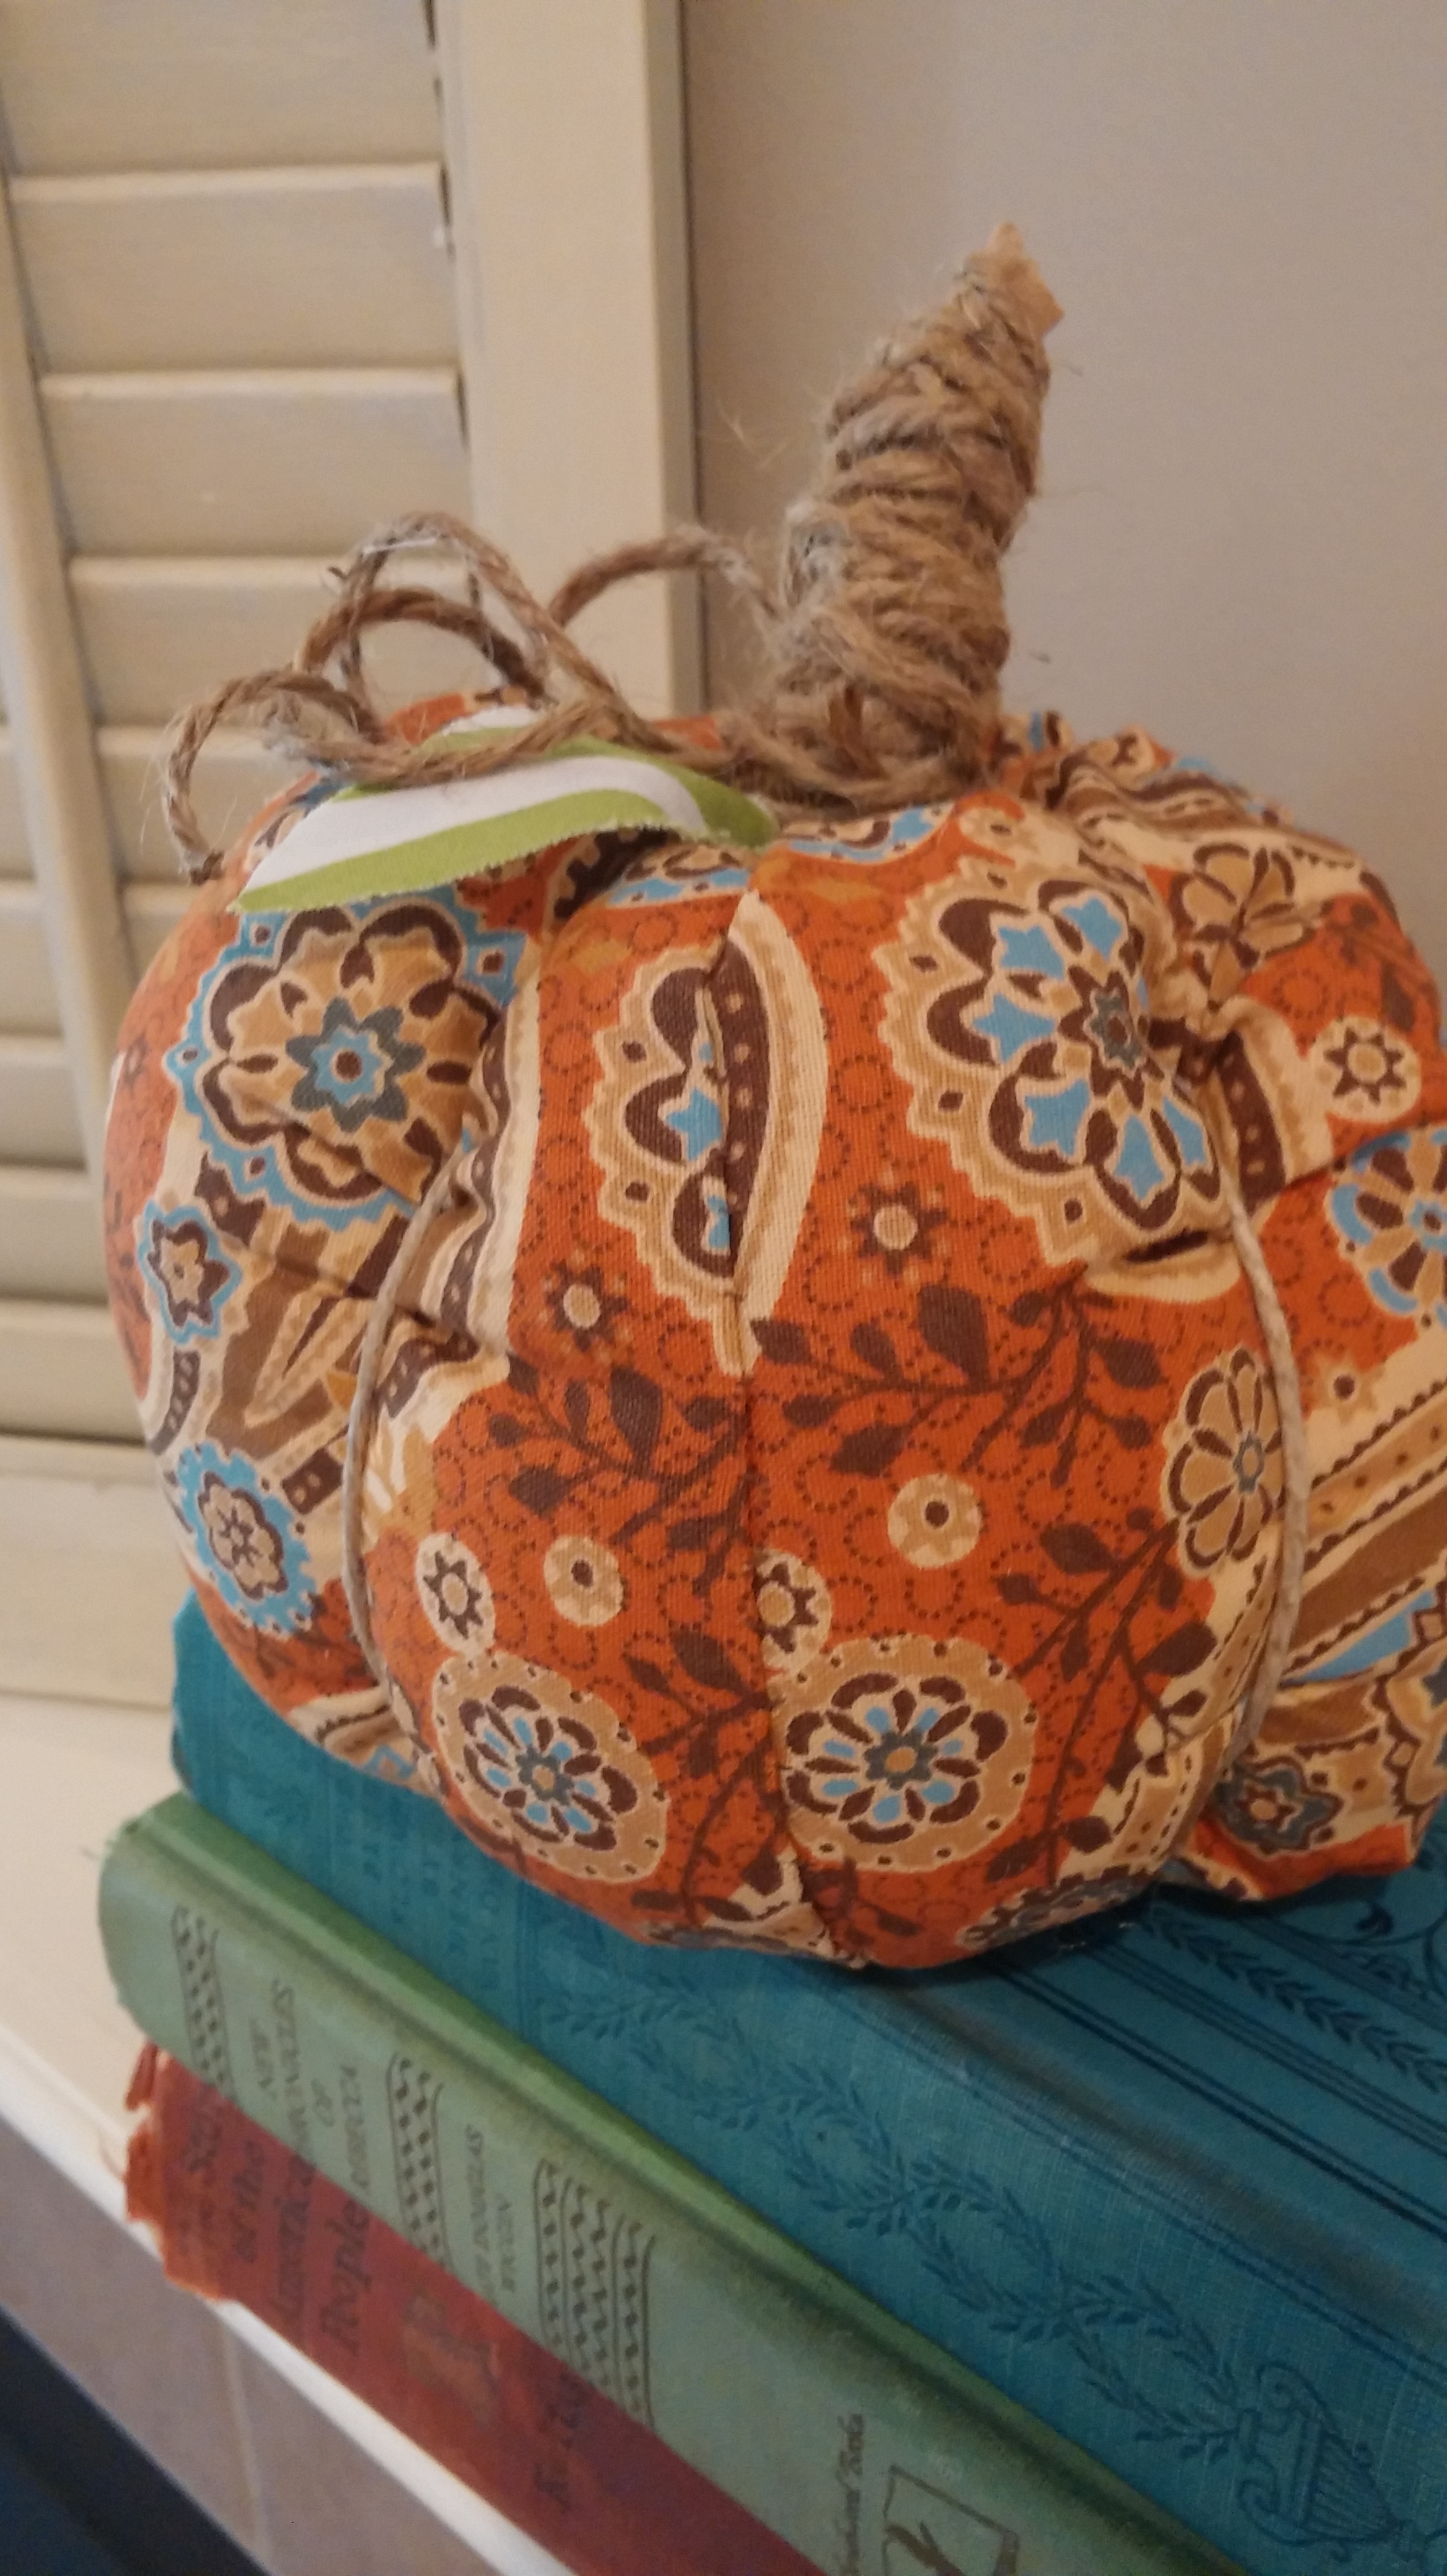
When I attended the Ladies’ retreat at Wolf Mountain camp this month, I got to participate in their fun Craft time!  Woo-Hoo!  They were making a couple crafts, one being the adorable fabric pumpkin pictured here.  It was made in about 30 minutes and was super easy to do.    I chose a paisley fabric for mine, which I thought was so cute.  A soft velour would be nice, too.  Let me walk you through the simple steps.

You’ll need:

  • A rectangular piece of fabric
  • Thread and needle
  • Twine
  • Pillow Stuffing
  • Paper bag for stem

Instructions:

  1. Turn right sides of the fabric together and stitch up the side seams.  I’ve drawn it on white paper to give you an example.  The right side is the folded edge, the left is open.
    wpid-20151022_191442.jpg
  2. Turn fabric right side out and make long basting stitch all the way around the top, leaving a long thread in which to pull and gather the top of the pumpkin closed in a minute. (You’re not sewing the two pieces shut, you’re sewing on one piece of fabric all the way around your circle, so you can gather it and stuff the inside.)
    wpid-20151022_191536.jpg
  3. Pull the thread a little to cause the fabric to gather and make an opening.  Fill the pumpkin as full as you possibly can with the filling.
  4. Pull the threads around the top to close the pumpkin.  Gather the fabric at the top and leave as little bit of the fabric on top as possible – about 1/2 inch.  Sew or tie the top closed. You could even close it with a rubberband; it will be covered.
  5. Using the paper bag, cut off a piece, about 4′ x 8-10″ and twist into pumpkin stem shape.  Using hot glue, attach to the top of the pumpkin.
    wpid-20151013_091446.jpg
  6. Take a long string of twine and starting at the top, leave about two inches, then wrap it vertically around the pumpkin to give it its shape, ending at the top.  Wrap pieces of twine around the paper stem.  Attach with hot glue, or tie off.
  7. I added extra twine around the whole stem, as you can see in the picture below. You can cut out a leaf shape from a contrasting fabric and attach it with hot glue as well.
wpid-20151015_122423.jpg
I also added little “tendrils” of twine to the top. You could add a little Spanish moss instead. Just be creative and use what you have. Raffia is another possibility.

Wouldn’t it be cute to have several sizes and coordinating fabrics?  I’ll add to my collection, I’m sure.  I hope you’ll making one of these – they’re so easy and lots of fun!

One another note – We’re having a Men’s Conference at our church starting tonight.  You can go here and see times of the services. We’d love to have your husband, sons, brothers or friends if you live in our area!  It’s going to be a wonderful time in God’s Word where men will be challenged to be mighty men of God! What woman wouldn’t want her husband to attend that?  Let’s be praying for them as they attend!

Stay refreshed,

8E63C63AC0BC189BF1C68B03C74DBB5F


Fall · Outside decor

Fall Porch Tour

One of the things that I love about our house is the fact that we have two porches!  They both have seating and a view, too, making it a great place to rest!

Keeping the porches clean and decorated is fun because that means I get to be out there enjoying the countryside beauty and the quiet.  I have been adding fall touches to my porches and this week I finally got some pictures taken.  Now you can see it too!  Ready?

The before picture of the patio table is found here.  I’ll probably wrap the table up and put it in the garage once winter arrives.  Until then, we’ll enjoy hot cups of coffee and cozy nights out there!

Have you decorated your porch for fall?  What do you add?

From my country porch,

8E63C63AC0BC189BF1C68B03C74DBB5F

womanhood

Comparison Kills

Growing up as an identical twin, comparisons were as inevitable and as sure as the sunrise. Anyone that didn’t know my sister and me well would line us up side by side and look at one and then the other. “She’s a little taller. Oh, She has a mole under her left eye. Her face is fuller (never what any girl wants to hear!). Her eyes are rounder.” On and on it went until they could find a feature that would allow them to “tell us apart.”

Unfortunately, however, most females don’t just compare themselves to their sisters for the sake of identification. It continues through the years as a part of our very worth. In the teen years, we compare ourselves to our peers, where we wish “our hair was straight like ______’s, or curly like _____’s”. We also wish we had more of a personality like the popular girl in the youth group or at school. Then we grow up and compare ourselves to other women. Her weight, marital status, number of children, spiritual gifts and talents, career, and fashion are all put on the scales of comparison and leave us most times feeling like we just don’t measure up.

The result of comparison is never good. If we come out on the “short end of the stick,” we feel worthless. If we come out ahead, we deal with pride. So what is a woman to do? We must do the thing that is necessary any time we want to know the truth – Look into God’s Word!

Being 4’9′ made me always feel inferior. I’d compare myself to my tall friends and wish my life away that I was their height. Then when I heard a message on Psalm 139 in my early 20’s, the Lord finally brought me to the place to accept everything about the way the Lord made me.

I will praise thee; for I am fearfully and wonderfully made:
marvellous are thy works;
and that my soul knoweth right well.

I was no mistake, no funny joke to the Lord. He designed me this size, and His creation is not bizarre or wrong, no matter if others would laugh or tease. How could I look into the face of my God who created me “fearfully, wonderfully, and marvelously” and tell Him He made a mistake when He planned my height?

Height is trivial. But then so is…

  • Your nose
  • Your teeth
  • Your body build
  • Your hair type
  • Your number of talents
  • …

The issue is, will we use what we have for God’s glory? He used

  • Small statured Zacchaeus
  • Young David
  • Paul with his thorn
  • Left-handed Ehud
  • Tempestuous Peter
  • Doubtful Thomas

What do you wish you could change about yourself? If it’s part of God’s design, learn to accept it and determine to be useful for the Lord’s honor. Comparing yourself to others will result in death – death of your usefulness, death of your spirit. You are just the way God purposed. Instead of living with comparison that kills, enjoy spiritual life that invigorates!

P.S. And do twins a favor and don’t line them up for your comparison. Let them be the individuals God designed them to be. In time you’ll learn who’s who as you get to know their personality. (I was the ornery one!)

Lovingly,

breakfast

Make Ahead Individual Omelets

Make ahead omelet1

What’s cuter than an individual omelet? One that you can make and freeze ahead of time! These little omelets take a little work on one day to give you the ease of having a homemade omelet ready to thaw and heat in the microwave in minutes! Mine actually never made it to the freezer, so just so you know, you could just make them and put them in the fridge for tomorrow and the next day’s breakfast. Here’s how you make them:

Ingredients:

Frozen hash browns, thawed
9 Eggs
3/4 Milk
Salt
Cooked Bacon
Ham
Onions, chopped
Green and red peppers, chopped
Tomatoes, diced
Shredded Cheese

Yield: One dozen

I added hash browns to mine, which you could totally skip, if you’d rather just have the egg.
Spray a muffin tin with cooking spray and put thawed hash browns in the bottom. Spray a little more cooking spray over the potatoes. Bake at 400 until they’re getting brown and crispy.

hash browns

Chop bacon. Dice ham, and any other add-ins like green and red peppers, onions, tomatoes and cheese. Mix whatever ingredients you want in a bowl. Sprinkle over top of cooked potatoes.

wpid-20151015_083638.jpg

Scramble the eggs; add milk. Add salt. Pour egg mixture over eggs. Bake at 375 for about 20 minutes. Let set just a bit. They are ready to serve, or after cooling, refrigerate or freeze for later consumption!

Make ahead omelet

It’s great to have a fast, healthy choice for breakfast! You need to make up some of these so you can enjoy the morning due to a delicious start!

With love from my country kitchen,

Uncategorized

A Handy Baking Tool

wpid-20151015_194312.jpg

A few weeks ago I attended my daughter’s birthday surprise Baking Party with Francine Bryson, first runner up of the American Baking Competition.  Francine shared a couple of tips that I’ve implemented into my baking, and one of them is the addition of a flour jar with a sifting/shaker lid on top.  It’s helpful to have a jar like this filled with flour for:

  • Adding a little bit of flour to the counter before rolling out dough
  • Sprinkling in flour to sauces or gravies

Any time you need just a little flour, this is the perfect container to grab.  I was thrilled to find this jar at a little shop near me for  only $5.  The lid is metal with three openings – one for pouring, one for sifting out smaller amounts and also one for sifting larger amounts.  I love it because when I need flour at those times, my hands are usually a mess, so if I go to the canister to get the flour, I lift the lid with my messy hands and add flour to the lid, the counter and possibly the floor!

wpid-20151012_214316.jpg

For those in my area, I got this in Jonesborough at a great new shop called, Type A.  It’s adorable with all kinds of fun merchandise that you need to check out!  If you’re not from here, any kind of jar with a shaker lid will work.  Those tall jars that many put confectioners sugar in would work well, too.

Type A
“Type A” downtown Jonesborough

Another tip Francine gave was to crack your eggs on a flat surface, rather than the edge of your bowl.  That edge causes the egg shell to push into the inside of the egg, then fall into your bowl!  That makes complete sense; why didn’t I think of that before?

What helpful tool or tip could you share?

Stay refreshed,