baking · Bread · Uncategorized

Sour Dough Bread

sour dough breadOver 30 years ago I received a mason jar containing the sticky substance called, Sour Dough Bread Starter.  I have kept that dough going all these years, making untold number loaves of bread, English Muffins, and  Cinnamon Rolls!  If you’ve ever had sour dough, you know what a delicious flavor the “sour” starter gives the bread.  I don’t know the science behind it, I only know it’s good and I want it the rest of my life!

Sour dough is also a very easy dough to put together.  Beginning a starter can be a little tricky, so if you know someone who has a starter already, ask for a cup of theirs to be sure it will be active and cause your bread to rise!

But if you want to try your hand a beginning a starter here’s what you need:

To start: Place in a mason type jar:
1 cup warm water
3/4 Cup sugar
3 tbl. instant potato flakes

Stir and let set on counter all day. It should be in a place that is a little warm.  Place lid on jar and cover lightly (don’t fasten all the way down). Let set 3-4 days.

The starter will have a fermented fragrance.  It will also have little bubbles on top and kind of “sizzle.”

To make bread with that starter:

Add the same ingredients again to starter. Let set all day on counter.
The Next day you can make bread:
Ingredients
6 cups bread flour
2 1/2 tsp. yeast
1 tbl. salt
1/3 C sugar
Mix, then add:
1 C of the starter (place remaining cup back in the fridge)
1 1/2 C very warm water (110 degrees)
1/2 C oil

Mix, then turn out on floured board and knead lightly. Place dough back in oiled bowl. Cover and set in warm place ’til dough is doubled in size.

Sour dough 2a
Punch down dough. Divide in half. Place in two greased loaf pans. Let rise ’til about an inch higher than bread pan.

Sour Dough rising 1

Bake at 375 degrees about 25 min.  Allow to cool before slicing (if you can resist!).

wp-image-519203035

As I mentioned, you can make all kinds of other breads from this starter. My favorite way to eat this bread is toasted – either for breakfast or as a grilled sandwich.  It’s fantastic!!

I hope you’ll give this a try.  Maybe in 30 years you’ll still be making up hot loaves from the starter your received in 2017!

Who else has used sour dough starter?  Who loves sour dough?  

With love from my country kitchen,

Denise Signature 150 px

baking · Bread · Fall · Gifts

Hello Pumpkin!

pumpkin bread b

When we recently experienced a very cool morning, all I could think about was baking! I dug into my trusty recipe box and found a tried and true Southern Living recipe for Pumpkin Bread, just a plain, straightforward recipe with nothing extra added, which meant I had all the ingredients! It makes 3 loaves, too! Since I intended to share 90% of the results, that was an added blessing! I baked them up in small pans, yielding 6 delicious loaves. They’re a perfect size wrapping up to give to friends! Even if you make them in the regular size pans, you’ll have one to keep, one to freeze, and one to give away!

wp-image--609544264

If you’re in a baking mood as I have been, and are hungry for something simply pumpkin, you’ll love this recipe!

Pumpkin Bread

Ingredients

  • 3 1/3 cups all-purpose flour
  • 3 cups sugar
  • 2 teaspoons baking soda
  • 1 1/2 teaspoons salt
  • 1 1/2 teaspoons ground cinnamon
  • 1 teaspoon ground nutmeg
  • 1 cup vegetable oil
  • 2/3 cup water
  • 4 large eggs
  • 1 (15-ounce) can pumpkin

How to Make It

Step 1

Stir together flour and remaining ingredients in a large bowl until smooth. Divide batter evenly among 3 greased and floured 9- x 5-inch loaf pans.

Step 2

Bake at 350° for 50 minutes to 1 hour or until wooden pick inserted into center of each loaf comes out clean. Cool in pans on wire rack 10 minutes. Remove from pans, and cool completely on wire rack.

wp-image--1716587396

It couldn’t be any easier!  Whip up a loaf, perk some coffee, and invite a friend over for some sweet Pumpkin fellowship!

With love from my country kitchen,

Denise Signature 150 px

baking · Cookies · dessert · freezer · Uncategorized

For the Love of the Best Cookie

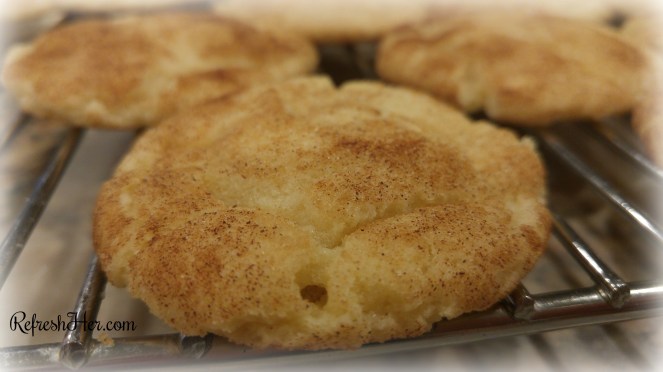
How could you even have a bad day on an afternoon when you bite into a Snickerdoodle? The name alone makes me smile!  In case you’re somehow not sure what a Snickerdoodle is, it’s not a type of dog, rather it is a cookie drenched in a cinnamon/sugar bath and baked to a soft, sweet perfection!

I introduce you to The Snickerdoodle…

0728171936

It amazes me to find that some of my favorite recipes of all times have escaped being posted here on my blog!  I went to search for this family-favorite cookie recipe here in my recipe index and was amazed that it was absent!  In order to fix that, I baked up a batch of cookies, snapped away at pictures, and ate a couple cookies in the process, then froze the rest for upcoming company!  They’re safer in the freezer!

I love this recipe because it’s very quick to whip up, but the cookie isn’t like some mediocre recipe.  This is a Ten!  No kidding.  It makes 3.5 dozen normal size cookies and good luck at eating only one.  You might want to double the batch – which work just fine!  They do freeze well, if you don’t trust yourself with a whole pile of cinnamon/sugar heaven sitting under your nose!

Here’s the simple and wonderful recipe:

Snickerdoodles
Ingredients
1 cup shortening
1 1/2 cups sugar
2 eggs
2 3/4 cup flour
2 tsp cream of tartar
1 tsp soda
1/2 tsp salt
2 Tbl. sugar
2 tsp. Cinnamon

Directions
Cream together shortening, sugar, and eggs.  Sift together and stir in flour, cream of tartar, soda and salt.  Shape dough into balls the size of walnuts.  Roll each in mixture of the sugar and cinnamon.  Place 2 inches apart on ungreased cookie sheet.  Bake 7-9 minutes at 375 degrees or until LIGHTLY browned.

I bake mine for exactly 7 minutes and then let them sit in the pan a few minutes to cool before putting them on the cooking rack.  They may seem a little underdone, but I think they’re best when they’re soft in the middle.

Do someone a sweet favor and bake up a batch to share!

0728171935b

Just curious, what’s your favorite cookie?  

With love from my country kitchen,

8e63c63ac0bc189bf1c68b03c74dbb5f (1)

baking · Cooking · dessert · Family life · grilling · home · Home making · main dish · Main entree

Individual Berry Cobblers & What We Really Eat

berry cobbler.jpg

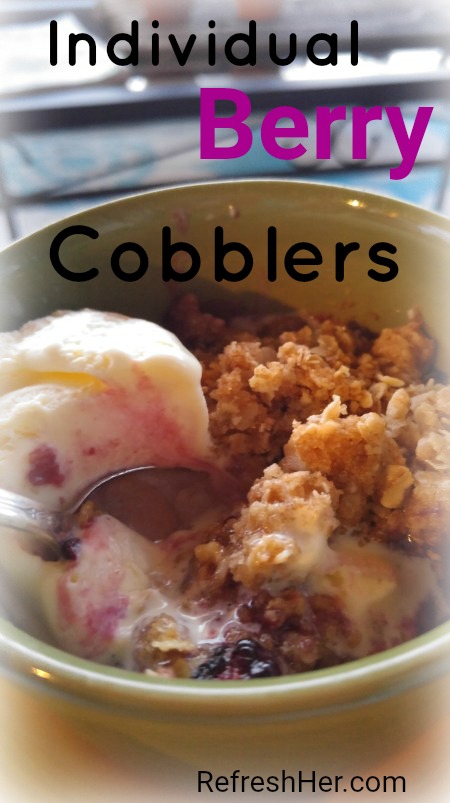
Happy Monday!  First let me start with sharing a new recipe that I made as a special treat for my cobbler-loving husband!  If you need a treat for Fourth of July these would be perfect.  You can make one, or you can multiply the recipe to make as many as you need.  These are Berry Cobblers,  served in individual ramekins, making them a perfect size and also easy to serve!

I found the recipe here on this site. They were so easy to pull together, and with no sugar added to the fruit, I think they’re a really healthy little dessert, well, maybe the ice cream added some fat and calories, but you can’t eat cobbler without ice cream!

Individual Berry Cobblers
Ingredients
  • NOTE: These directions are per each serving so multiply it by how many servings you plan to make.
  • ½ cup berries or fruit of choice
  • 2 tbsp oatmeal
  • 1 tbsp all-purpose flour
  • 1 tbsp brown sugar, slightly packed
  • 1½ tbsp softened butter
  • pinch of salt
  • pinch of baking soda
  • a couple drops of vanilla

Instructions –
Preheat oven to 350 degrees
Place berries/fruit In a ramekin or other small baking dish
In a separate bowl, Mix all other ingredients….oatmeal, flour, sugar, butter, salt, baking soda, and vanilla. Use your hand or a fork to make sure all ingredients are incorporated well.
Sprinkle oatmeal mixture evenly over berries/fruit.
Place ramekin on a baking dish (just in case it boils over a little bit) and bake at 350 degrees for 25-30 minutes or until topping is beginning to brown.

berry cobbler 2.jpg

Do you ever look at people’s You Tube videos of their food and wonder if they really eat? I mean, sometimes it’s more about the tableware and presentation than the food.  To me, the most important part of mealtime is the food!  We really enjoy our food over here and I want it to be delicious and pretty – not just pretty!

So, I’m going to close today by giving you a little look at my plates from this past week so you can see what we really ate.
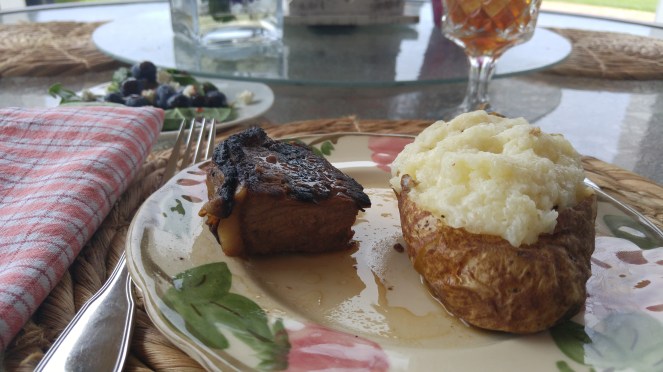
Here’s a real look at our meals:

wp-1498945762059
Grilled Marinated Steaks, Twice Baked Potatoes, Berry Green Salad
0622171822
Perfect Pork Tostadas, Spanish Rice, Fresh Fruit
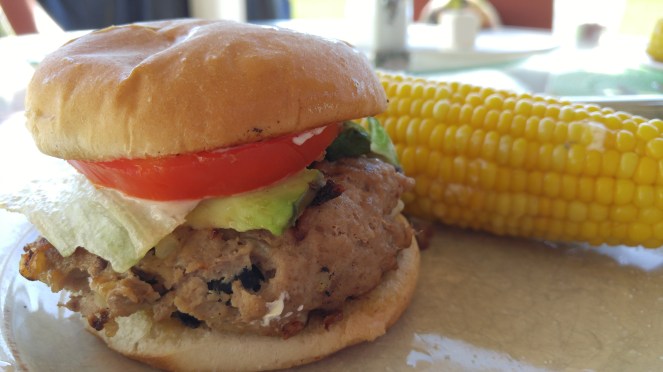
0526171712
Turkey Burgers with Chipotle Yogurt Sauce, Corn on the cob, Oven Garlic Fries
0626171753
Chicken Fajitas, Refried Beans, Lime tortilla chips, Cantaloupe
0625171328
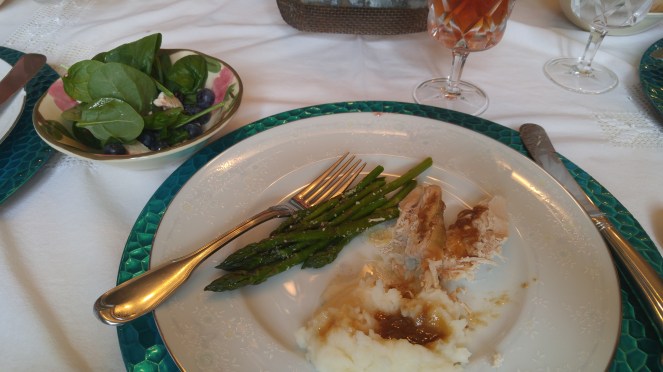
Turkey Breast, Mashed Potatoes, Asparagus and Berry Green Salad

I don’t just take pictures of pretty food – we eat real meals every day at home.  Presentation is part of that, but also good food, prepared and cooked at home to nourish body and soul! Also the time at the table, sitting and talking as we eat, sip on glasses of tea, or nibble on sweet treats like this berry cobbler!  Meal time is a huge part of family time.  Let’s make dinner delicious, nourishing, pretty and memorable!

What have you made this week that your family loved?

From my country kitchen,
8e63c63ac0bc189bf1c68b03c74dbb5f (1)


baking · dessert · home · Home making

(L)Oven Monday – Strawberry Shortcakes & Menu Inspiration

recipes 1

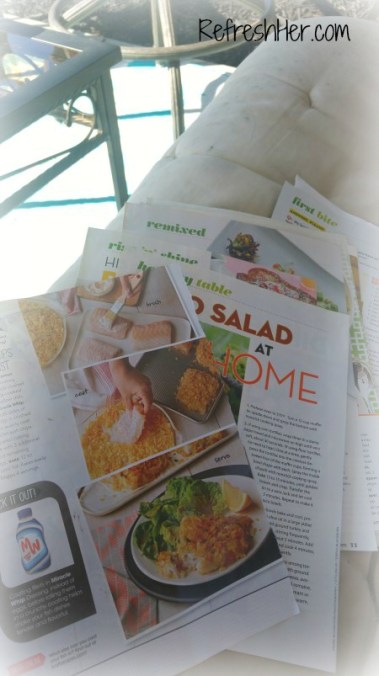
Happy Monday, friends!  I had a great time Friday night sitting out on my back porch with a stack of food magazines and iced coffee.  Most of the periodicals had been given to me by others who had looked through them, then passed them along.  How sweet!  Why do I flip through food magazines?  Or why do I sit with one of my cookbooks and put page markers in the pages? Not just to “Oooo” or “Ahhh” over the pictures (though I do that!). I do it for three reasons:

  1. I get tired of eating the same things
  2. I like to try stirring new things up in my kitchen!
  3. I like to surprise my husband with special recipes I’ve made for him!

I sat there for about a half an hour and ripped out recipes I want to try.

recipes 2

How about you = are you in a menu rut?  Spaghetti, frozen pizza, chicken tenders from the freezer section, steamed veggies in a bag…it just gets old.  I would challenge you to pull out either the magazines that have been delivered to your mailbox or one of your favorite cookbooks.  You can even go to the library and check out a cookbook from there to get some fresh ideas.  The point is, flip through and find recipes of menu items that you maybe already have most of the ingredients for.  If you know you purchased chicken breasts and they’re in the freezer waiting to be cooked, look for a recipe for chicken!  You might only try one new recipe this week, but add something to change up your normal routine.

Here are some of the recipes I found:

  • A supper Entree’ – Chicken breasts with Strawberry Salsa and Feta cheese – I have all the ingredients!
  • A fish recipe – Salt and Vinegar Baked Fish – You use the Salt and Vinegar chips as the coating!  That’s brilliant! Similar to this
  • A weekend breakfast – Sausage and Egg Flatbreads – I’m going to make my own .
  • flatbreads for this.
  • A dessert – Strawberry Icebox Cake – This will be great for company this summer! Similar to this one.

I won’t make all these this week, but I will try at least one!  It’s amazing how much money and time is saved when you make a menu.  It is so helpful to me to know what’s for supper, so I can plan and work ahead.

So, if you’re not in the habit of making a menu, plan at least few nights for starters.  If you’ve been making a menu, but you’re in a rut, go find some new, yummy sounding recipes to add!

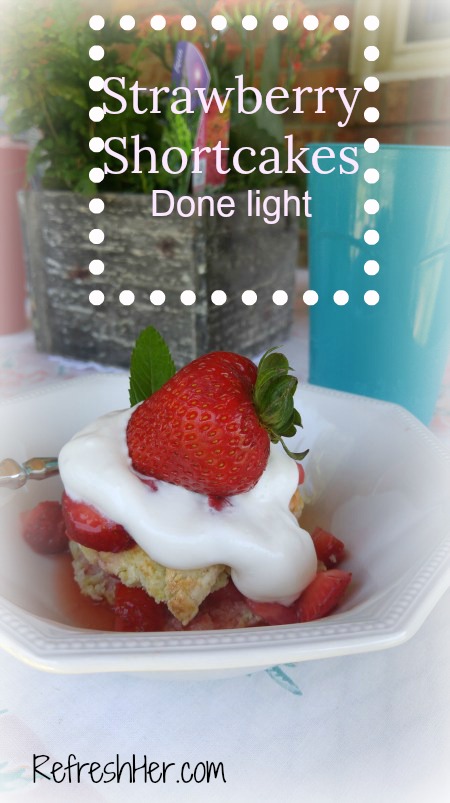
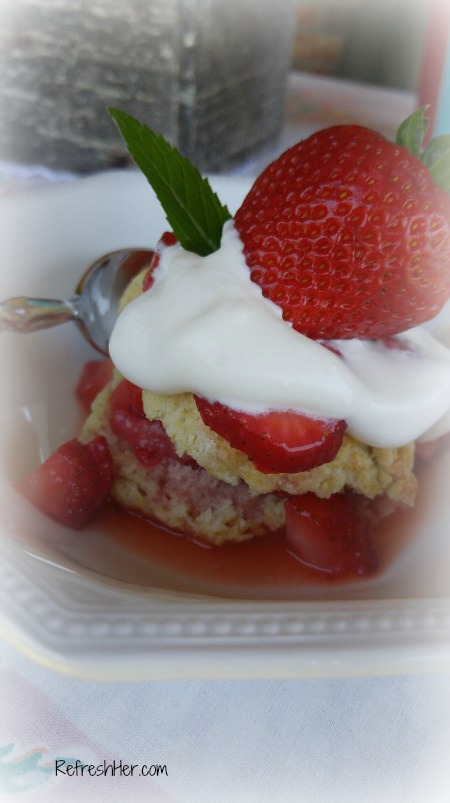
Now let me share a recipe that I love.  This is a quick and delicious Strawberry Shortcake, made a little lighter.  These sweet biscuits are so much better than the store bought sponge cakes!  The addition of the orange juice and vanilla to the fresh berries makes it SO good!

strawberrry shortcake1

Lite Strawberry Shortcakes

Ingredients

  • 3 1/2 cups halved strawberries, divided
  • 1/3 cup sugar
  • 1/3 cup orange juice
  • 2 teaspoons vanilla extract
  • 1 teaspoon lemon juice
  • 1 1/4 cups all-purpose flour
  • 3 tablespoons sugar
  • 1 teaspoon baking powder
  • 1/4 teaspoon baking soda
  • 1/8 teaspoon salt
  • 3 tablespoons chilled stick margarine or butter, cut into small pieces
  • 1/2 cup low-fat buttermilk
  • Cooking spray
  • 6 tablespoons frozen reduced-calorie whipped topping, thawed
  • Whole strawberries (optional)
    1. Combine 1 cup strawberry halves, 1/3 cup sugar, orange juice, vanilla, and lemon juice in a bowl, and mash with a potato masher. Stir in 2 1/2 cups strawberry halves. Cover and chill.

    2. Preheat oven to 425°.

      Lightly spoon flour into dry measuring cups; level with a knife. Combine flour, 3 tablespoons sugar, baking powder, baking soda, and salt in a bowl; cut in margarine with a pastry blender or 2 knives until mixture resembles coarse meal. Add buttermilk, stirring just until moist (dough will be sticky).

    3. Turn dough out onto a lightly floured surface, and knead lightly 4 times with floured hands. Pat dough into a 6 x 4-inch rectangle. Cut dough into 6 squares. Place 1 inch apart on a baking sheet coated with cooking spray. Bake at 425° for 12 minutes. Cool on a wire rack.

      Split shortcakes in half horizontally using a serrated knife; place each bottom half on a dessert plate. Spoon 1/4 cup strawberry mixture over each bottom half. Top with shortcake tops; spoon 1/4 cup strawberry mixture over each top. Top each serving with 1 tablespoon whipped topping; garnish with whole strawberries, if desired.

      strawberry shortcake 2
      This dessert is as delicious as it is pretty!  

I hope you’ll add this to your menu and also find some other great recipes to freshen up mealtime at your house this week!

Refresh your menu!

Denise Signature 150 px