baking · dessert · entertaining

(L)Oven Monday – Super-Fast Drop Sugar Cookies

sugar cookies 2

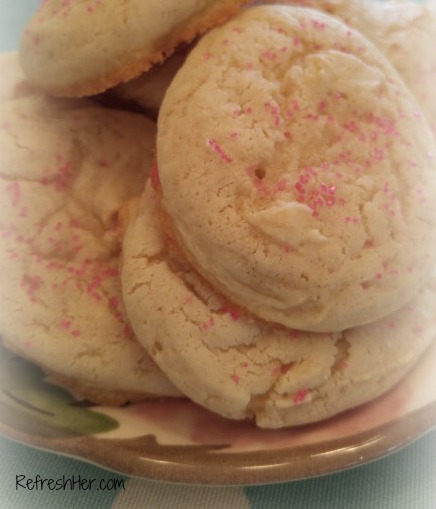
Not all sugar cookies are created equal.  Many recipes call for an hour of refrigeration before you can roll out the dough.  But what if you need a dessert in a hurry and decide that sugar cookies would be the perfect ending for your  meal for guests that’s just 45 minutes away?!

That’s exactly the predicament I was in a week ago!  I decided last minute to add cookies to the menu.  So what did I do? I made Drop Sugar Cookies!  This soft dough is whipped up in the mixer, then spooned onto baking sheets for a quick bake.  These make a delicious dessert!  Because I was in a real hurry, I only baked up one sheet (a dozen), which was all I needed, then after my guests left, I baked the remaining dough and froze the extras.  Yay for cookies in the freezer!!  This recipe was found on Pinterest and is a family recipe from The Mom Who.

sugar cookies 3

Drop Sugar Cookies
Ingredients
  • 1 cup Sugar
  • ¾ cup Milk
  • ¾ tsp. Vanilla Extract
  • ½ cup Crisco
  • 1 Egg
  • 2½ cups Flour
  • 1 tsp. Baking Soda
  • 1 tsp. Baking Powder
  • Sugar Sprinkles
Instructions
  1. Preheat oven to 350 degrees.
  2. Line a cookie sheet with parchment paper and set aside.
  3. In a small bowl mix the dry ingredients: flour, baking soda and baking powder.
  4. In a large mixing bowl, mix the sugar and Crisco.
  5. Then add the egg to your mixture.
  6. Next add the milk and vanilla extract to your wet mixture.
  7. Gradually add the dry mixture to the wet mixture that’s in the large bowl. Mix until incorporated. Don’t over mix!
  8. Scoop dough into 2 tablespoon sized scoops and drop them on your sheet.
  9. Bake for 6- 7 minutes and then carefully add sprinkles to the tops of the cookies. Continue baking for 2-3 minutes.
  10. Remove from oven and let sit on cookie sheet for 5 minutes before moving to a cooling rack.
  11. Enjoy!
  12. *Note- You can add the sprinkles to the cookies before baking, but the sprinkles sink down into the cookies. You decide on when to place the sprinkles- Before, During, or After baking.

Is there a recipe you pull up if you need a fast dessert?  I’d love to hear what it is!

Happy Baking!

Denise Signature 150 px

baking · dessert

Angel Food Cake Video Tutorial

I LOVE watching the British Bake-Off on Netflix!  Recently the technical challenge was…Angel Food Cake!  I smiled as I watched some of them grease their pans, wonder how stiff to beat the egg whites, and what to do with the dry ingredients.  I only knew because I’d recently made one!  But it’s really not difficult at all!

I’d love to show you my technique!  So here’s a speedy video of making an angel food cake.  You can pause the video at any time if you need to see something a little more closely!  I hope this helps and encourages you to make an Angel Food really soon!

I don’t know what Paul or Mary would think of my finished product, but we enjoyed it!!

Happy baking!

Denise Signature 150 px

baking · cakes · dessert · hospitality · Make-Ahead

(L)Oven Monday – A Healthy, Yummy Dessert

Angel Food.jpg

Cooking Light has great recipes for Angel Food Cakes.  These cakes have no fat, making them a healthier dessert than most.  The nice thing about baking your own Angel Food cake is:

  1. They taste better
  2. You can add flavorings
  3. They cost pennies
  4. You can make it ahead of time and freeze it

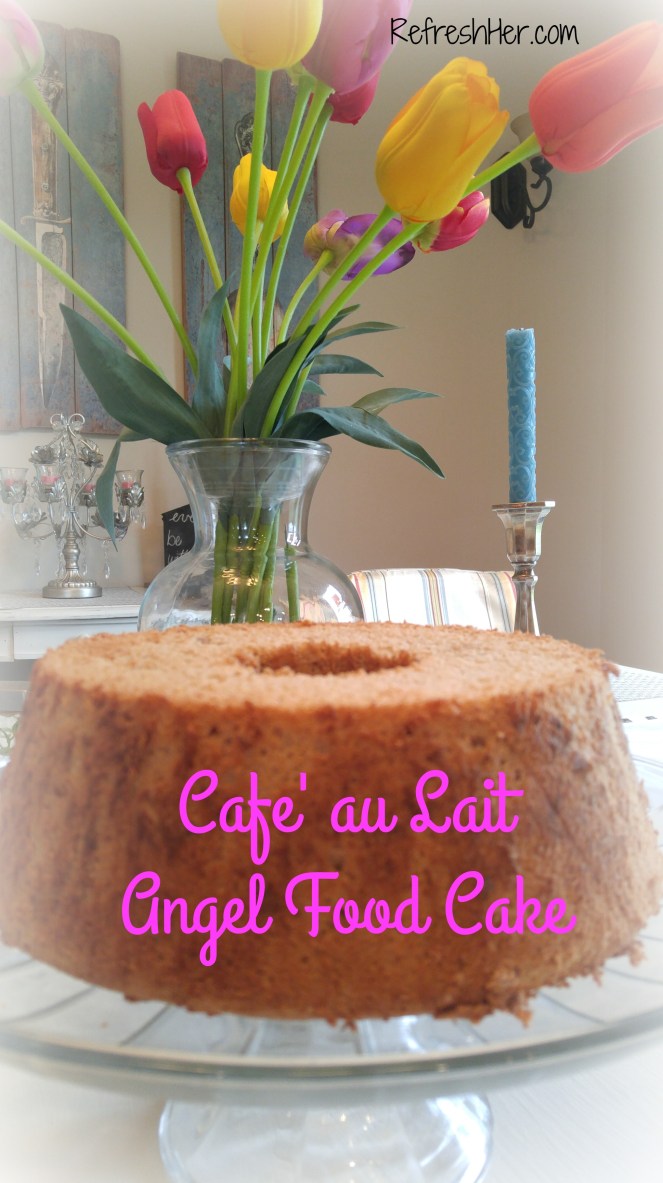
This recipe  – Cafe’ au Lait Angel food has a coffee flavor and we love that!  Cafe’ au Lait means coffee with milk.  This recipe also has a custard-like sauce to serve with it,which gives the coffee flavor it’s “milk addition.  It takes regular old Angel Food to the next level, and certainly makes it company worthy!  Here’s the recipe:

Cafe’ au Lait Angel Food Cake

Ingredients

  • Cake:
  • 1 cup sifted cake flour – Don’t have any?  Try this – Take one level cup of AP flour, remove two tablespoons, and then add two tablespoons of cornstarch back in. Be sure to sift the flour to distribute the cornstarch well before using it in your cake batter.
  • 1 1/2 cups sugar, divided
  • 1/4 teaspoon ground cinnamon
  • 2 tablespoons instant espresso granules or 2 tablespoons instant coffee granules
  • 2 tablespoons hot water
  • 12 large egg whites
  • 1 teaspoon cream of tartar
  • 1/4 teaspoon salt
  • 1 1/2 teaspoons vanilla extract
  • Sauce:
  • 3 large egg yolks, lightly beaten
  • 1/2 cup sugar
  • 1 tablespoon cornstarch
  • 1/8 teaspoon salt
  • 3 cups 2% reduced-fat milk, divided
  • 1 vanilla bean, split lengthwise
  • 3 tablespoons Frangelico (hazelnut-flavored liqueur) –  I didn’t use this or substitute
  • Remaining ingredient:
  • 1/2 cup chopped hazelnuts, toasted
  1. Preheat oven to 350°.

  2. To prepare cake, lightly spoon flour into a dry measuring cup; level with a knife. Combine flour, 3/4 cup sugar, and cinnamon, stirring with a whisk, and set aside. Combine espresso and hot water, stirring until espresso dissolves; set aside.

  3. Place egg whites in a large bowl; beat with a mixer at high speed until foamy. Add cream of tartar and 1/4 teaspoon salt; beat until soft peaks form. Add 3/4 cup sugar, 2 tablespoons at a time, beating until stiff peaks form.

  4. Beat in espresso mixture and vanilla extract. Sift 1/4 cup flour mixture over egg white mixture; fold in. Repeat procedure with remaining flour mixture, 1/4 cup at a time.

  5. Spoon batter into an ungreased 10-inch tube pan, spreading evenly. Break air pockets by cutting through batter with a knife. Bake at 350° for 50 minutes or until cake springs back when lightly touched. Invert pan; cool completely. Loosen cake from sides of pan using a narrow metal spatula. Invert cake onto plate.

    I had to work just  a little to loosen my cake from the pan, but it did come out whole after a few little “tugs” with my metal spatula.

    I saw that eggs are on sale at Kroger this week for .79, so it’s a good time to make one of these cakes!  I’m going to attempt to upload a video  this Wednesday of how to make this cake.  You can see just how simple it really is!  It’s really fun to venture out a little a make something a little challenging.  I hope you’ll give this a try!  Plus it’s just fun to say – Cafe’ au Lait!

    Happy baking!

    With love from my country kitchen,

    Denise Signature 150 px

    baking · breakfast · Christmas · evangelism

    Friday Favorites- Countdown To Christmas

    In this week before Christmas, I was blessed to do some things that I LOVE.  Let’s start with the pictures in the left column below:

    161222_214702_collage-1.jpg

    1.  My husband and I got to go to Abington, VA to the Barter Theatre to see A Christmas Carol.  Before the play, we went to a favorite restaurant, Rain.  We shared a bowl of their fabulous Butternut Squash Soup, and their Grilled Chicken Sandwich.  Outstanding.
    2. We picked up our tickets and made our way to the play. Abington is a charming town!
    3. This fountain is across the street from the theatre.  What a fun date this was!  My husband, who isn’t a book or movie fan, really wasn’t sure he’d ever read or seen the story we were about to see, so he saw it all through new eyes.  One of the young actors is a member of our church, so it was especially fun to see him on stage!  He did a wonderful job!
    4. Having a daughter who lives in my town and goes to my church is a blessing!  Sometimes our lives are so busy that we don’t get to spend a great deal of time together.  We made a lunch date this week in our little town and caught up on one another’s lives.  She makes me laugh.  She encourages my heart, and she always picks the best desserts for us to share!
      Now the pictures on the right side:
    5.  Liza cuddled up on my lap one morning this week while I was having my Bible study.  That’s a special treat from a normally not-so-cuddly kitty!
    6.  I had a baking day that included making these Cream Cheese Danishes.  The recipe makes four at a time, plenty for us and for sharing.  The dough is soft and sweet and the filling makes them irresistible.  I like to also add a little bit of fruit preserves to the cream cheese filling.  Mmmm, these will be good for breakfast this Christmas weekend!  You could ask my husband who already enjoyed a couple slices when they were warm from the oven.  He washes most all of my baking dishes, so I’m happy to give him a taste of anything I’ve baked!
    7. We went caroling Wednesday night.  It’s a blessing to sing the songs of Christ’s birth and wish the folks at the door a Merry Christmas.  We are singing the Gospel and it doesn’t get any better than that!

    1221161129.jpg

    The last picture above is a weekly event at my house- Bible Club.  What a blessing to pull out my flannel graph (yes, it’s an antiquated teaching tool, but the kids love it!) and remind the children of the reason for Christmas, starting with the fall of man.  They had fun adding the flannel graph pieces as I told the story.  My heart is full as I pour into my young pupils each week the Truth of God’s Word.  They are like sponges, listening, asking questions and responding with tender hearts.  I thank the Lord for this rich privilege!

    Now here we are at the end of the week, just days away from Christmas.  Our whole family will be together, and I’m excited to celebrate with my girls and their husbands! There will be worship together, lots of good food, laughter, more laughter and probably some music!

    I pray that your Christmas will be simple, special, and full of talking about and worshiping the Savior.  He came to die for each of us, and that makes every day worth celebrating!

    John 1:29 Behold the Lamb of God,

    which taketh away the sin of the world.

    Merry Christmas!

    Denise Signature 150 px

    baking · Christmas

    (L)Oven Monday – Hungarian Nut Rolls

    hungarian-nut-rolls

    It’s the week of Christmas, Y’all!  Most of our ovens will probably be producing all kinds of yummy treats this week.  I still have a bit of baking to finish up, but let me show you what I made this weekend!  Years ago I made a cookie similar to the one pictured above. You know how it goes – the recipe gets misplaced and then forgotten.  Recently a sweet neighbor brought us a plate of Christmas goodies, and on the plate was this cookie!  We remembered how delicious they were by her kind deed!

    So, my husband requested these to be added to my Christmas baking list.  They are a little time consuming, but hey, it’s Christmas!  Also, they’re totally worth it!  They’re a cute little cookie full of a flaky dough, nuts, and sugar granules that give that extra special crispy crunch.  Yum!

    picmonkey-collage


    Hungarian Nut Rolls

    Ingredients

    For the Pastry:
      • 2 ¼ cups all purpose flour
      • ½ teaspoon salt
      • 8 oz cream cheese, room temperature
      • 1 cup unsalted butter, softened
      • ½ cup granulated sugar for rolling
    For the Walnut Filling:
    • ½ pound freshly ground walnuts (finely)
    • 1 cup sugar
    • ½ cup of boiled milk
    • 1/8 cup melted butter

    Instructions

    To make the Walnut Filling:
      1. Mix filling in a medium bowl using only ¼ cup of the boiled milk. The mixture should be thick.
      2. If the filling is not spreadable, use the rest of the milk.
      3. Note: You can make the filling ahead of time and freeze it until you are ready to use it. Just thaw at room temperature when you are ready to use. – I found that I had about half of the filling left over.  It’s in the freezer for another batch!
    For the Pastry Dough:  Taking my own advice, I made the dough one day and assembled and baked the cookies another day.
      1. Sift flour and salt together in a medium bowl and set aside.
      2. Beat the cream cheese and butter together with a stand mixer or a hand mixer until completely incorporated and creamy (3-5 minutes).
      3. Reduce the speed of the mixer and slowly add in the flour. I used 5 additions and completely mixed in the flour each time. The dough will be soft but not sticky.
      4. Divide the dough into 4 equal parts and flatten each to ¾” thick. Wrap in plastic wrap and refrigerate until hard, at least 2 hours.
    Assembling the Walnut Rolls:
    1. Pre-heat the oven to 375°. Move the oven rack one setting higher than the center.
    2. Take one of the disks of dough from the refrigerator and lightly flour both sides. Spread granulated sugar on your pastry board or work surface. Place the dough on top and roll out pastry to 1/16” thick or as thin as possible. Thinner is better. If you roll them too thick, the bottom will burn before the inside has a chance to fully cook and puff up. They still taste good but they taste so much better when properly rolled. I halved the disk, and rolled it into a 6″ square, then divided it into 9 2″ squares (see photo above).
    3. With a pastry wheel or sharp knife, trim the dough into a square and then cut the square into 16 smaller squares. My dough never rolled out into a perfect circle so I would just cut as many 1 1/2 “ squares a possible, saving the scraps for later.
    4. Place a dollop of filling in one corner of each square. I used ½ teaspoon.
    5. Starting in the corner with the filling, roll the dough around the filling from corner to corner, gently pressing down as you roll. Grab the roll on both sides and pinch as you bend the roll to create a crescent shape. Gently move it to a parchment covered baking sheet, placing the Rolls no closer than 1” apart.
    6. Repeat with all remaining squares.
    7. Sprinkle the middles of the Rolls with just a touch of granulated sugar.
    8. Bake 12-14 minutes (I baked mine for 11 minutes) or until the bottom edges are a golden and you can smell them. They should puff up slightly in the middle. Let cool slightly on the pan on a wire rack and then move them gently to a wire rack to cool completely.

    nut-rolls

    These are so delicious!  I’m so happy to have discovered the recipe for these little gems!

    What have you baked (or getting ready to bake) in your oven this week?

    With love from my country kitchen,

    Denise Signature 150 px