baking · Bars · Gluten-Free · Uncategorized

Peanut Butter Chocolate Chip Bars – Gluten-Free, But Perfect For Anyone!

Whether you have to eat Gluten-free, or you just love a good peanut butter-chocolate chip bar, this recipe is going to make your stomach smile!  There’s no butter in these bars, but the peanut butter makes up for all the creaminess the butter would give!  These take literally minutes to pull together, then only require 22 minutes in the oven, which means you are 30 minutes away from a delicious treat!  These cut beautifully, and were just a perfect sweet any time of the day! This recipe came from WellPlated.com – a blog that is filled with lots of healthy and delicious recipes! I found her via Pinterest – where else?!

peanut butter bars 2a

Gluten-Free Peanut Butter Chocolate Chip Bars

Ingredients:

    • 1 cup creamy  or crunch peanut butter
    • 3/4 cup light brown sugar
    • 1/2 teaspoon baking soda
    • 1/8 teaspoon kosher salt
    • 1 large egg, at room temperature
    • 1 teaspoon vanilla extract
    • 1/2 cup semi-sweet chocolate chips
    • 1/3 cup old fashioned rolled oats – I used Quick oats and they worked fine!
  1. Place rack in the center of your oven and preheat oven to 350°F. Line an 8×8-inch baking dish with parchment paper and lightly coat with cooking spray. Set aside.
  2. In a large mixing bowl, beat together the peanut butter, brown sugar, baking soda, and salt on medium speed until well combined.
  3. Add the egg and vanilla, then mix on medium low, just until incorporated. By hand, stir in the chocolate chips and oats.
  4. Press the dough into the prepared baking pan. Bake for 22 minutes, until golden and the top is set. Let cool completely in the pan. Remove, slice and serve.

peanut butter bars 2

We don’t eat Gluten-free, but these will stay in my recipe box because they’re just plain ol’ good!

With love from my country kitchen,

Denise Signature 150 px

Marriage · Wife's Role

Family Friday – What Every Husband Desperately needs

What a blessing it is to stand alongside, before and behind my husband as he serves God.  Last weekend I had the blessing of encouraging him as he ministered to many different people.

At a couple’s retreat he challenged couples in biblical marriage principles.  I sat in front of him, prayed for him and smiled at him when he looked my way.

img_1944

After the retreat when we had the fun of enjoying an Amish bakery, I laughed with him as he enjoyed his ice cream-filled donut!  I also enjoyed two bites!

img_1953

When he preached all day on the Sunday of that busy weekend, I devoured his message, nodded encouragement, and told him what a blessing it was to watch him encourage that flock of people.

img_1964

When we got to stop at an old home place where we lived many years ago, we reminisced over memories made there – some good, some bitter sweet. We held hands and wept, and also thanked God for His blessings.

img_1985

When he got to encourage a group of young believers, I rejoiced in my heart for his love for people.  He has a shepherd’s heart that longs for Christians to stay close to the Good Shepherd,drink from His cool waters and feed on the grass of God’s pasture.

img_1988

Ministry can be hard some days…some months even, but how grateful I am for the times when we can serve together and I can do my first calling – support this man that God has given as my life’s mate.  I’m so proud to call him my husband. He has told me

As long as you’re behind me, I can withstand anything.

What has God called your husband to do?   Stand behind him and encourage him in whatever that calling is.  You and I will never do it perfectly, but the important thing is that we keep on encouraging.  It’s what our husbands desperately need from us!

Denise Signature 150 px

Cleaning · refreshment at home

Simple Techniques to Keep Your Oven Clean

 
oven 3

Cleaning the oven is probably at the bottom of most of our most-loved chores!  But I have a greater disgust for a dirty oven than I do the chore itself, so I have tried to learn simple techniques to get my oven clean and keep it that way.  My food is going in there, so I want it to be clean and as sparkling as possible.

Here are the tools I use:

Oven 1

That’s right – I don’t use chemicals or sprays.  I simply use a Brillo pad, a razor and rubber gloves.  I might add paper towels to that list, just to be technical.

Here’s the process:

  • I remove the racks to make it easier to clean the inside of the oven.
  • I wet the Brillo pad a little to get it soapy.  I use it to scrub the inside of the door, the sides, the floor and top of the oven wall.s
  • I use a damp paper towel to wipe out the soap.  I can then to assess and see if there’s any dirty residue that needs more scrubbing.
    • If there’s anything baked on the floor of the oven or the door, I use the razor blade to scrap it, then I use the Brillo pad and paper towel to wipe and check.
  • Once the inside is clean, I put the racks back into the oven to clean them.  I don’t have a sink big enough for them to fit into, so this is much easier!
    • I pull one rack at a time out as far as it will go and still stay secure in the oven.  Then I use the Brillo pad to scrub each rung of the rack.  I wipe it with a paper towel.
    • Repeat with other rack(s).
  • Give the whole oven another wipe down with a damp paper towel.
  • Use window cleaner on the front glass, the top of the oven door and the drawer beneath.
  • Hang a clean towel over the door.
  • Stand back and admire!

The real key to a clean oven is taking care of a mess as quickly as possible.  Don’t let several days of splatters and spills accumulate, or you’ll never want to attack it. However, if you’ve neglected it, just do it.  Turn on a good podcast and listen while you scrub away.

Then vow to keep it shining!

oven 3

There are other methods you can try, too, if the oven is a huge mess.

What is your most dreaded household chore?

Denise Signature 150 px

Responding to trials · trials

Keep Looking Up!

spring tree 1

Last week I was doing my weekly errands of grocery shopping  and Target run with the typical flurry of moving quickly from one place to the next.  While walking up the parking lot towards Target, I had my head down, towards the pavement, while also reaching for my shopping list.  Then in my peripheral I caught a glimpse of

PINK 

lots of pink! 

I turned my gaze away from my frenzied walk to look up towards the sky.  There in my view was this lovely sight –

spring tree

Of course I had to snap a picture!  I didn’t want to waste the gorgeous view of these pink blooms against the crystal blue sky.  It literally took my breath away.

After I finished my shopping and walked again under its beauty, I heard the Lord whisper in my heart ~

You need to keep your eyes upward.  That’s where the joy is!

Oh, that is so true!  Hebrews 12:2,3 tells us:

 Looking unto Jesus the author and finisher of our faith;
who for the joy that was set before him endured the cross,
despising the shame,
and is set down at the right hand of the throne of God.
For consider him that endured such contradiction of sinners against himself,
lest ye be wearied and faint in your minds.

It’s really difficult to stop and consider Jesus when I have my head down, dwelling on my concreted  problems.  It’s hard to see the beauty of His presence and remember His promises if I focus on my list of troubles.

I must lift my gaze into His lovely face.  It doesn’t take the problems away, but it reminds me of the truth that He endured mistreatment from sinners, but He is now in heaven, victorious!  Because of that, I don’t have to be weary and faint! I can have victory, too!

That’s a beauty even spring blooms can’t come close to! One day all those that know Christ as their Savior will be gathered with Him where troubles and trials will be over forever.  Until then, friend, let’s

Keep Looking Up!!

Denise Signature 150 px


Chicken · Fast meal · freezer · main dish

Getting the Most Out of a Deli-Purchased Chicken

chicken-pot-pie-3

When was the last time you went to the grocery store or Sam’s Club and picked up one of these rotisserie chickens from their deli? Recently a friend brought one to me at a busy time and it was such a blessing!

Image result for deli rotisserie chicken

They are usually about $5 and are a great easy, delicious meal straight from the container. You might slice the meat and serve:

Potato Salad
Green Beans
Salad

It’s a wonderful busy night dinner.

However, if there are only two or three, you’ll have leftovers, but probably not enough to serve slices of meat again.  What do you do with the remains without wasting it?  I have a couple of ideas to help you get the most out of that $5 bird! Last week when I had that chicken, here is all the ways that it provided for us –

Chicken Salad – If you have enough white meat left, you could mix up the ingredients for lunch tomorrow!  This made for a delicious lunch!
Add:

  • White meat Cubes
  • Grapes
  • Pecans
  • Celery
  • Dressing – I mix together
    • Mayo
    • A little sour cream
    • Cinnamon

Served on bread or crackers, it totally transforms a rotisserie chicken into a whole new meal.

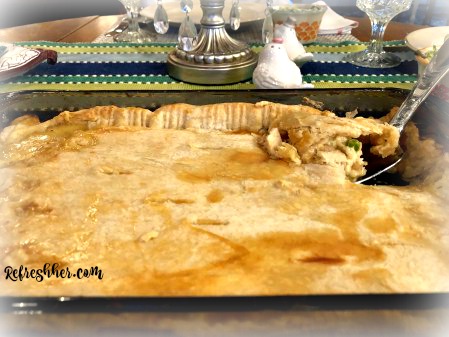
Chicken Pot Pie – You can use white meat, dark meat or a combination of both. It only takes 1 1/2 Cups of chicken – or you could use 1 cup and add more veggies!

chicken pot pie 2

I make a low-fat version of Chicken Pot pie that is equal to any high fat version!

Don’t be afraid to alter the vegetables to what your family likes.  Changing that will not change its deliciousness!

Crust:
1 1/4 Cup all-purpose flour
1/4 tsp salt
1/4 cup shortening
4-5 Tbl cold water

Mix dry ingredients.  Use a pastry cutter or fork and cut in shortening until mixture resembles fine crumbs.  Add water, 1 tbl at a time, until all dough is moistened.  Form dough into ball.

On a lightly floured surface, flatten the ball of dough with hands.  Roll dough into a 13 x 8 1/2 inch rectangle.  Cover pastry and set aside.

Filling:

1 cup slices fresh mushrooms
1/2 cup chopped onion
1 12 oz. can evaporated skim milk
1/4 cup all-purpose flour
1/4 cup (or more) chicken broth
1 tsp instant chicken bouillon granules
1/2 tsp dried sage, marjoram, or thyme (thyme is my favorite!)
1/8 tsp pepper
1 10-oz package frozen peas & carrots
1 1/2 cups chopped cooked chicken

Spray a cold medium saucepan with nonstick coating.  Add mushroom and onion.  cook and stir over medium heat about 4 minutes or till the onion is tender but not brown.

Meanwhile reserve 1 tbl of the milk. Set aside.  In a small mixing bowl gradually stir the remaining milk into the flour till smooth.  Stir into vegetable mixture in the saucepan.  Stir in the water, bouillon granules, sage, marjoram or thyme: and pepper.  Cook and stir till thickened and bubbly.  Stir int he frozen peas and carrots and chicken.

Transfer mixture to a 12 x 7 1/2 x 2 inch baking dish.  Place pastry over chicken mixture.  Fold under edges.  Crimp edges of pastry with a fork.  Brush pastry with reserved milk.

Bake in a 375 degree oven for 30 minutes or till the chicken mixture is heated through and the pastry is golden brown.  Makes 5 servings.

Chicken pot pie 3

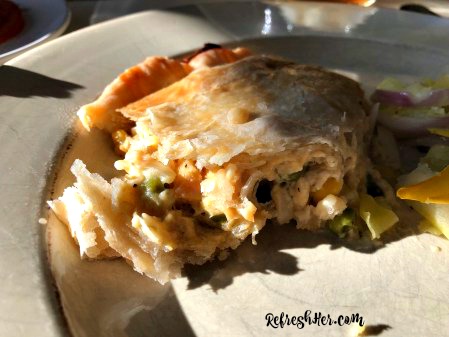
This pie is so good, friends!  You could even assemble it and pop it into the freezer for another day!

Now, at this point I had stripped most all of the meat off the carcass.  Was it ready for the garbage?  No!  DON’T THROW THAT CARCASS IN THE TRASH CAN YET!!  There’s one more GREAT WAY to use that chicken!

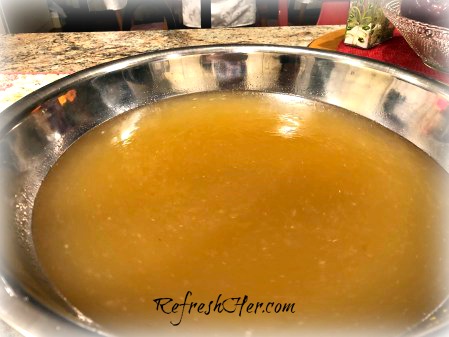
Chicken Stock – No need to purchase cans or boxes of this in the store if you have a chicken carcass in your fridge!

Here’s the recipe and method I use to make chicken stock. Let me add one more thought – I have learned that it’s even easier to make it in the crock pot so I don’t have to babysit it.  I do the very same thing, only pop it into the crock pot and cook it all day long.  The house smells amazing and I have about 8-10 cups of chicken stock when it’s finished! Look how rich that broth is!

chicken broth

I pour it into small baggies, then put them in a large Ziplock bag and freeze them.

You could also just cube the meat off and freeze it in small freezer bags ready for soup, enchiladas or quesadillas, 

The possibilities are endless, and also so convenient because the chicken is already cooked.  You know, you might even consider buying TWO rotisserie chickens just so you can make so many great meals so easily!

When was the last time you enjoyed a rotisserie chicken?  What else do you do with yours?

With love from my country kitchen,

Denise Signature 150 px