Crafts · Fall

Fall Banner Tutorial

img_5846

While my girls and I were on our trip a couple weeks ago, I suggested we make a simple craft together.  Neither of them having the love for crafting that I do, so I wasn’t sure how they would respond.  I sent them a picture of a fall banner and they loved it!  I assured them it would require very little skill.  They were happy and I was too!  We were going to get to craft!!!

Continue reading “Fall Banner Tutorial”

baking · children · Crafts · Family life · home · memories · Motherhood · summertime · Uncategorized

Summer Fun Series (Day Two)

Here we go – another list of fun things for children to enjoy during summer months:
front porch2a

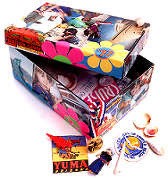
This clever treasure box, which is organized around the principle that anything goes, has ample room for plastic bags of beach sand, seed packets, subway tokens, maps, sea glass, photos, finger paintings, invitations or even a tiny book of best friends’ autographs.
box

Start with a sturdy cardboard box (one with a lid), which your child can label with his name and the date. As he amasses odds and ends, he can tuck them inside or, if he prefers, glue some onto the outside of the box. To give the box a durable finish, brush on a coat of white glue thinned with water or cover with Con-Tact paper.

Make Homemade balls:
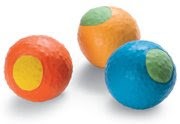
balls
CRAFT MATERIALS:
9 (11-inch) balloons (for 3 balls)
Funnel
2 1/4 cups of dried lentils
Scissors
Time needed: Under 1 Hour
1. Stretch the first balloon by inflating it halfway, holding it closed for about 30 seconds, and deflating it. 2. Place a funnel in the balloon’s neck and gradually pour in 3/4 cup of lentils, pushing them in as you go. The balloon should be firm but squeezable. 3. Snip off the balloon’s thick rubber lip. Cut the neck off a second balloon and gently stretch the opening. 4. Ease the second balloon over the filled balloon, tucking in the neck as you go. 5. Cut the neck off the third balloon, stretch the opening, and ease it over the other two. Repeat this process to make a set of three balls, or however many you’d like.
How about making some cute cupcakes on the day your grass gets cut? What a yummy reward!  Or make these for a great Father’s Day treat! This idea was on Family Fun web site.
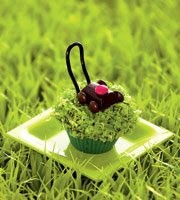
lawn mower cupcake
RECIPE INGREDIENTS:
Chocolate-frosted cupcakes
Coconut, flaked
Green food coloring
Hershey’s Nuggets
M&M’s
Frosting
Black licorice laces
1. For each cupcake, mix a handful of flaked coconut with a few drops of green food coloring. Press a chocolate-frosted cupcake into the coconut to cover. 2. The mower is made with a dark chocolate Hershey’s Nuggets body, brown M&M’s wheels, and a red M&M’s engine, held in place with dabs of frosting. 3. Shape the handle from a piece of black licorice lace, then insert the ends into the cupcake.

Make a simple version of homemade ice cream –

What you’ll need:
1 tablespoon sugar
1/2 cup milk or half & half
1/4 teaspoon vanilla
6 tablespoons rock salt
1 pint-size plastic food storage bag (e.g., Ziploc)
1 gallon-size plastic food storage bag
Ice cubes

How to make it:
Fill the large bag half full of ice, and add the rock salt. Seal the bag.
Put milk, vanilla, and sugar into the small bag, and seal it.
Place the small bag inside the large one, and seal it again carefully.
Shake until the mixture is ice cream, which takes about 5 minutes.
Wipe off the top of the small bag, then open it carefully. Enjoy!

Tips:
A 1/2 cup milk will make about 1 scoop of ice cream, so double the recipe if you want more. But don’t increase the proportions more that that — a large amount might be too big for kids to pick-up because the ice itself is heavy.

Don’t forget some of the good ol‘ standby summer fun things, such as:

  • Hopscotch on the driveway
  • Hula hoops
  • Sprinkler or water hose jump rope
  • Cardboard boxes – find a refrigerator box and let the kids make a playhouse or puppet stage
  • Make Popsicles
  • Play hide and seek just as it’s getting dark. Use flashlights to tag!
  • Don’t forget the library. There are so many fun things to do there!

Enjoy…summer’s going to be gone before we know it and we’ll be pulling out the sweaters!

Denise Signature 200 px

Crafting · Crafts · home · Home decor · refreshment at home

Chalkboard Pantry Door

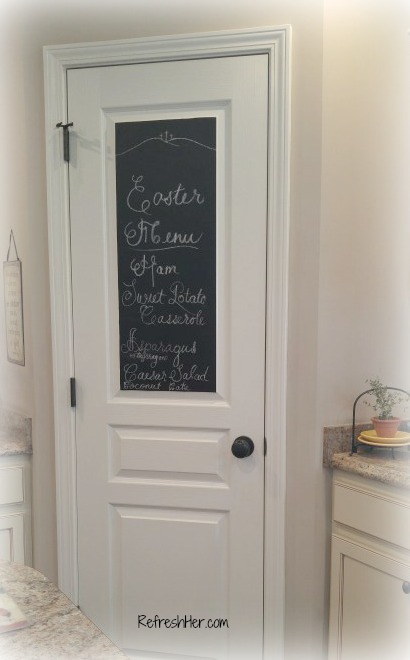
Pantry Chalkboard.jpg

Maybe I love chalkboards so much because I taught school, I don’t know, but I do love them in every shape and fashion!  I have them in several places in my home, but I recently saw a place for a chalkboard that made my jaw drop…it was painted on the pantry door!  “How cute is that?” I thought. I decided then and there that I’d use my leftover chalkboard paint to create that in my kitchen.

But when I got to thinking about putting paint on that vinyl door, it made me wonder what I’d do when the chalkboard love had waned in my heart?  What would I do about that paint?  Another creative thought jumped in and I remembered seeing chalkboard vinyl that could easily be added or removed from a door!!!  This was my answer!

After much searching, I found just what I needed at Hobby Lobby (where else? I should have started there!).  So let me show you the simple process:

The before and after shots:

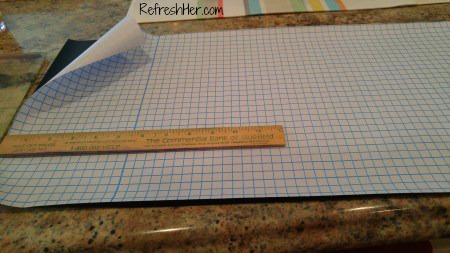
The vinyl has a grid on the back, making it super easy to cut a straight line, thank the Lord!  Try as I might, my lines wiggle all over the place without those patterns to guide me!  So I measured the width and the length and cut it accordingly.

pantry chalkboard vinyl

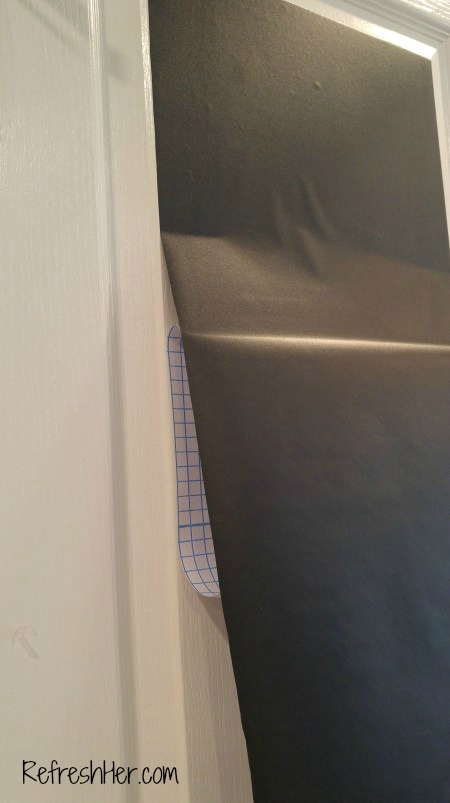
Then I took the vinyl with the backing still on it, and starting from the top, I placed the sticky part down,then slowly pulled the backing away, smoothing as I went.  This product went on super well.  It was easy to pull it off and straighten it, or push out any air bubbles,

pantry chalkboard process

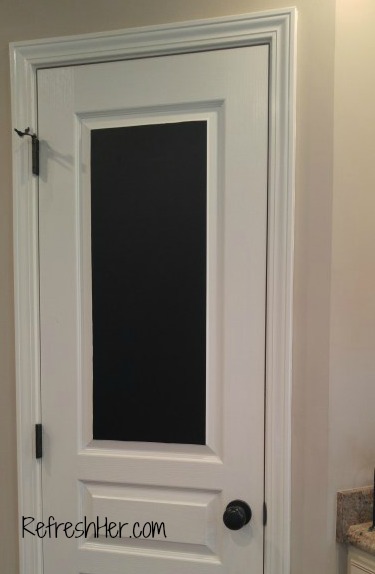
Here’s the finished project without any writing on it – all ready for my chalk!!  Woohoo!  It took me 15 minutes to do this!  It doesn’t get any easier.   It’s sticking really well and hasn’t pulled away, but when I am tired of it, it pulls right off. I tested it to be sure!

pantry chalboard plain

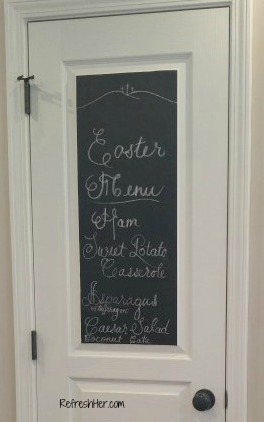
I wrote our Easter Menu on the board for the weekend, but…

Pantry Chalkboard a

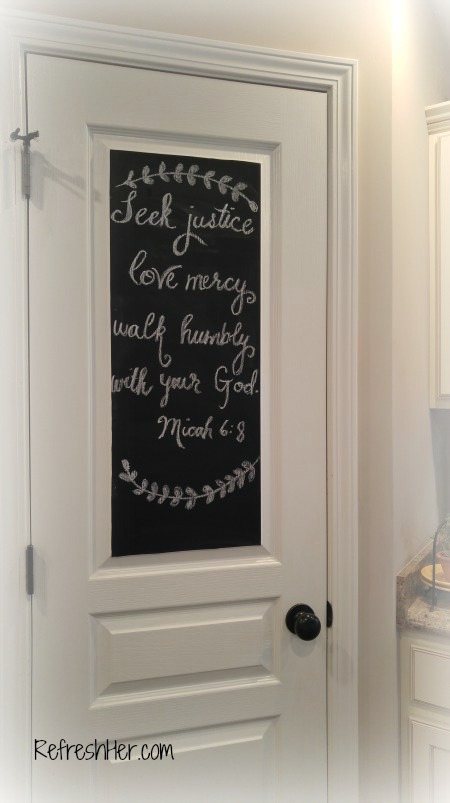
it already has a new look on it!  I anticipate changing it out weekly!  Why?  Because I love chalkboards!!

pantry chalboard drawing.jpg

But wait, here’s another fun use for the vinyl!  Have you ever used the last of your cinnamon and forgotten to add that to your grocery list? Then the next time you go to make cookies you remember you’re out of  it?  Me too!  So I also added a small piece of the vinyl inside my spice cupboard so I could remember the ones I needed to purchase and also which ones were stored away in the pantry.

wp-1492625104376

Not only was this project fast, it was also very inexpensive!  I used my 40% off coupon at Hobby Lobby and purchased this for less than $5.  I didn’t even use the whole roll, which means two things:

  1. It cost me around $3 to do this fun project!
  2. I have more chalkboard vinyl to add to other places in my house!!!  Hurries off to find a place to use that leftover vinyl…

Do you have chalkboards in your house?  How do you use them?

Refresh your home with a cute chalkboard!

Denise Signature 150 px


children · Crafts · Dinner · Family life · memories · Winter

Family Friday – Wintertime Fun at Home

As promised last week, I’m dedicating Friday’s to Family matters.  Did you see the Winter Date Night I posted last Friday?  You can see that here   if you missed it.

What better memories can you create than fun in the home?  It’s wintertime, and a great time to stir up, craft up and cozy up some good fun at home!

EASY Snowman Pancakes - the perfect idea for the kids on Christmas morning and one they can help make too!
How adorable is this winter treat from Lil’ Luna?

The weather’s been cold for many days almost everywhere in the country, and if your children are used to going outside they probably haven’t – unless there’s snow to play in. The winter months can create restlessness in children and parents alike. Before there’s a meltdown in attitudes with your young ones create some fun activities they can participate in inside.

 Food and cold weather just go together, don’t they? How long has it been since you’ve popped popcorn on the stove instead of popping a bag of the microwaveable corn? Here’s a simple video to remind you how easy (and inexpensive) it is to pop it the old fashioned way! Your children will love watching the kernels pop and then you’ll have a yummy treat to enjoy together!


A fun activity on a snowy day is a snowman craft. This one is adorable!
 Image result for melted snowman craft
Making an army of these little pom-pom snowmen would stir up some creativity and fun in an otherwise drab day!
Make snowman cupcakes. Go here to see a video on how to create a tasty treat. Use your imagination – if you don’t have the ingredients they call for to decorate the cupcake look
in your cupboardand get creative!
Go to pinterest and search for Mitten game and you’ll find a variety of fun games for their age and level.
Snowman pancakes     like the ones pictured above would make a great winter supper! Let your children help mix the pancakes, set the table, even create a snowy centerpiece! Put the pom-pom snowmen in the middle of the table!

Whatever your weather is like where you live, I trust you’ll have some fun times at your house with your children. Winter memories are fun ones because everything’s cozy and homey when you take the time to do things together as a family.

Stay warm!

What fun does your family have on winter days?

Denise Signature 150 px


Crafts

Tassel Fun

Do you ever feel like doing a simple craft that doesn’t take much time?  I have the answer for you!  Yesterday I worked with my little Bible Clubbers at my house.  We worked on some makeup work they needed to do for Pioneer Club and I got the pleasure of helping one of them a fun craft that isn’t just for kids!  As a matter of fact, I had purchased one of these at Hobby Lobby that wasn’t nearly as cute as the one we crafted together!  Let me show you what we made:

wp-1478650656688.jpg

All it took was:

  • Strips of fabric 3/4″ wide and 9″ long
  • Ribbon pieces 9″ long

Tear the fabric into pieces.  Lay about 14 or so pieces of coordinating fabric and ribbon in a pile. (Mix up the patterns) Tie it in the middle with ribbon.  Fold them in half and tie about an inch down with another piece of ribbon.  Incorporate that ribbon into the tassel.  Fluff.  You’re done!  How pretty is this?

wp-1478650608428.jpg

wp-1478650622230.jpg

These would make cute gifts.  You can hang them on a drawer pull, a door knob, a lamp, a purse, a curtain tie back, a package, a bookmark, etc.  Once you get started you’ll think of all kinds of things you could add to them to embellish them and you’ll find yourself making more than one!

Where would you put one of these?  I hope you’ll make one, or two or twenty!

Refresh your crafting desire,

Denise Signature 150 px